
With each year that passes since I started sewing in 2013, I buy fewer clothes. It’s impossible to quell Inner Sewing Voice saying, “Meh, I could probably make that. Or something like it.” It’s annoying, because the truth is I absolutely cannot make every piece of clothing I see and like. Sometimes Inner Sewing Voice needs to be taken down a peg.
There are times, however, when I break form and buy something new. When that happens, I look for details that would be hard to replicate—nice hardware, a fantastic fabric, or intricate embroidery. One of the last blouses I bought is from Dot Fox, a boutique on Bardstown Road in Louisville. After trying on a few ill-fitting vintage pieces (vintage is not meant for tall people with broad backs and wide hips), I found a lighter-than-air, rust-colored blouse with pretty silver embroidery on the front and an interesting neckline detail.


The blouse, by a brand called Entro, has a center front seam and is lined in the front for added coverage. It’s made from a thin rayon-poly blend that’s soft and semi-sheer. I love this shirt! It’s different than a lot of the tops I own, and I wanted to take a stab at sewing something inspired by its details.

Enter my DIY, franken-pattered chambray top. After unsuccessfully trying to trace the garment (the crinkly fabric made it way too frustrating), I decided to use a couple commercial patterns as a base. I used the armhole, sleeve cap, shoulder, and back neckline of Vogue 8944, and the side angle of Tessuti’s Ruby top for the front and back side seams.

Here are the design details I wanted to achieve:
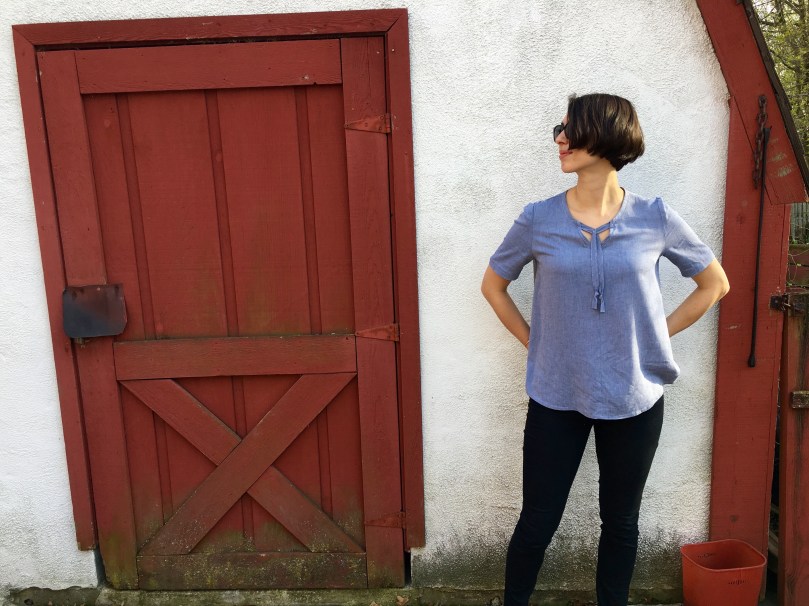
- Loose-fitting through the body
- Center front seam
- Sharp v-neck
- Button closure or tie at neck
I eyeballed the V neckline and ended up having to pinch some fabric out near the neck. It was a pretty easy fix, but I’m thinking that to create a sharp, more severe V, I probably needed to cut off a smaller wedge on the front pattern piece.
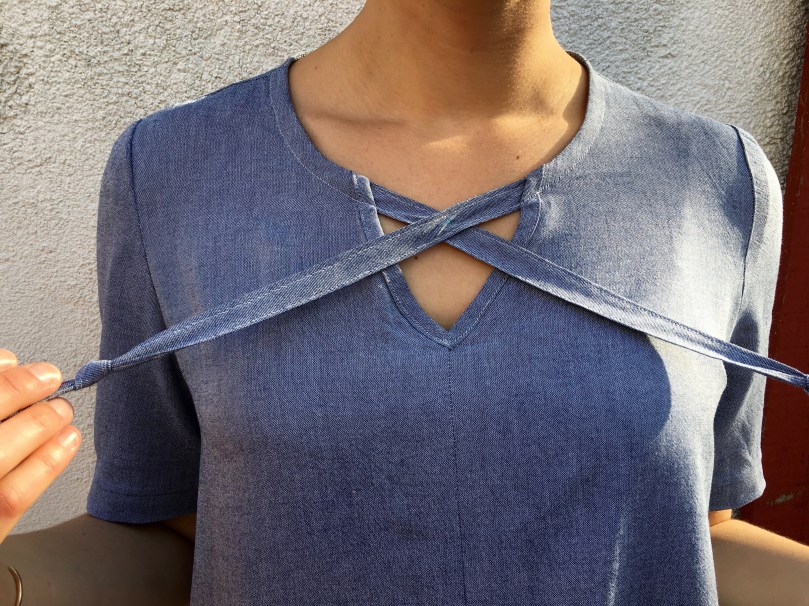
To finish the V, I used this step-by-step Burda tutorial for binding a v-neck. After that, I finished the neckline with a wide piece of self bias binding, which extends into the neck ties. I can’t remember all the steps I took to finish the neck edge, but before the finished product, the binding was facing up like a sad little collar. The finished product lies relatively flat on my neck, so I’m calling it a success!

The ties are anchored with small sew-on snaps. I like the way they hang gently at the center this way. The snaps are also unassuming enough that I can wear the ties hanging loose or tie the ends in a loose knot. Whatevs!


I wore this all day with my handmade jeans, and it made for an easy, comfy outfit. I’m thrilled this sewing experiment turned out pretty well! Have you ever franken-patterned anything?

It’s lovely. I think it’s relaxed and you got just what you wanted by the look of it. I did a Frankendress not so long ago, where I combined two patterns because I needed very simple lines for a heavily patterned fabric.
LikeLike
Thank you! What patterns did you use? I’d love to see it!
LikeLiked by 1 person
I used New Look 6483 and New Look 6723 thought it would be best to stick with the same brand. Here’s the link if you’re interested https://emmaandhermachine.wordpress.com/2017/03/24/a-successful-frankendress/
LikeLike
Great top, love the V shape and how the ties have a snap on them, I might need to give it a try as I heavily altered the Cheyenne tunic and now use it as a kind of sloper. the rust coloured top is lovely too.
LikeLike
Great result. I have franken-patterend a lot. I find myself doing it more and more now. Or just hacking an existing pattern to the way I like. I made this skirt recently: https://spareroomstyle.wordpress.com/2016/10/18/nostalgia-value/ and am currently working on a dress to wear for a wedding that’s a mix of the A-line skirt in that post, with my self-drafted top block with french seams added. Once you start, you can’t stop!
LikeLike
Reblogged this on By the Mighty Mumford and commented:
WONDERFUL!
LikeLike