
I dig whales. As a kid, I was obsessed with the beluga whales at the John G. Shedd Aquarium. There’s even a picture of my older brother and I “riding” Shamu at Sea World at the respective ages of 6 and 4. (I definitely talked myself into believing that ride happened.) My latest whale obsession is this Marushka whale-print sweatshirt—pictured above—from Study Hall, a similarly nautically obsessed boutique in Ukrainian Village. I’ve been living in this sweatshirt every weekend, and it inspired me to sew up some whale decor for the apartment. The best part about this project is that you don’t even need to buy fabric (except for piping). So grab an old pair of boot-cut jeans and let’s get to work!
What you need:
- Old pair of jeans (the wider the leg, the better)
- Button for the whale’s eye
- Contrasting thread
- Polyester fiber stuffing
- Piping
- Marking pencil
- Fray Check
1). Draft a pattern. This step leaves some room for creativity depending on the shape you want to end up with. Whatever you decide, make sure that you first draw the whale as you want it to look, then add a 5/8″ outline around it. That will act as your seam allowance. You can do this on the actual pattern, or just add 5/8″ once you lie the pattern down to cut it. I traced my pattern on a paper grocery bag since it’s got a little heft.

2). Deconstruct your jeans. This part is actually pretty fun (and therapeutic if you have anger issues). Cut a notch on the bottom hem of the leg near one of the side seams, and then rip upwards until you reach the back pocket. Cut a clean line right under the pocket so you have one flat piece of fabric. Iron out any creases.
3). Trace and cut out two mirror image whale pieces. You might be able to use one pant leg if you have enough fabric and don’t mind cutting slightly against the grain.
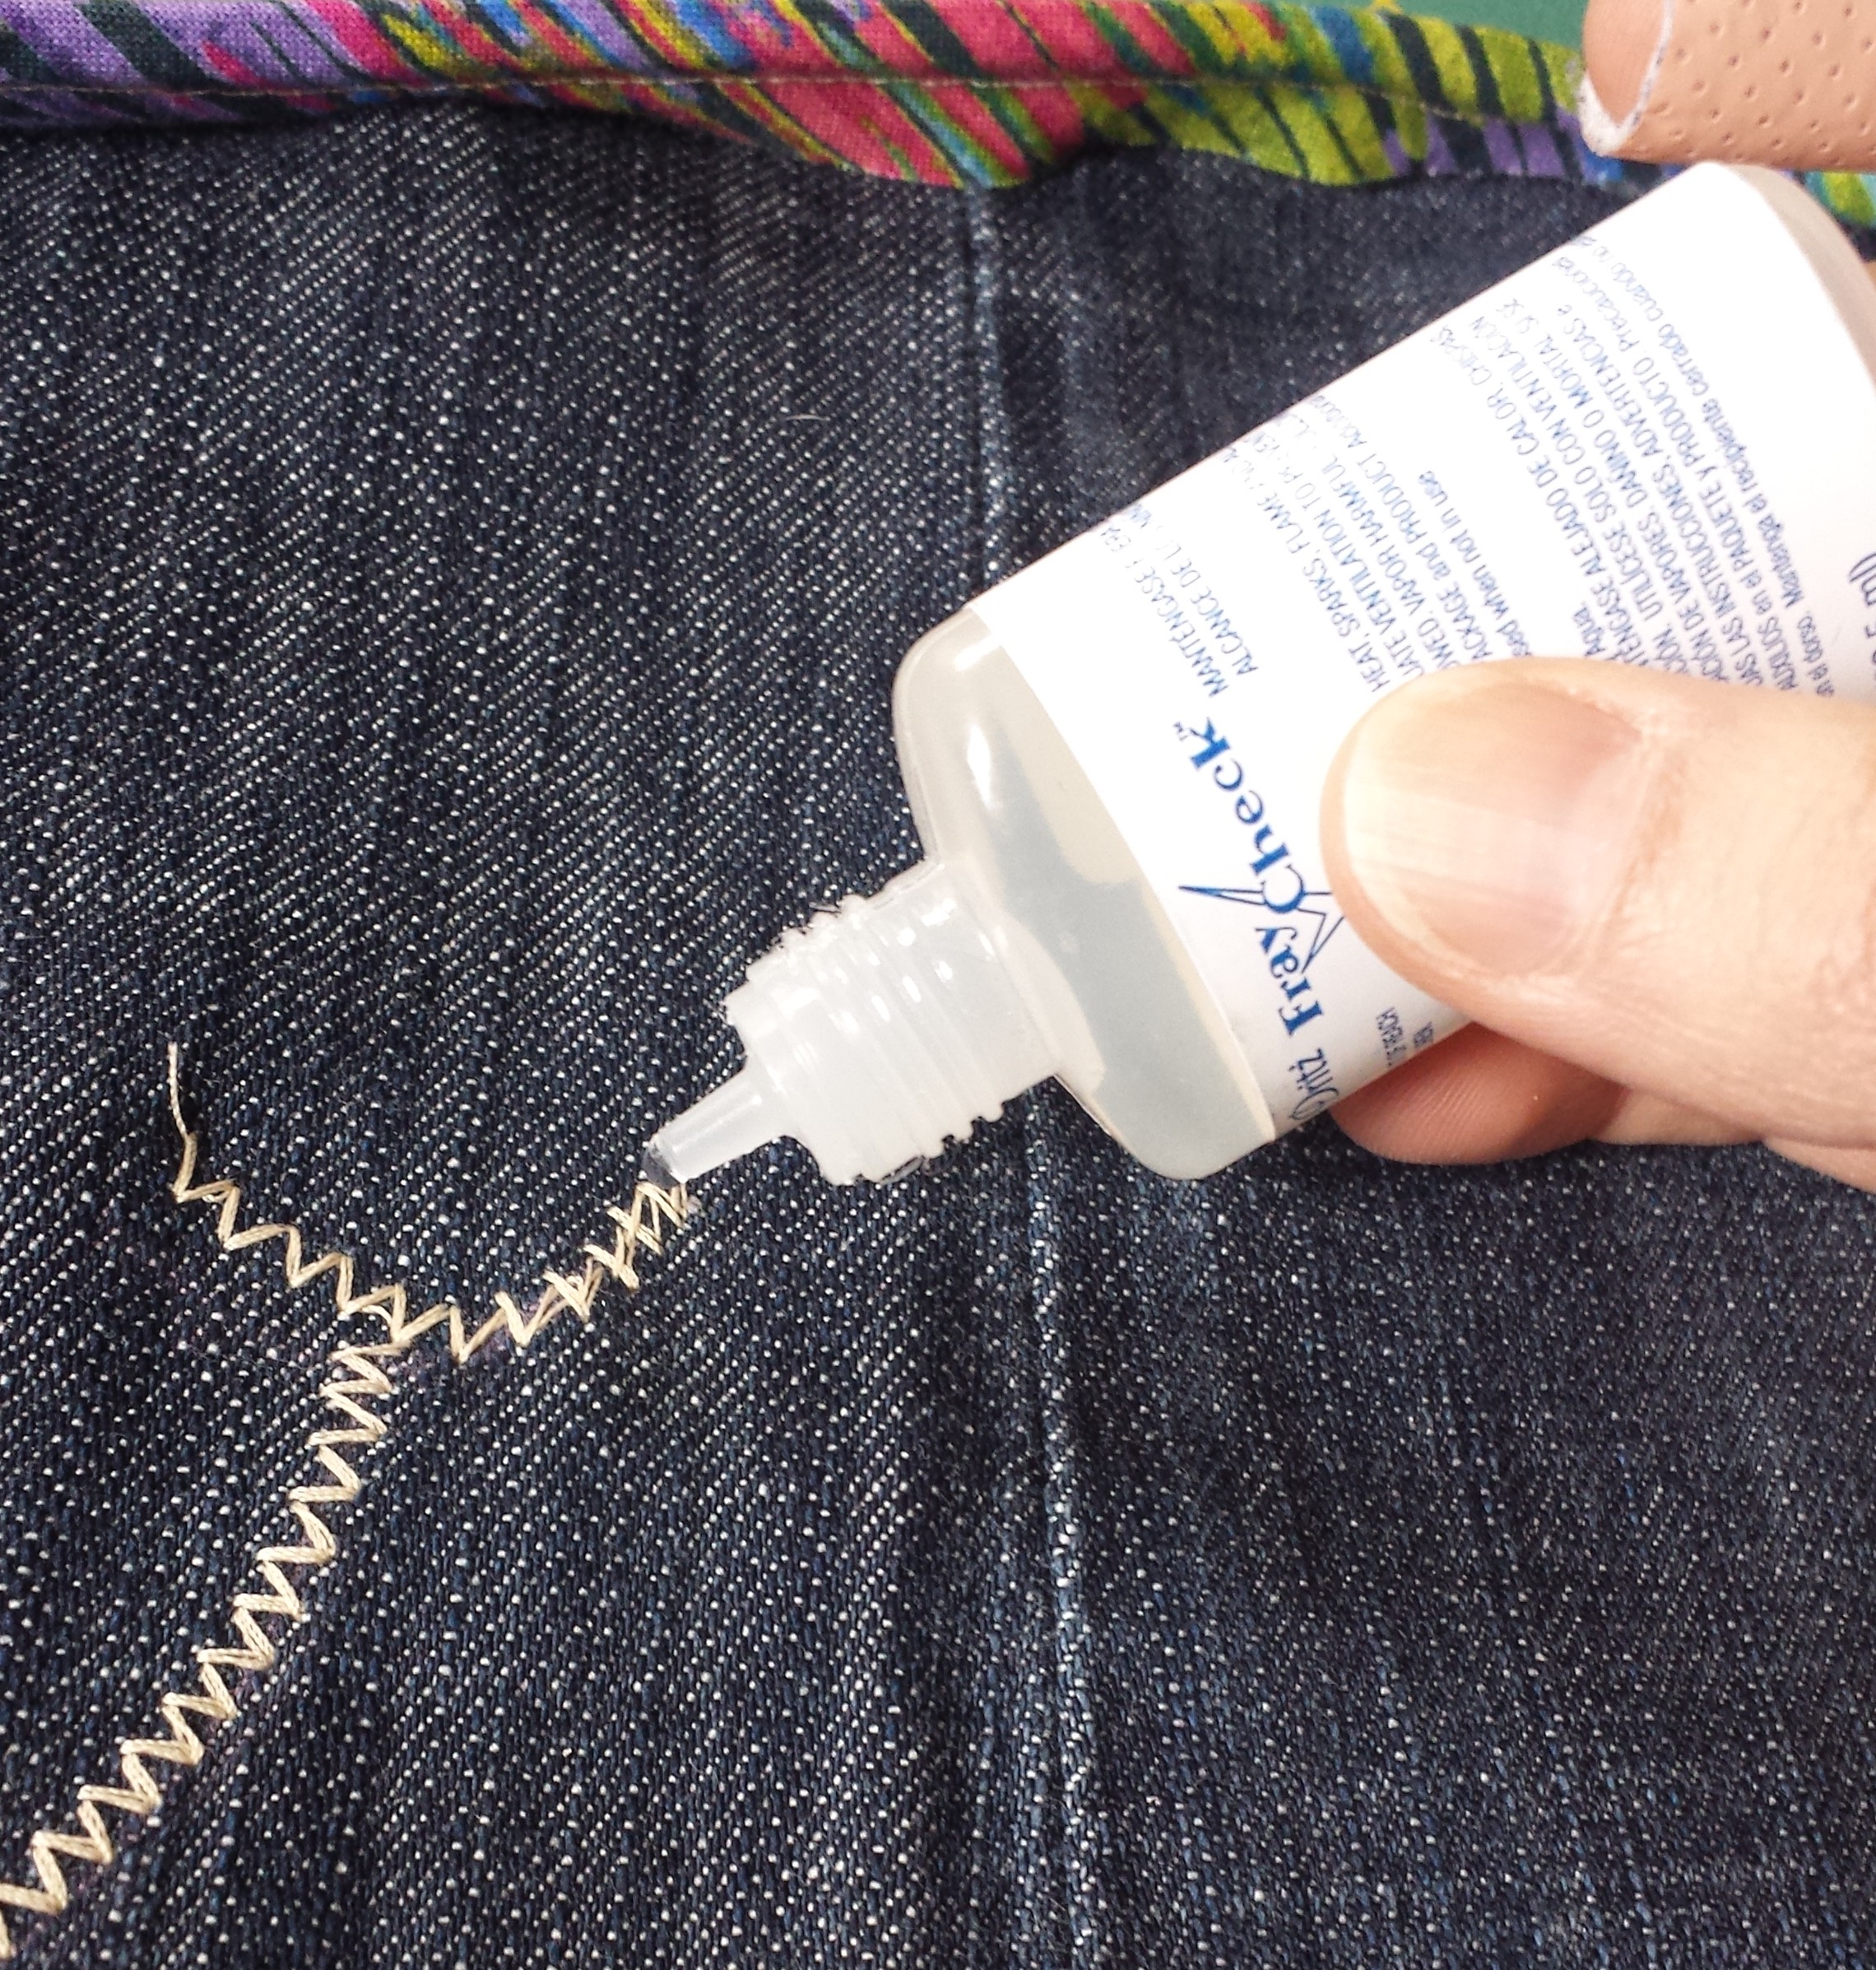
4). On the wrong side of one pattern piece, draw a mouth. Make sure to account for the seam allowance when making your placement. Using contrast color thread and a fun decorative stitch pattern, sew on the mouth. Remember to backstitch! I also used a little Fray Check at the ends so the thread won’t unravel later.
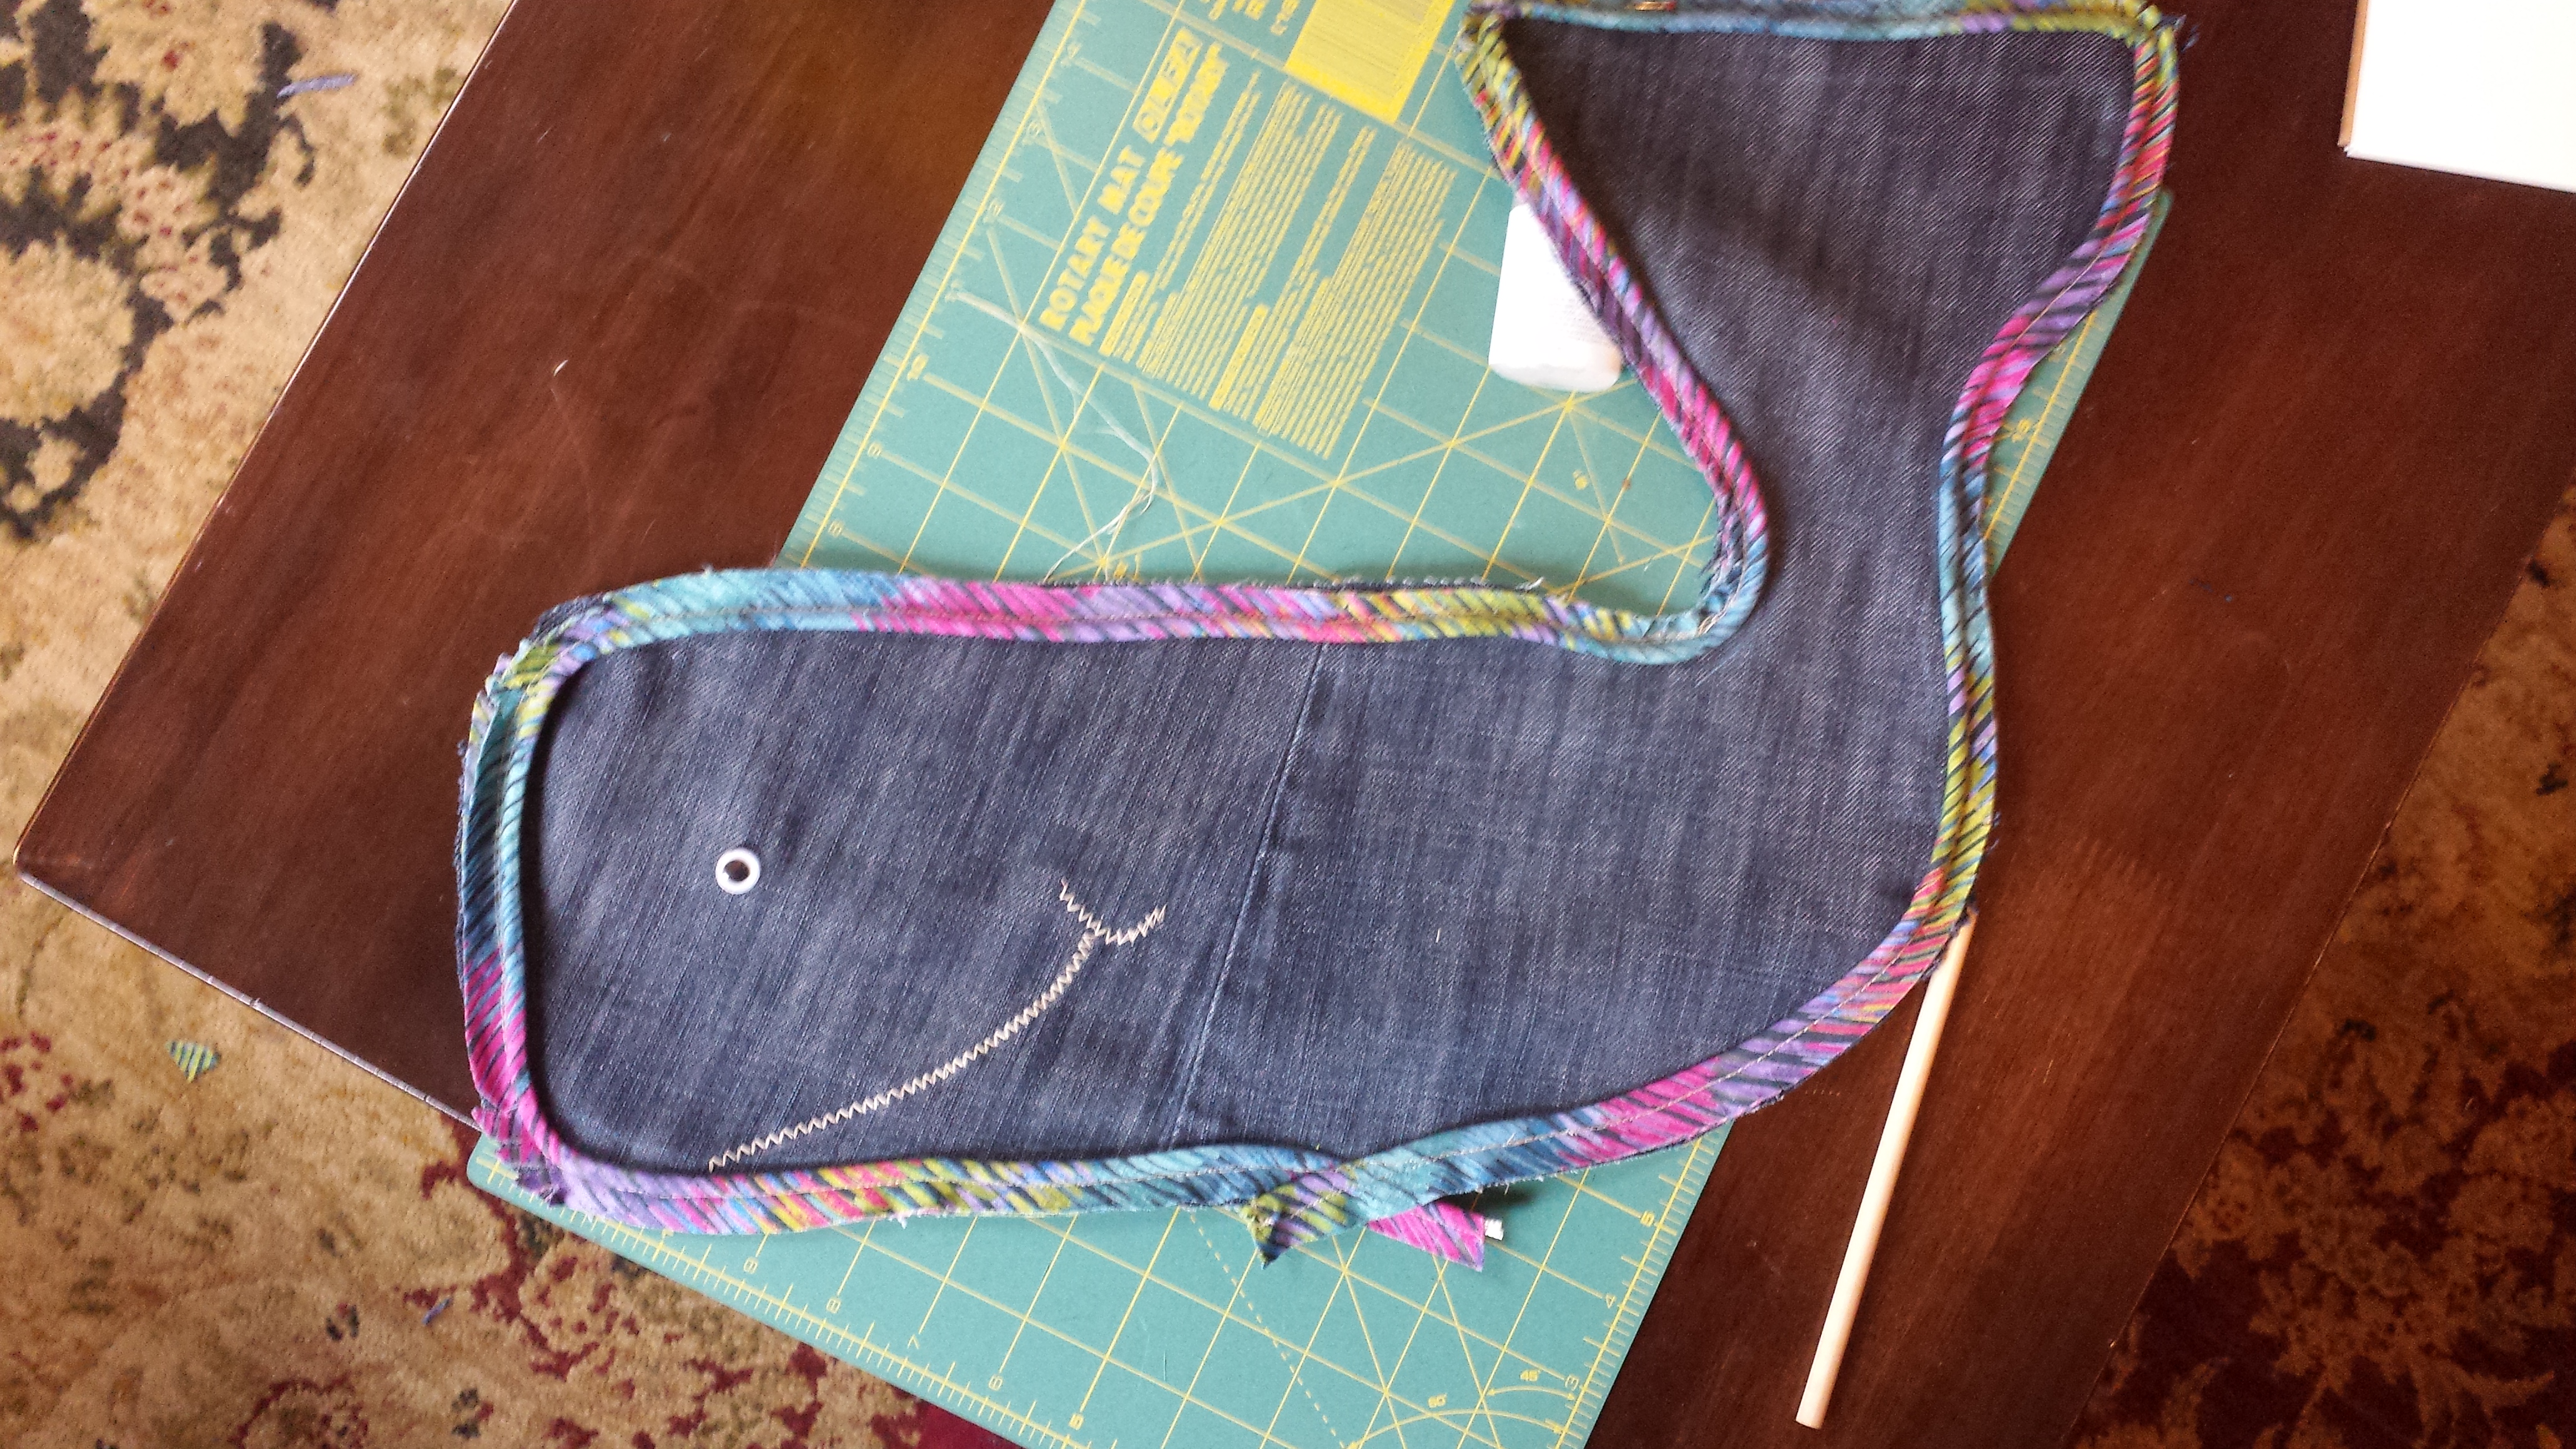
5). Mark a spot for the eye and hand sew a button on.
6). Pin the piping around the edges of the pattern piece with the mouth and eyes. I made my own piping for this project using this handy tutorial, but you can buy premade stuff at most fabric stores.

With the rolled edge of the piping facing toward the center and the flat edge flush with the raw edge of the pattern, pin the piping around the exterior (to the right side of the pattern). Pinning around all the curves and corners of the whale’s tail can be a little tricky. Clip around the edges so it’s easier for the piping to lie flat.

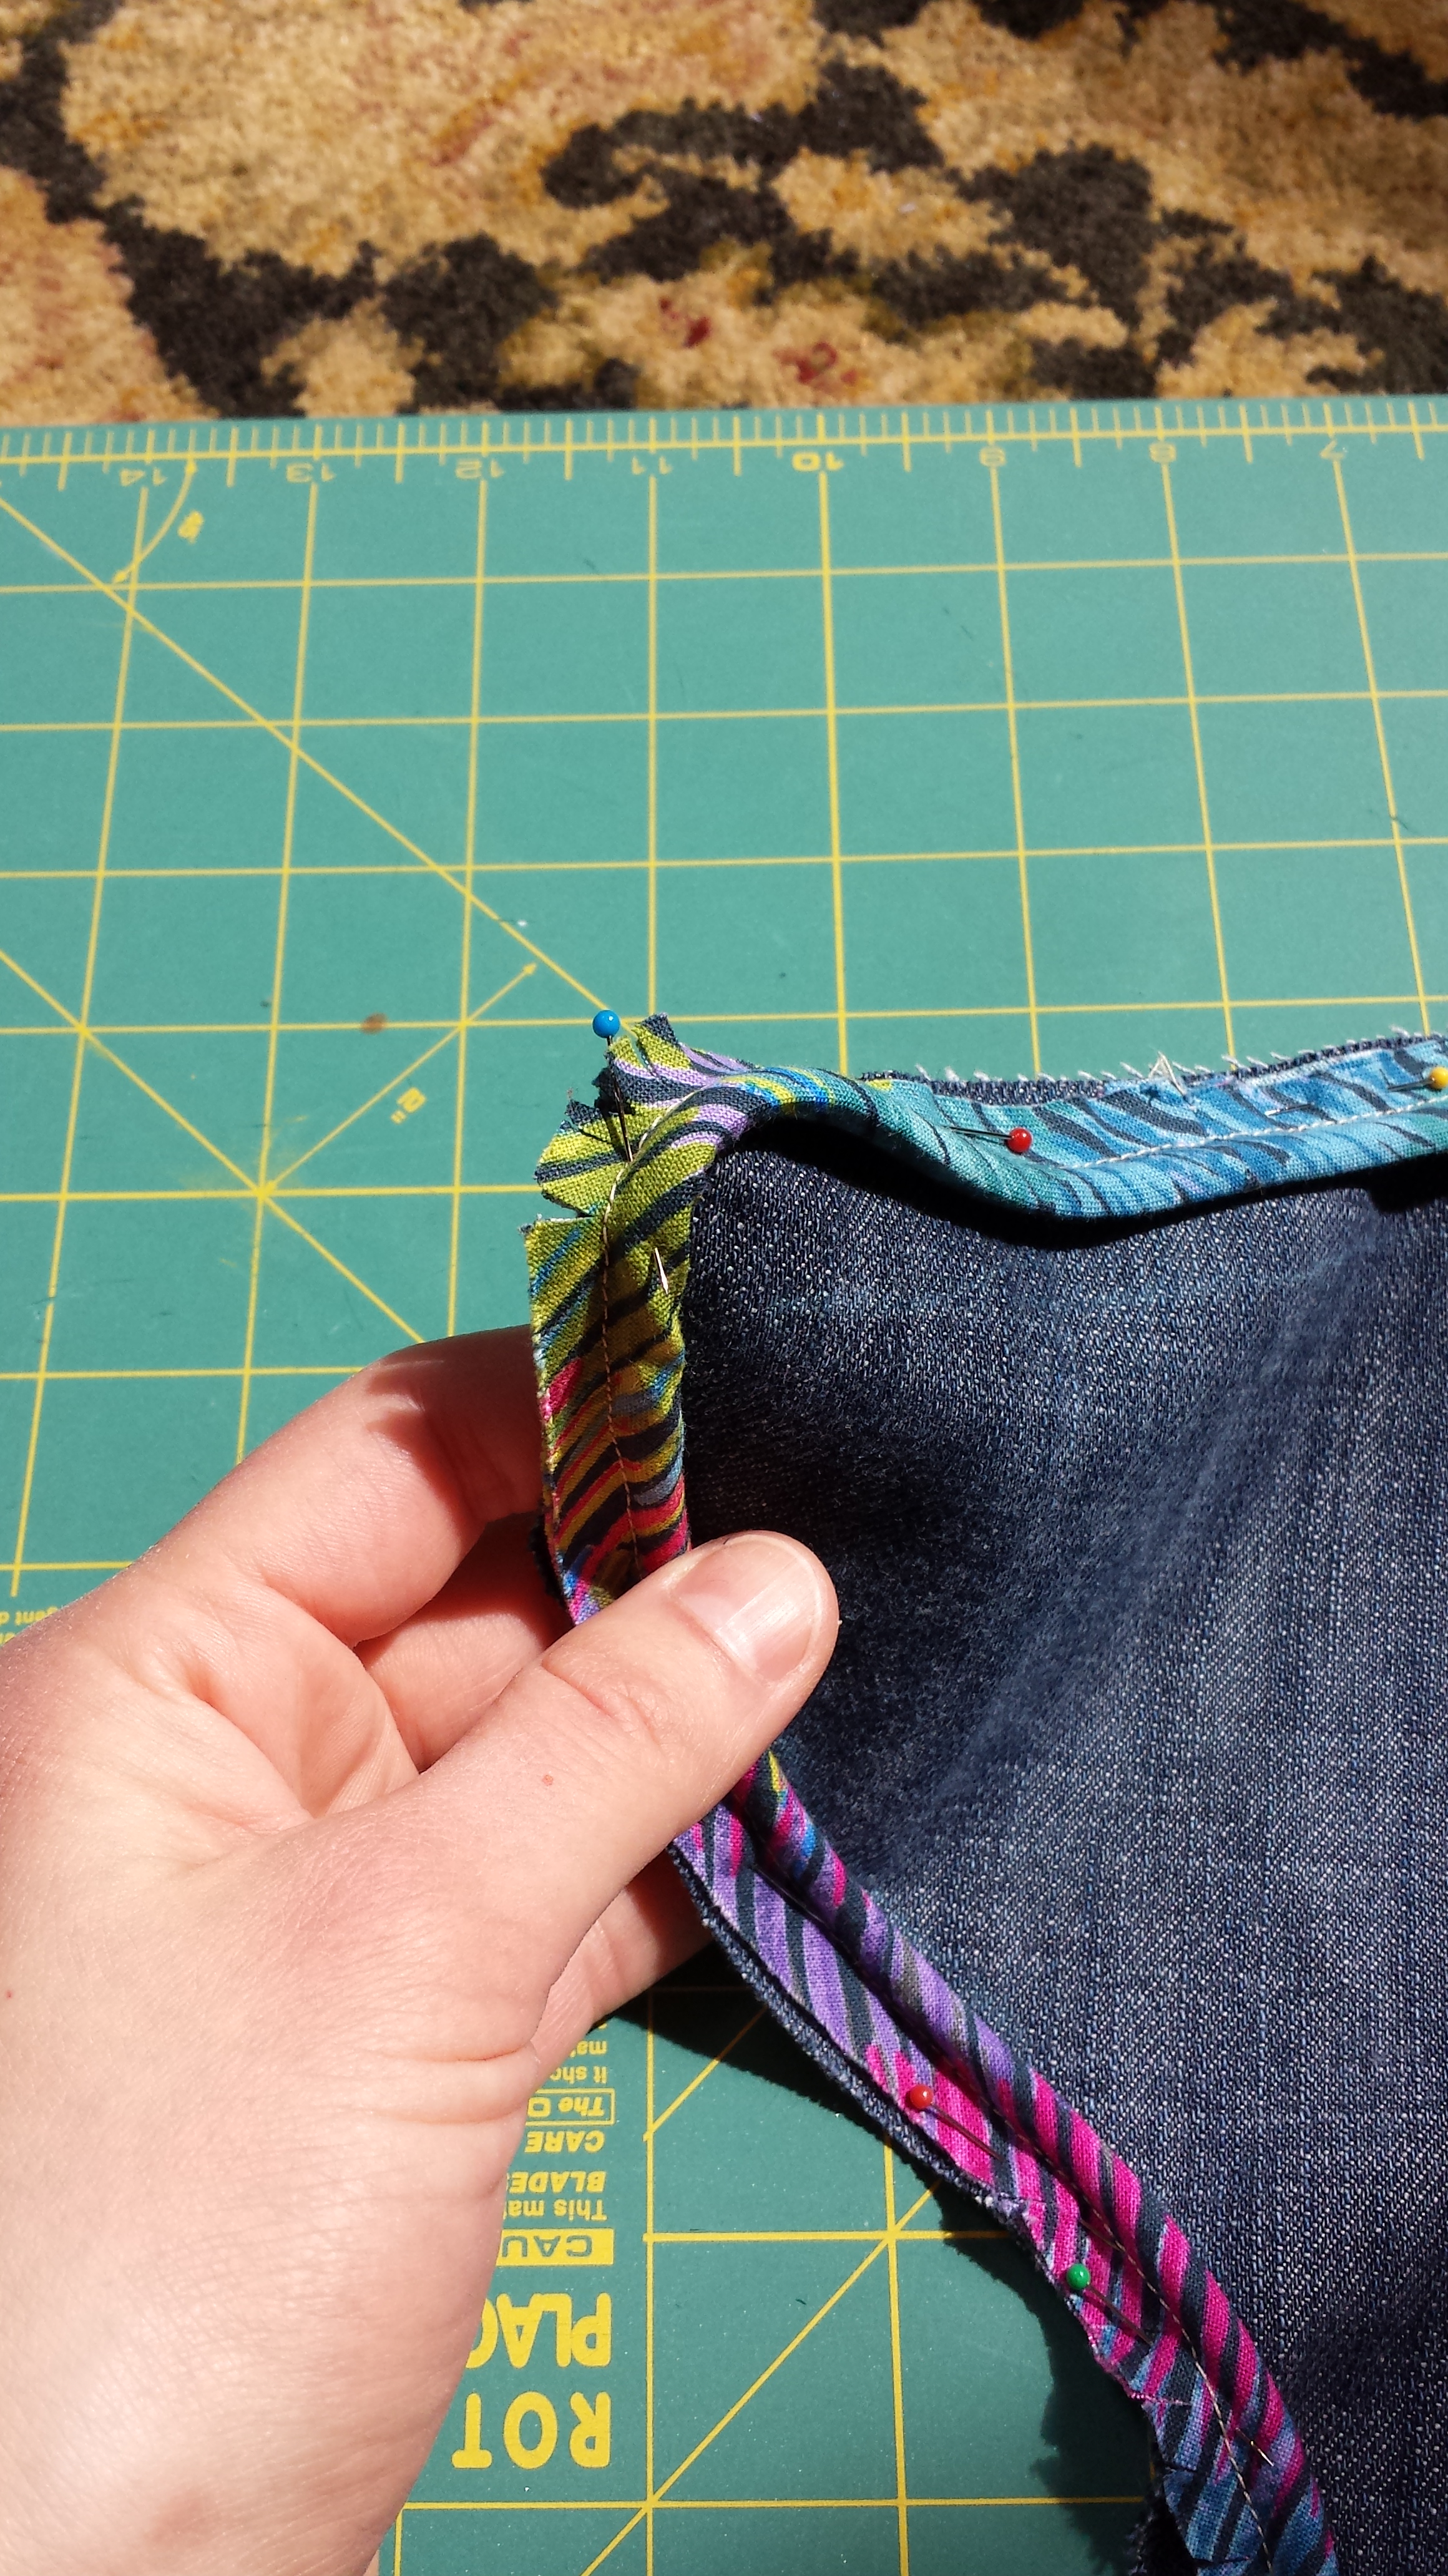
When you get back to where you started pinning, overlap the edges.
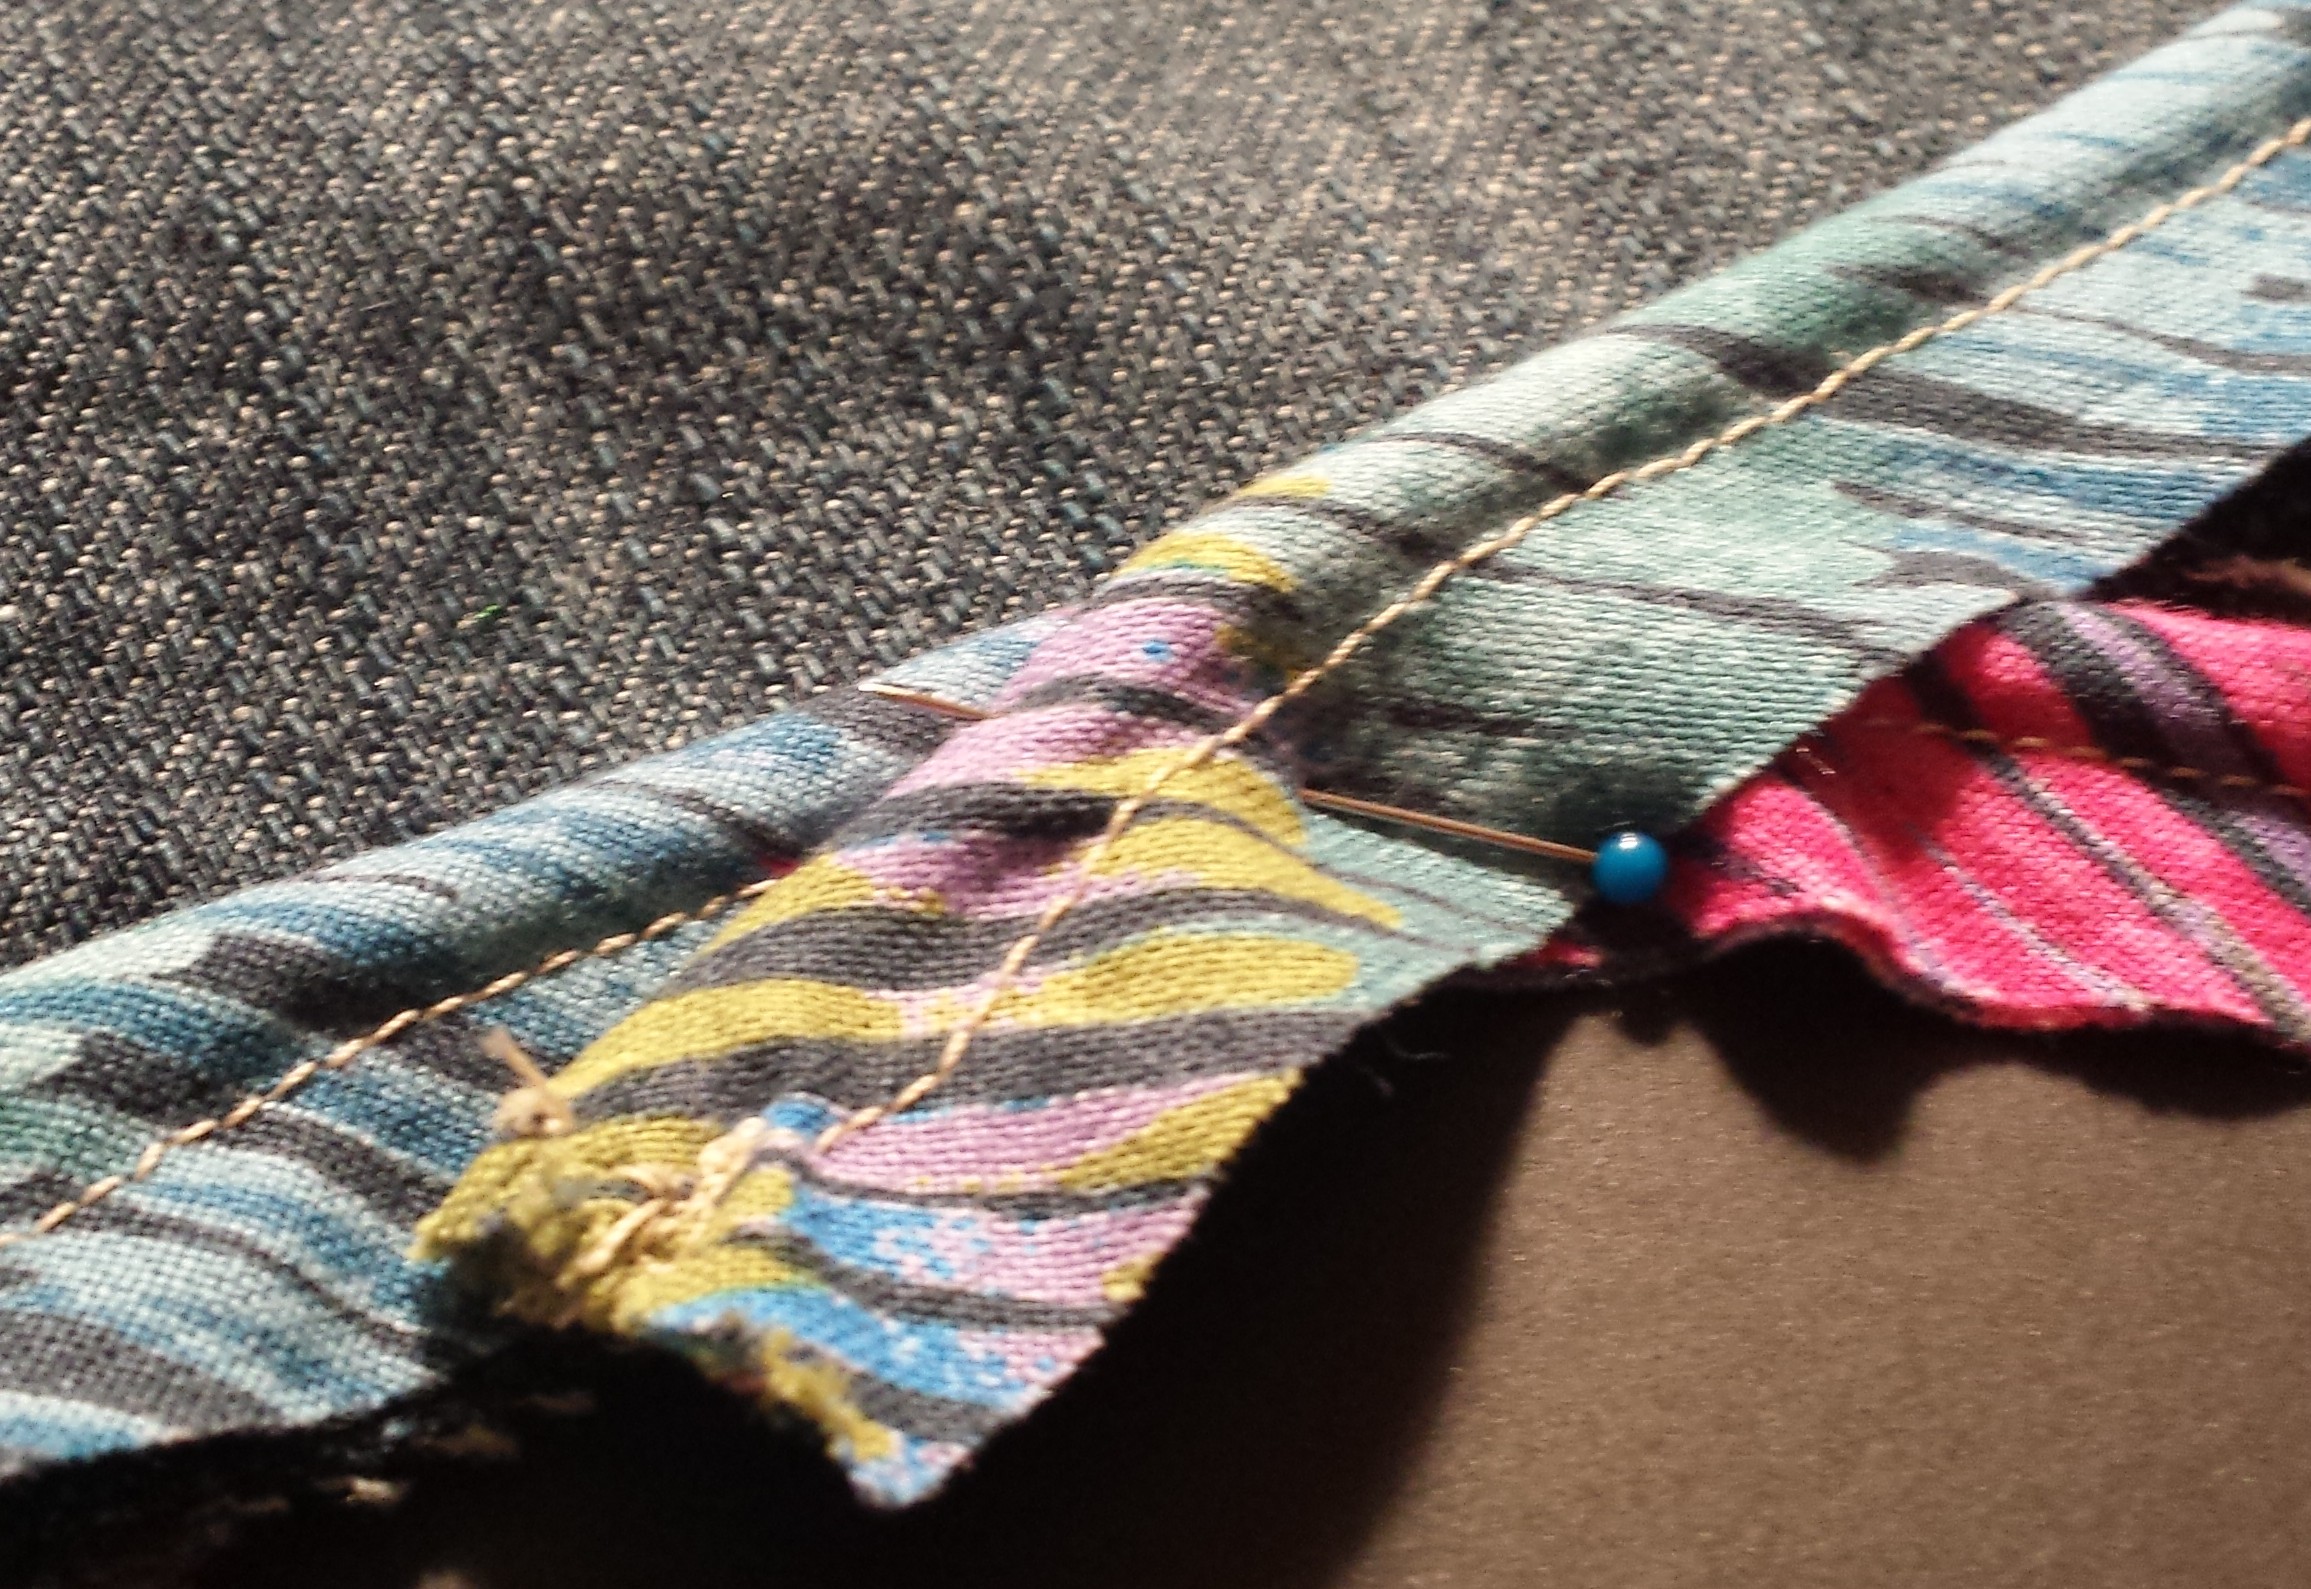
7). Now it’s time to sew the piping on. This part requires some elbow grease and a lot of patience. Using your longest stitch and a zipper foot, baste the piping to the pattern following the stitch line that creates the piping. Go as slowly as you need to. When you get to the overlapped section, just sew straight through, following the same line you were sewing before.
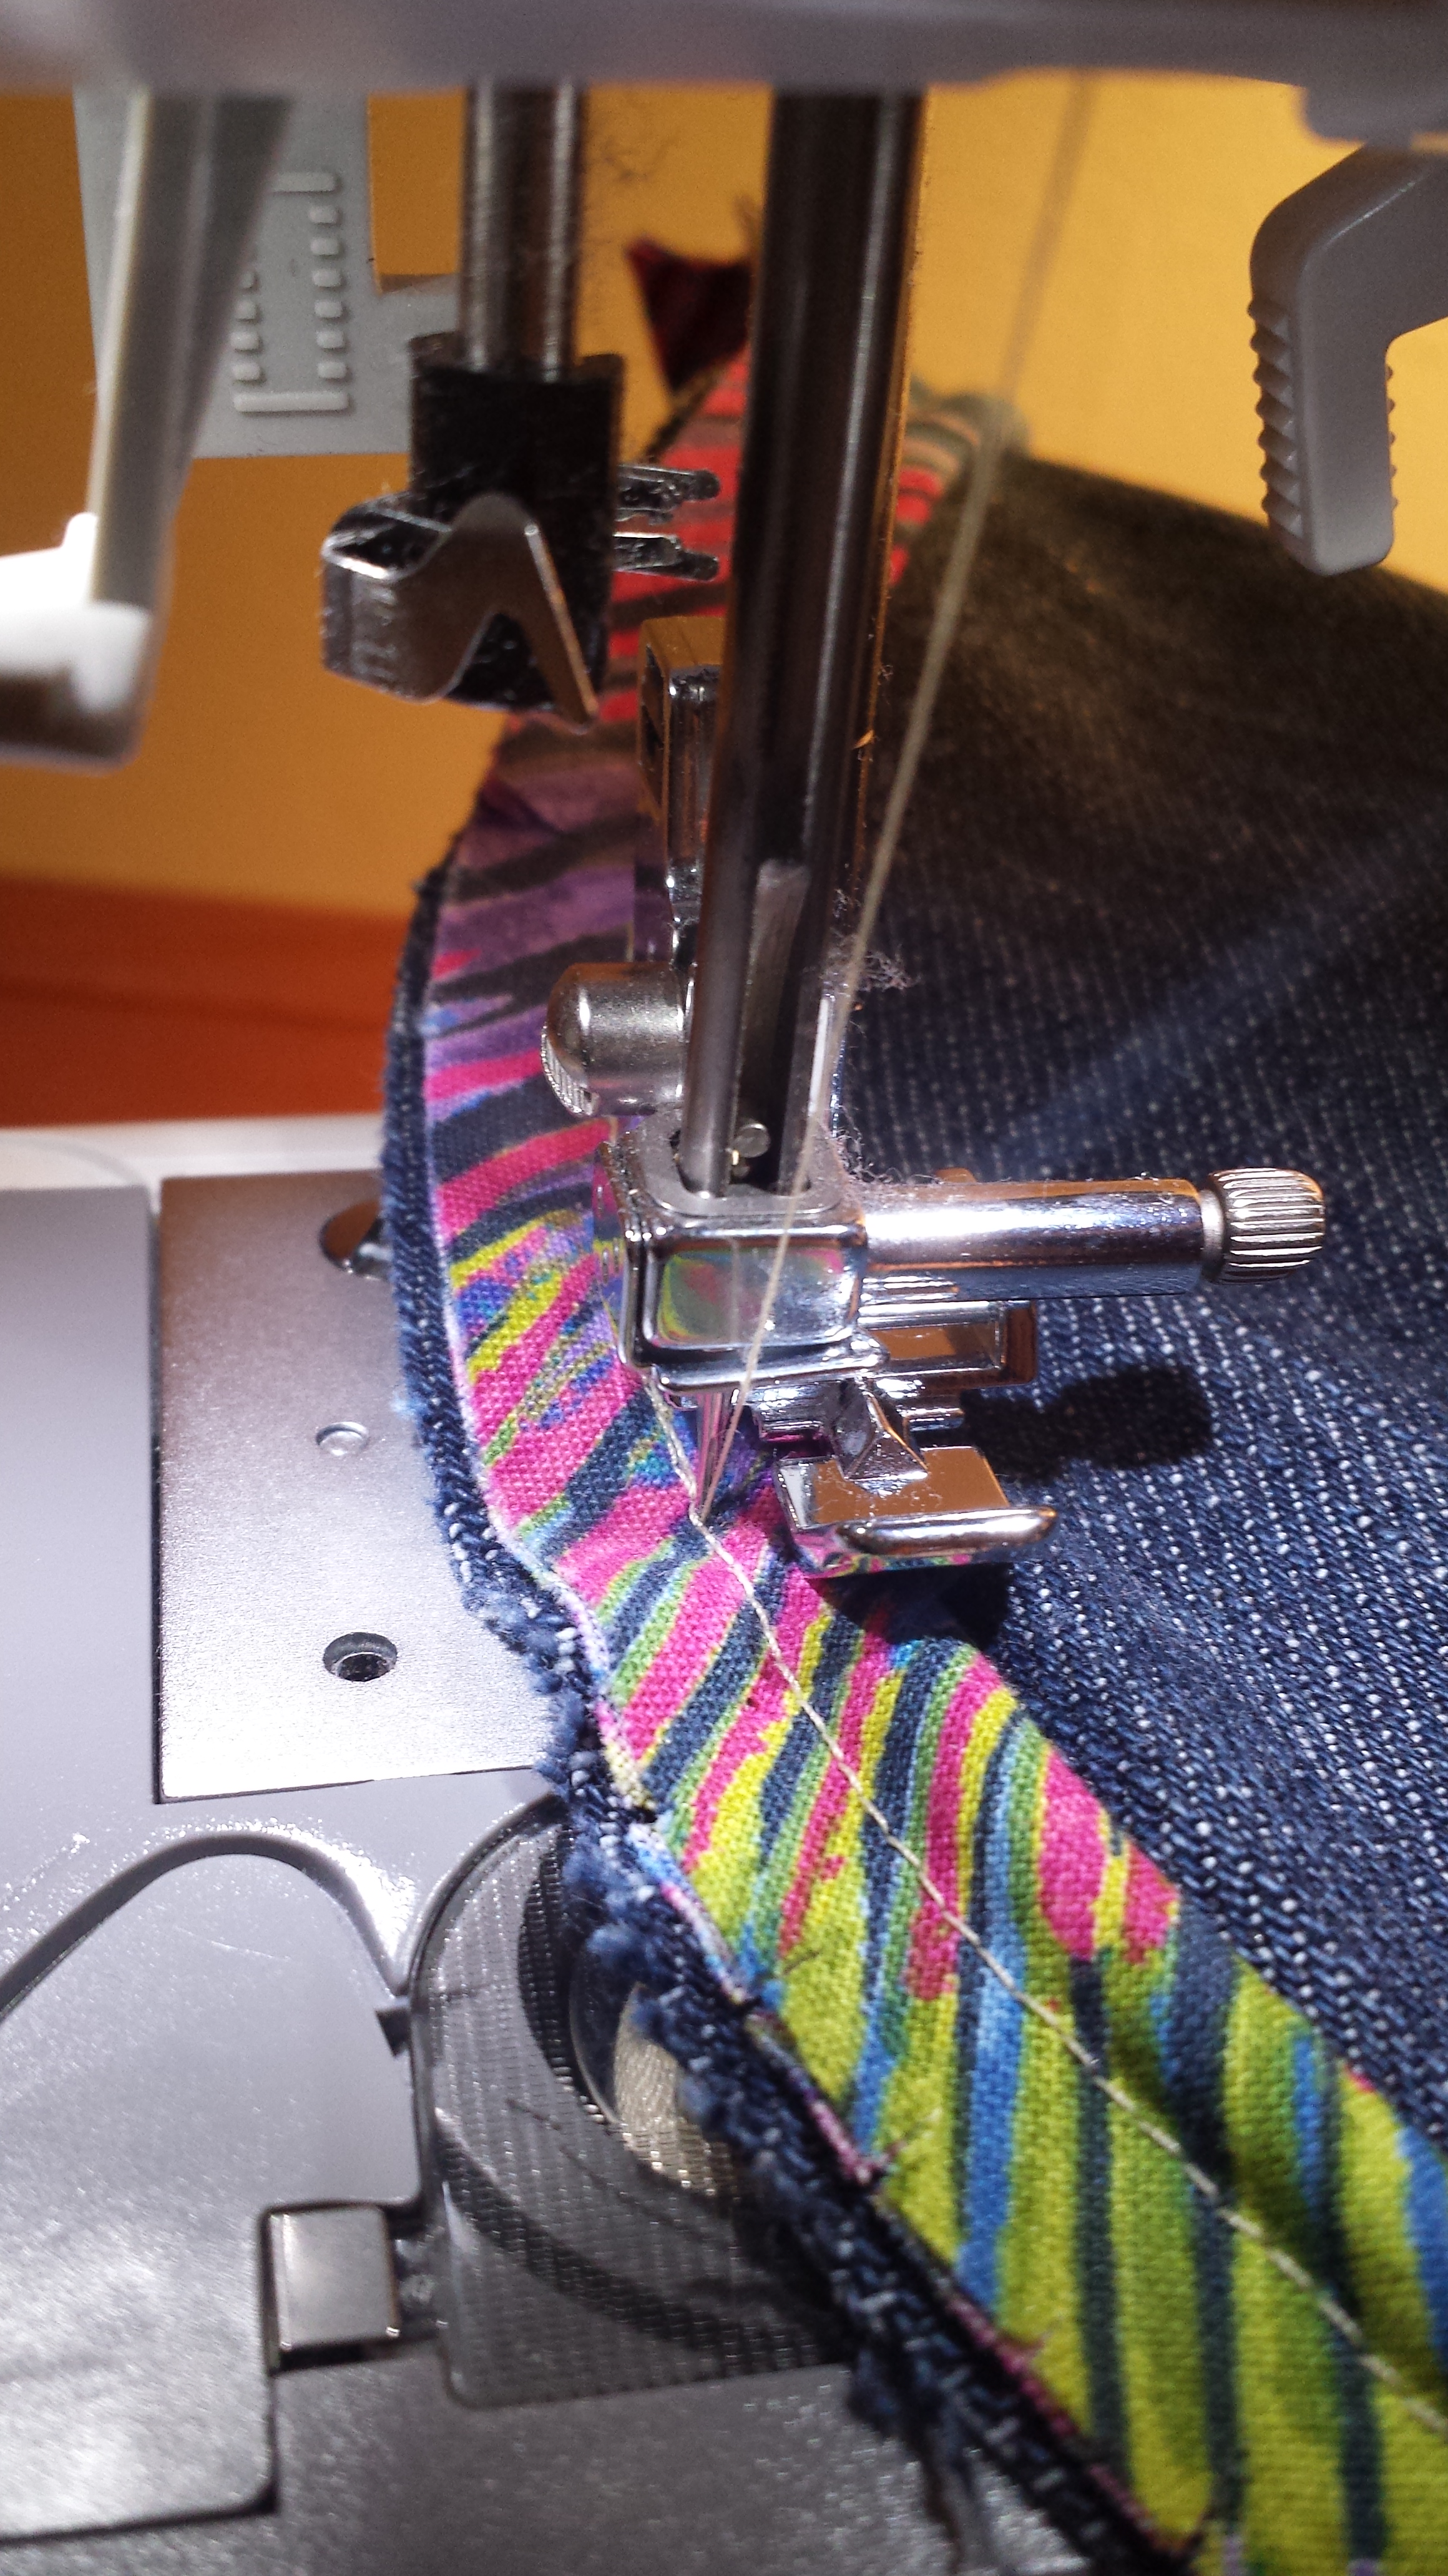
8). Pin the pattern pieces together, right sides facing. Make sure you’ve switched back to a regular sewing machine foot and standard stitch length. Stitch the two pattern pieces together by following exactly along the basting stitched you just made on the piece with the piping. Make sure to leave enough space on the bottom of the whale to turn the pattern inside out when you’re done.
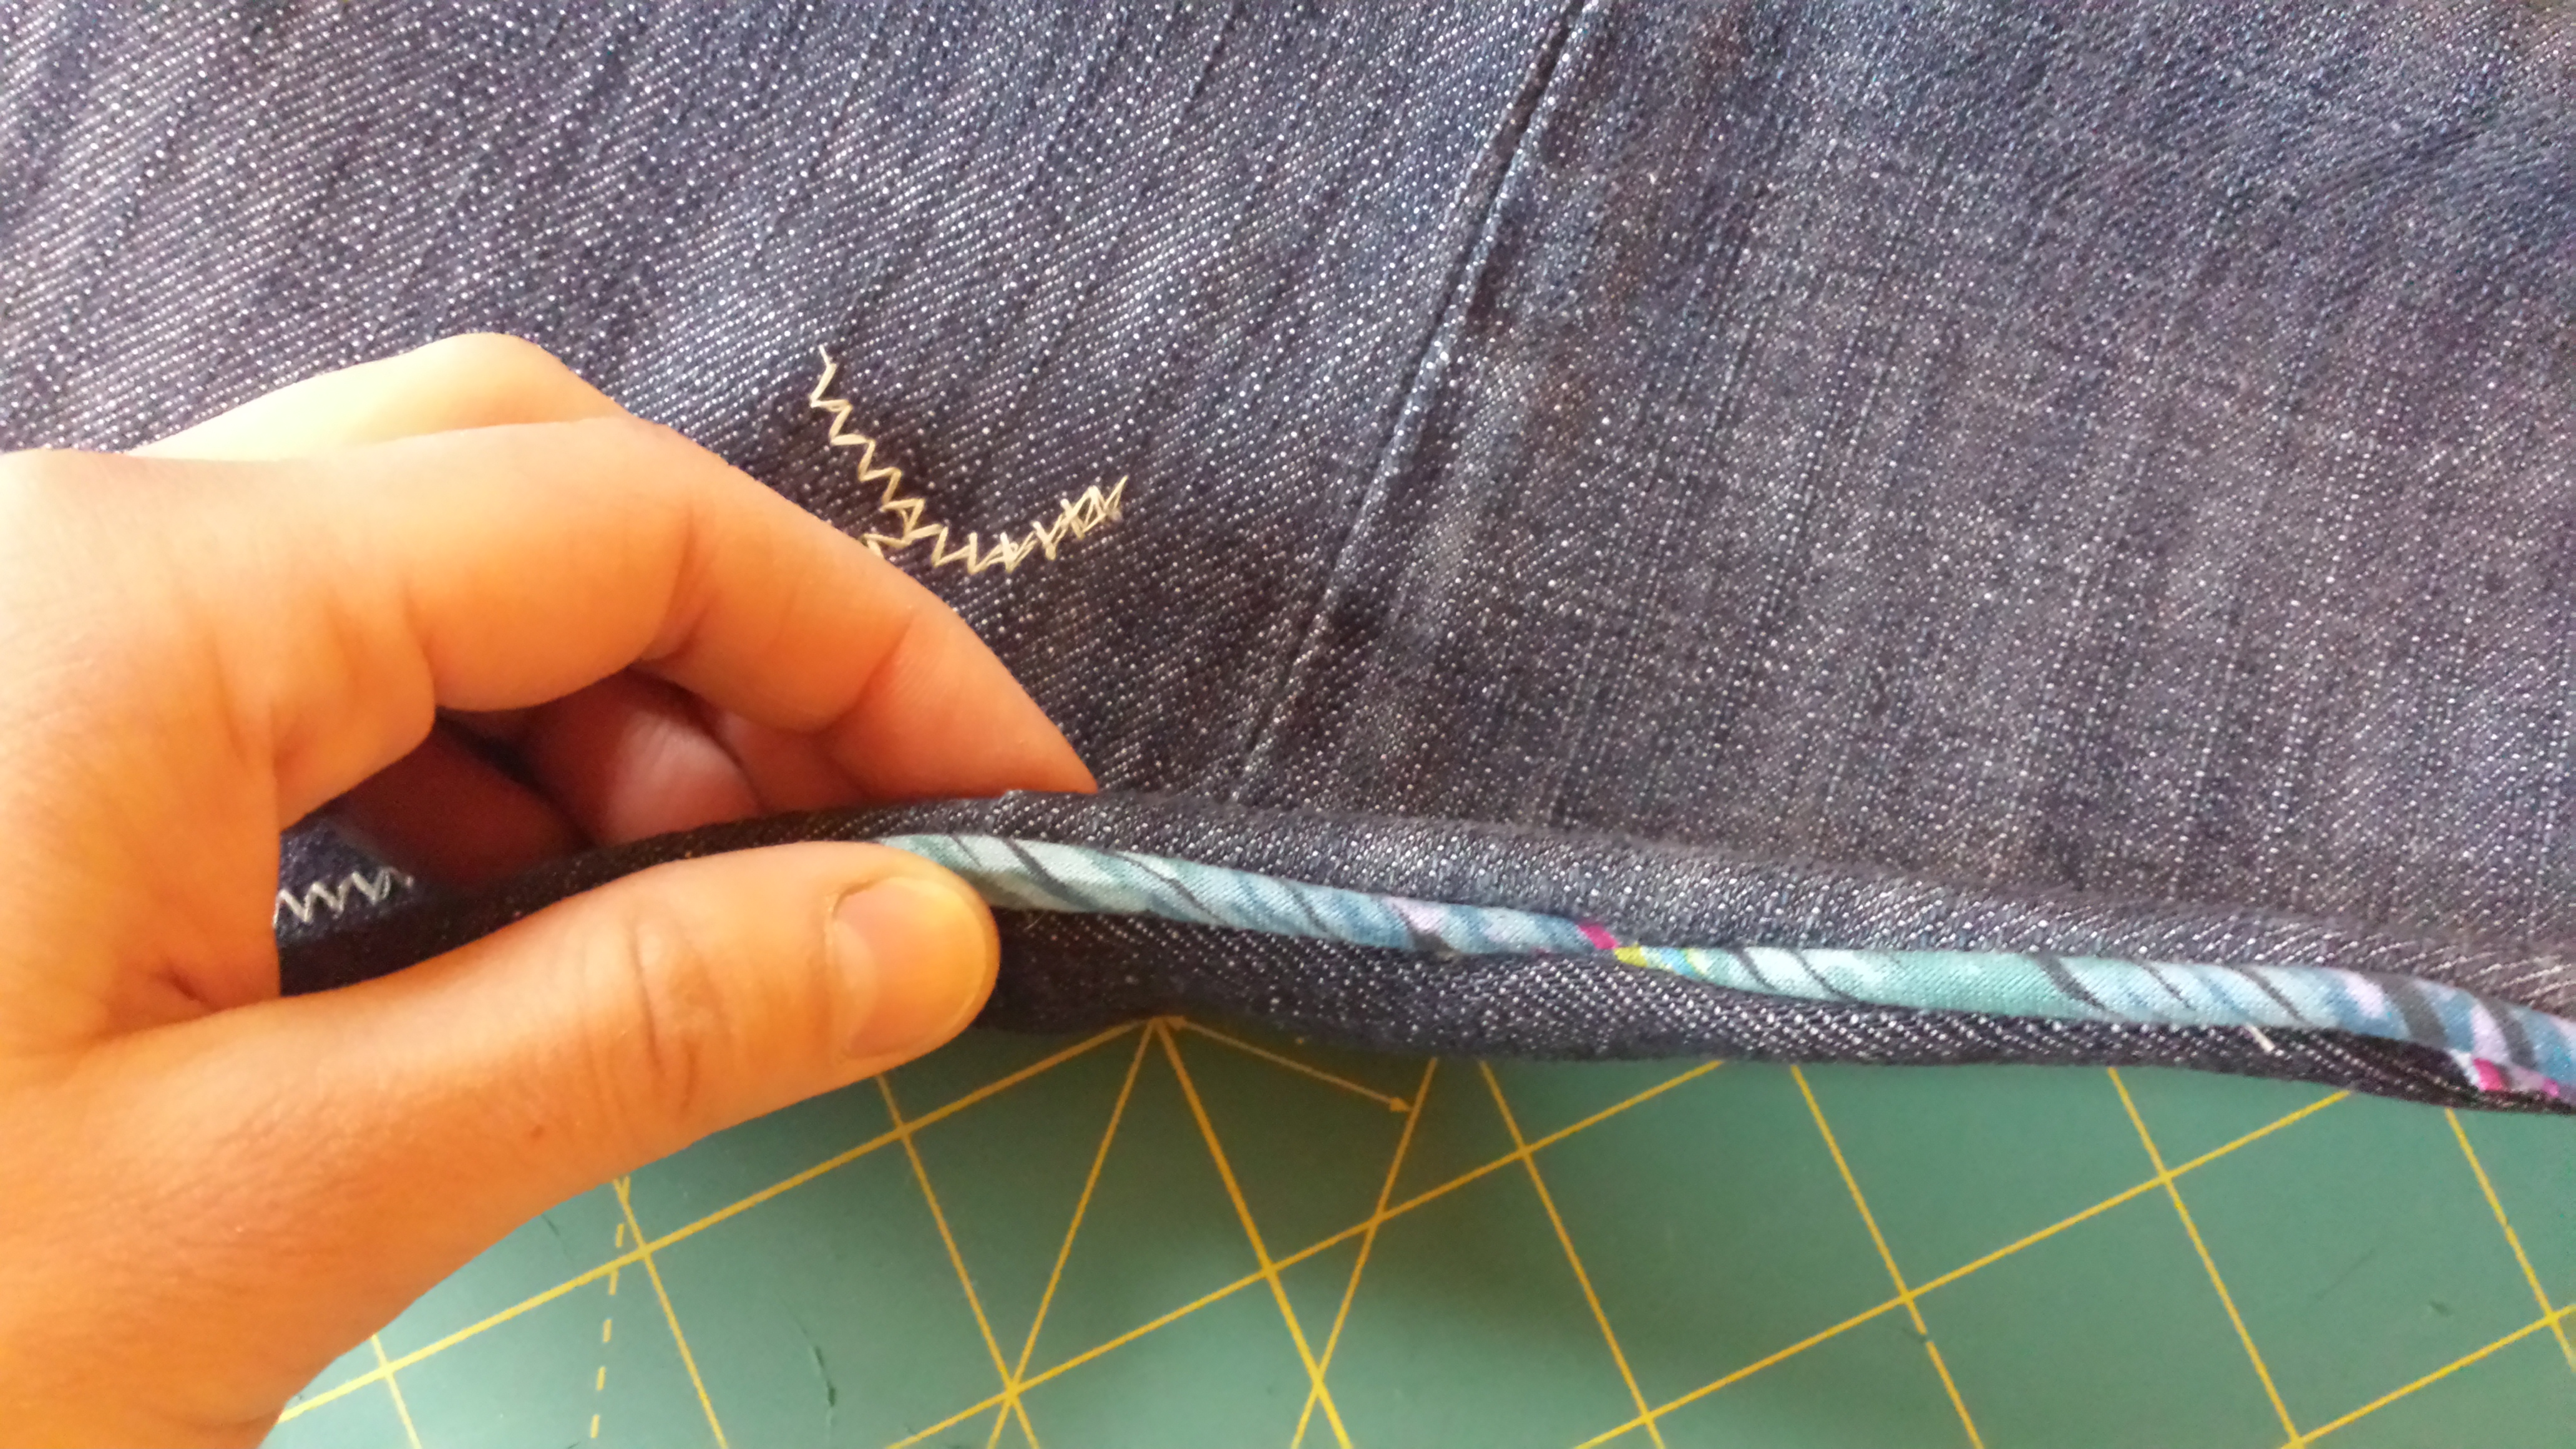
9). Clip excess fabric from the seam allowance. Grade around the curve of the whale’s tail and clip the corners.

10). Turn the pattern inside out, starting with the tail. Push out the corners with something sharp—a pair of scissors or eraser end of a pencil works. You’ll see that the overlapped section of piping isn’t too noticeable.
11). Starting with small handfuls of filling, stuff the whale. I always start with the tail since that seems to be the trickiest part. Make sure you use enough stuffing so the whale tail stands up on its own.
12). Blind stitch the seam closed…
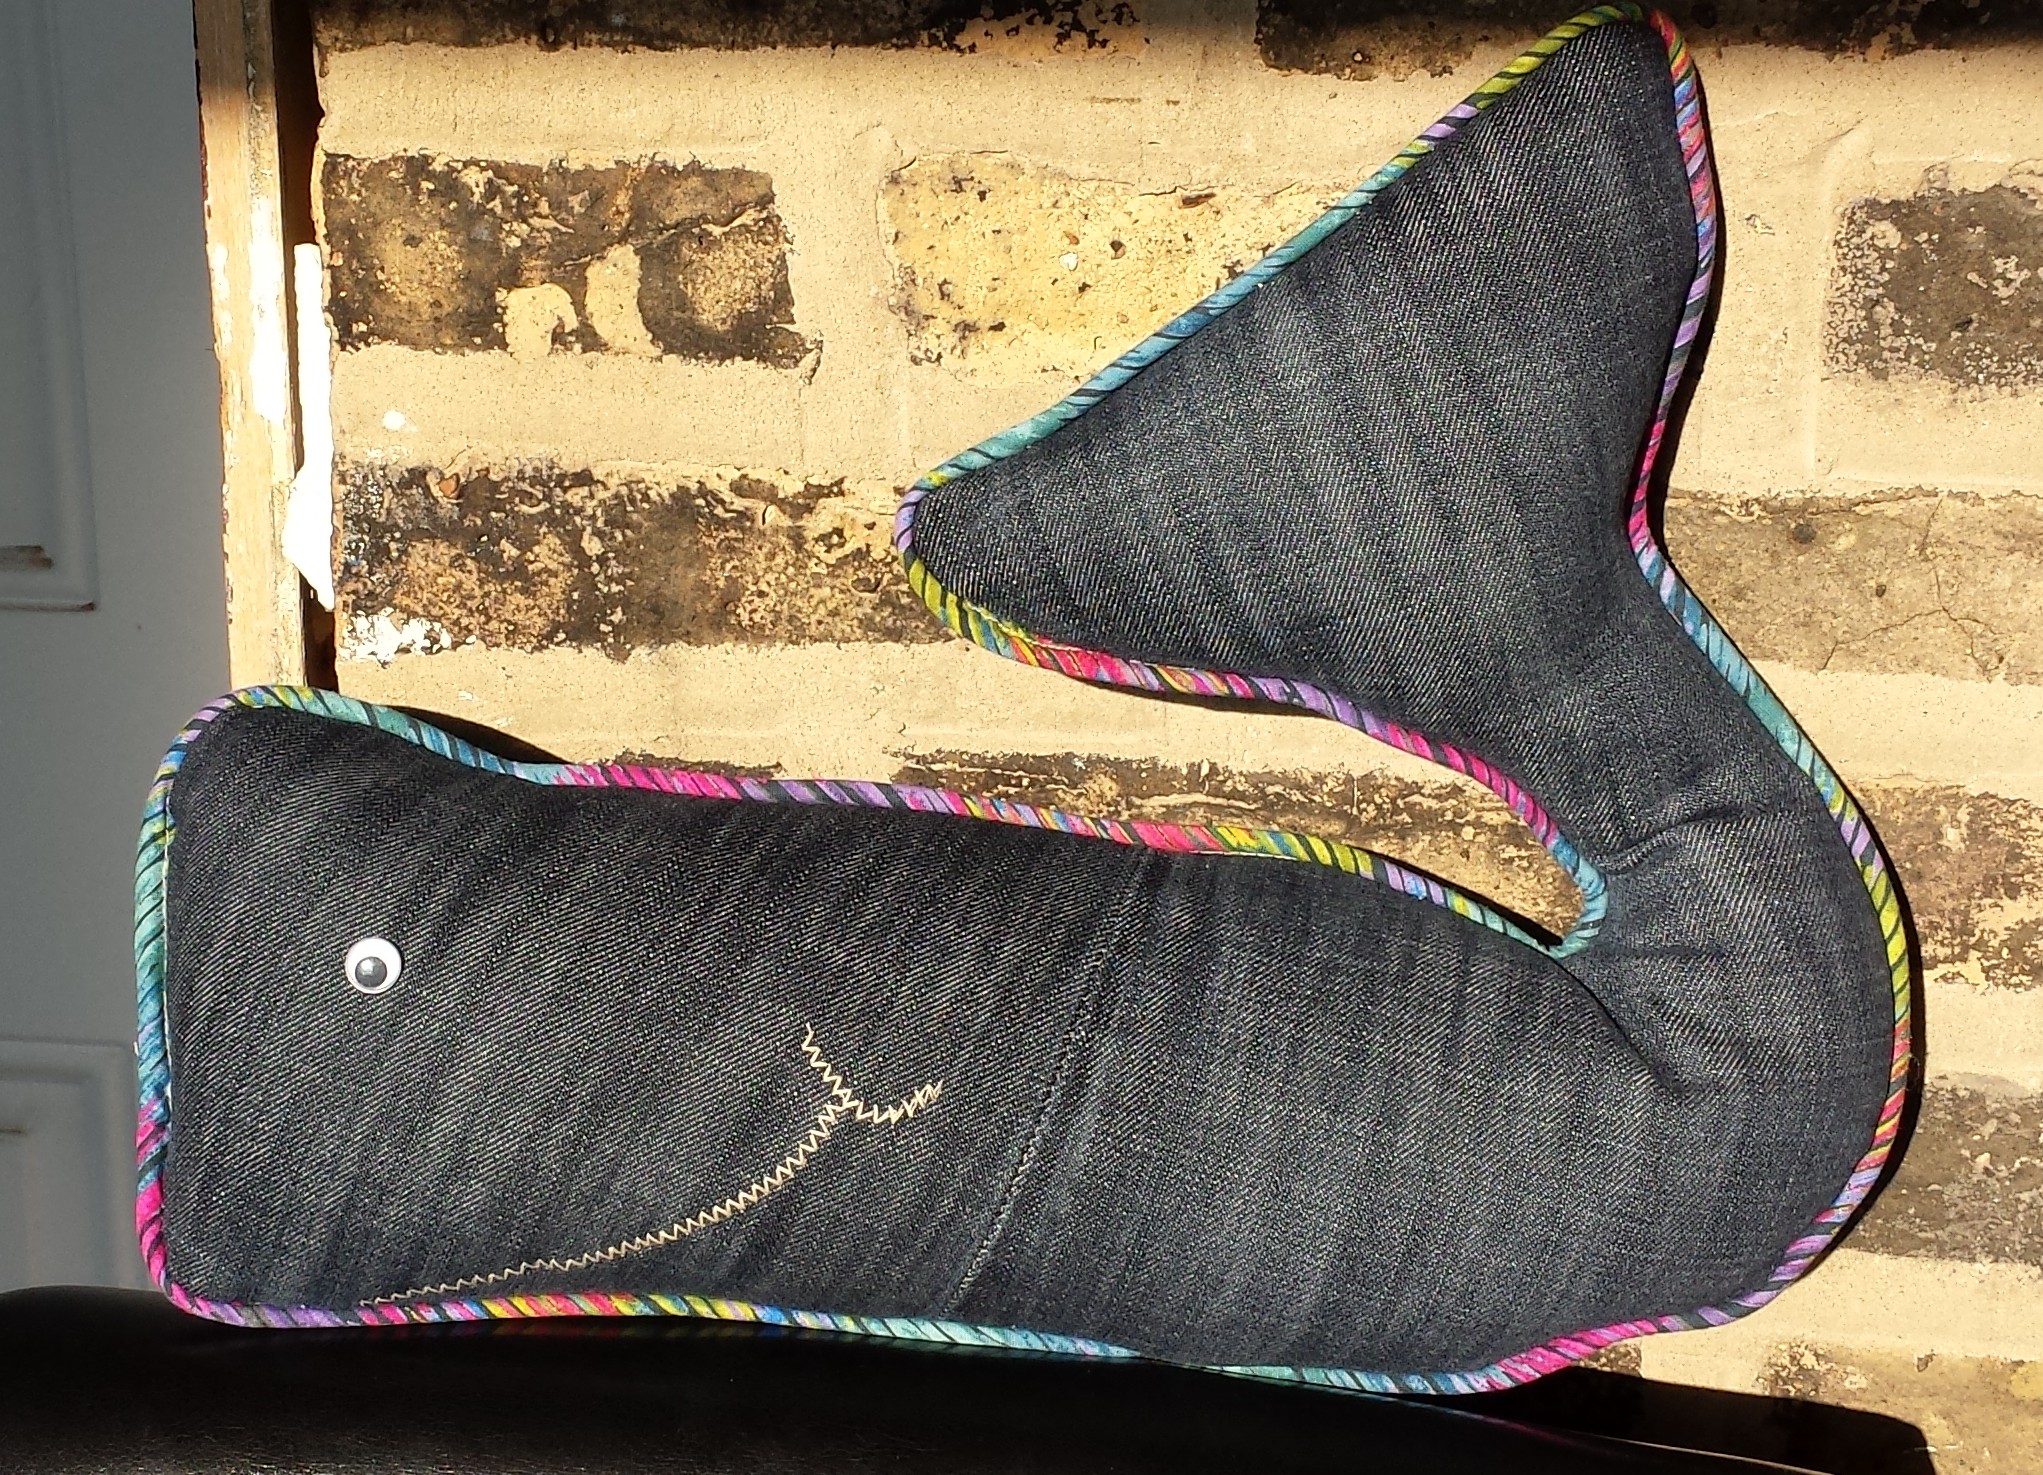
…and you’re done!
Here’s hoping that making some maritime-inspired decor will bring summer around a little sooner. Happy upcycling!

looks a million dollars!
xoxo
blanca
LikeLike