This dress came together in a very serendipitous way. I didn’t realize that the fabric and pattern would be a perfect match. I had no clue how it would look sans collar and buttons. But daggumit I went for it. And I love it.

This dress came together in a very serendipitous way. I didn’t realize that the fabric and pattern would be a perfect match. I had no clue how it would look sans collar and buttons. But daggumit I went for it. And I love it.
Before we get to the good stuff (another Deer & Doe Plantain Tee), let’s talk about a wonderful little household item: The Mr. Clean Magic Eraser.
Are you familiar? I mainly use ’em to clean up marks on the walls, but I recently learned of another amazing use: CLEANING THE IRON.
A stubborn mystery fabric had gunked up my iron pretty badly, and in a fit of desperation, I took to the rabbit hole of internet forums for help. Bless your heart, commenter DLM2000. Not only does the Magic Eraser work like a charm, but it’s also waaaay cheaper than toxic-smelling iron cleaner that runs $20 bucks a tube. Try it out next time your iron’s due for a cleaning!

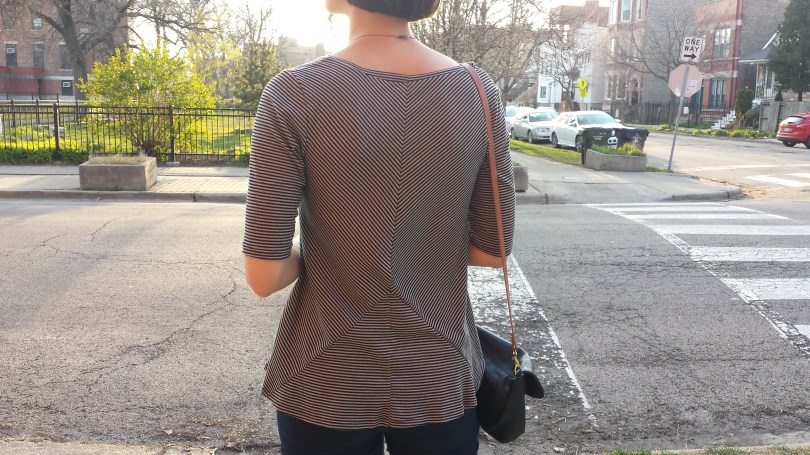
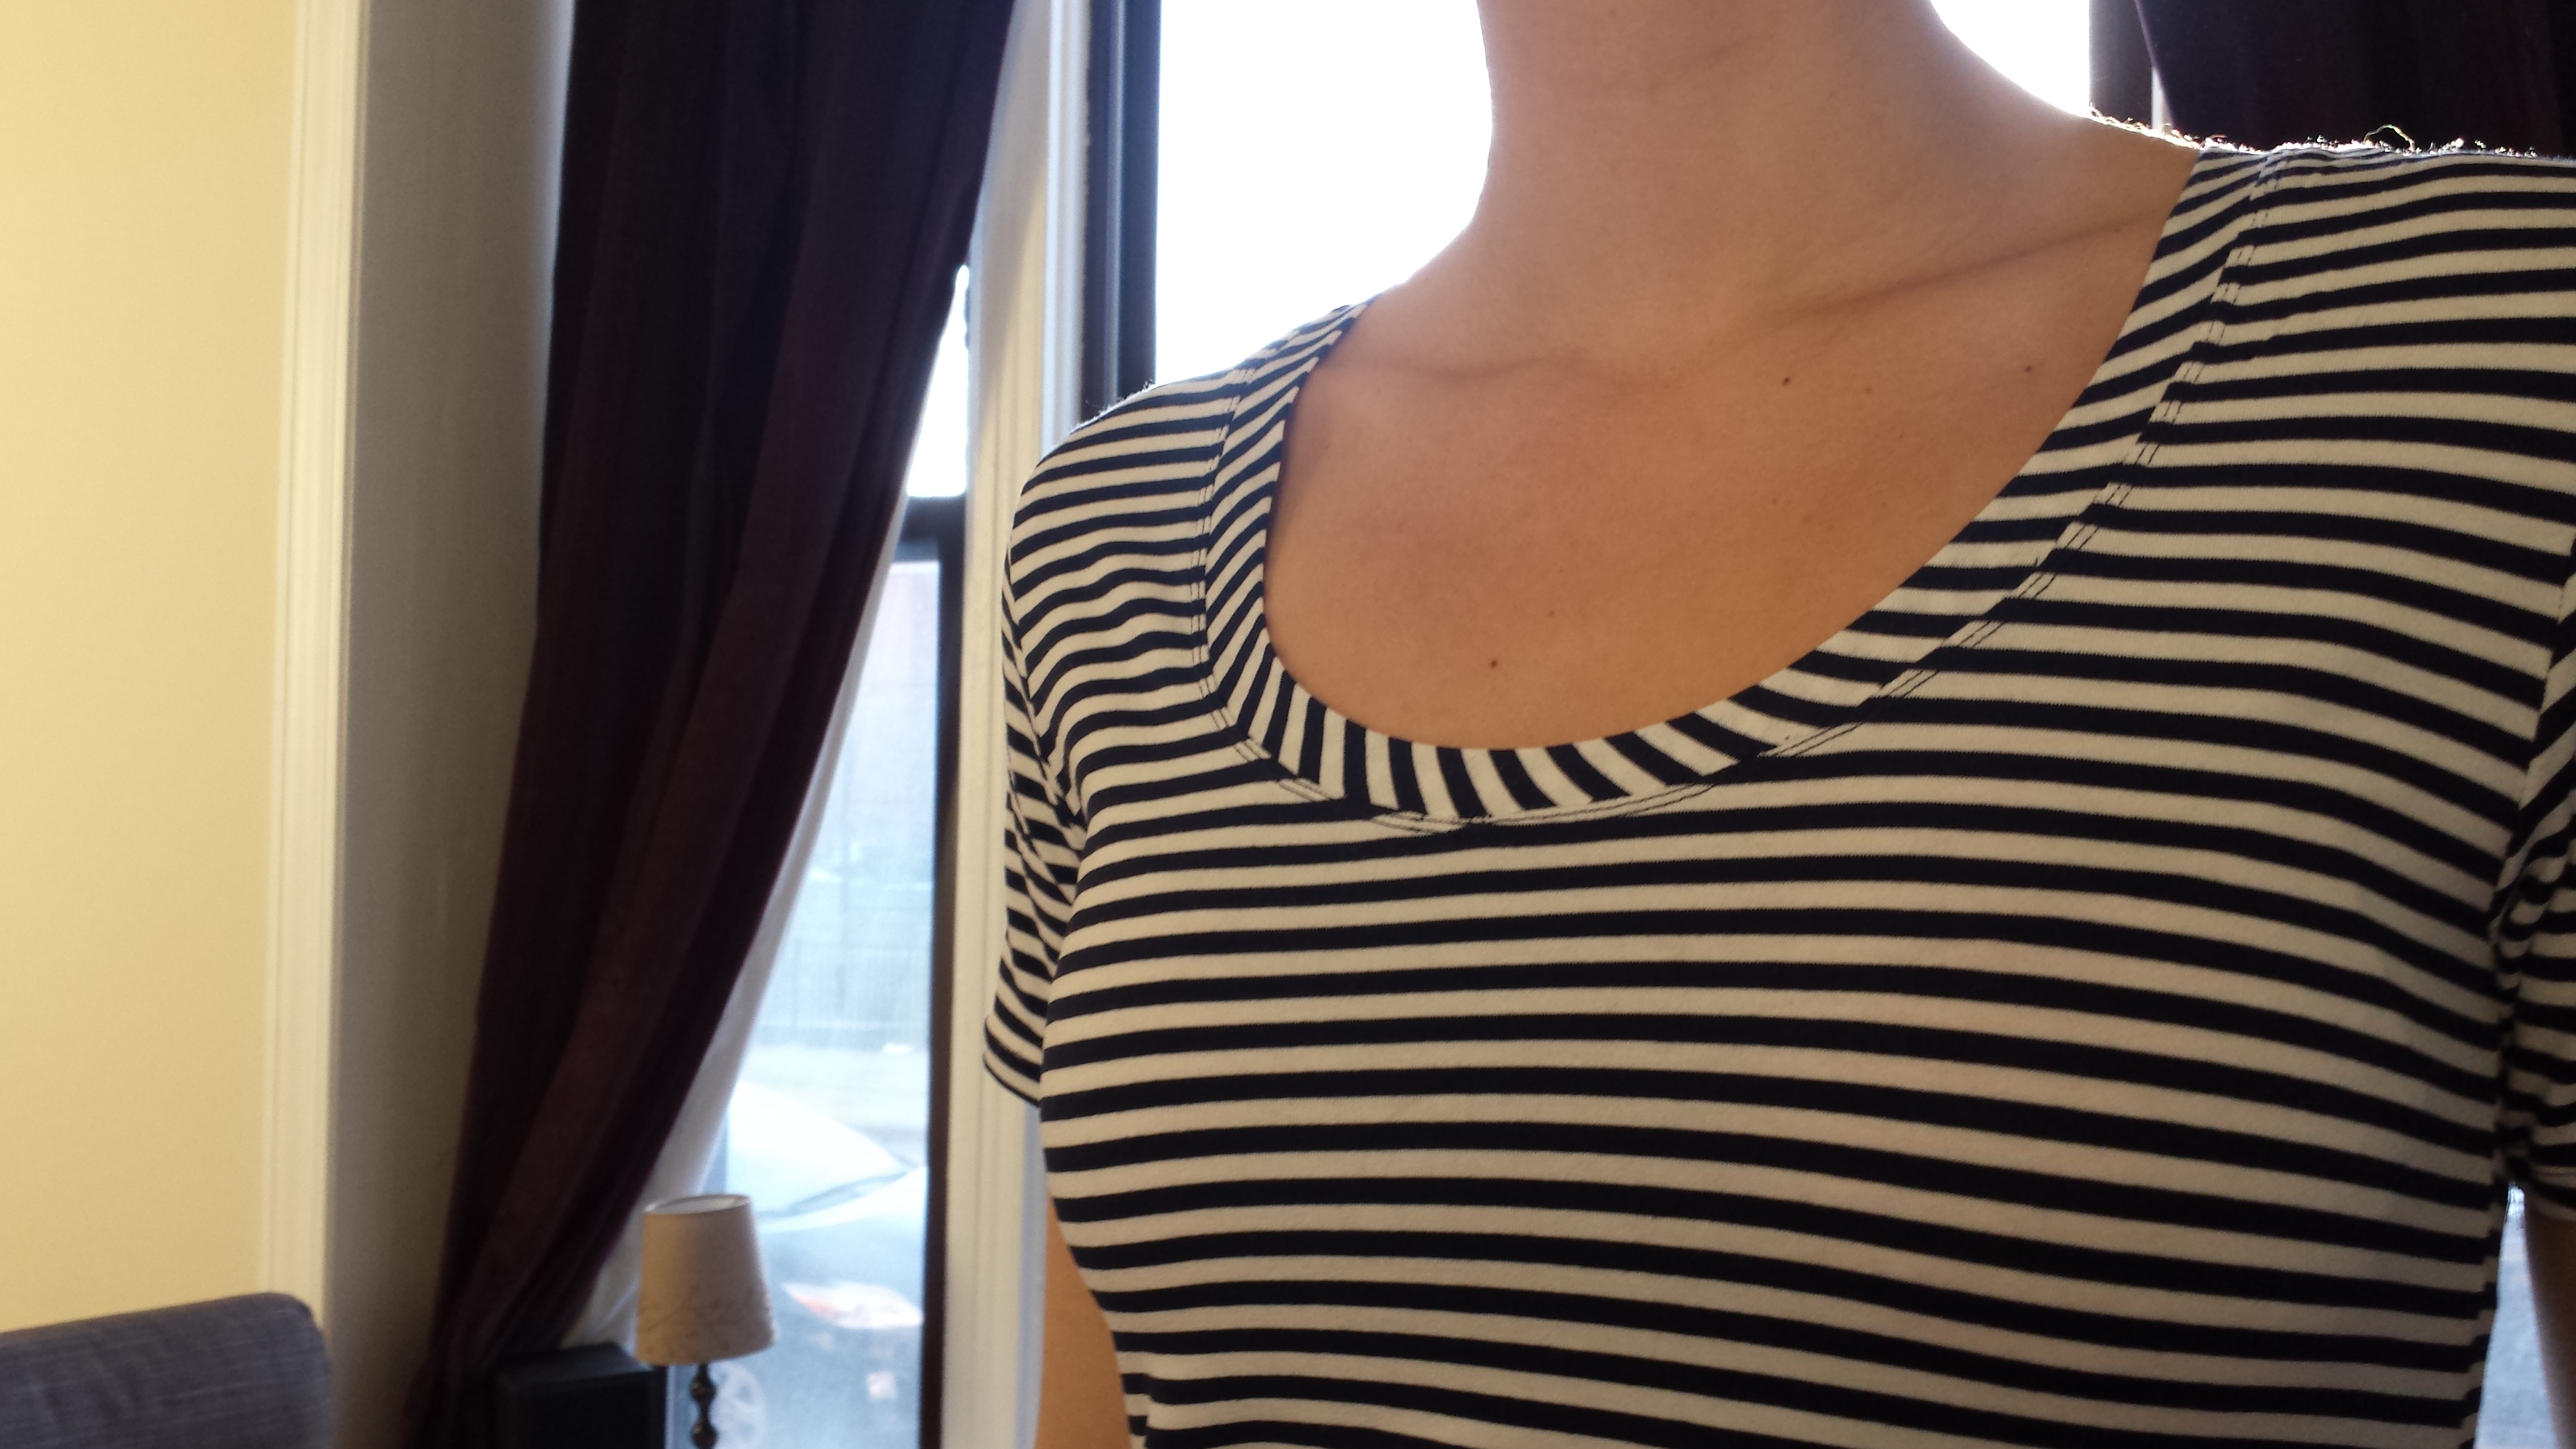
Now for the main attraction. I bought this lightweight striped knit with the intention of copying a swingy, tent-like RTW shirt I wear frequently. But tracing a knit top with wonky design lines turned out to be a little more complicated than I’d anticipated, so I decided to go with a tried-and-true shape that I know works for me: the Plantain Tee. (See versions 1 and 2.)

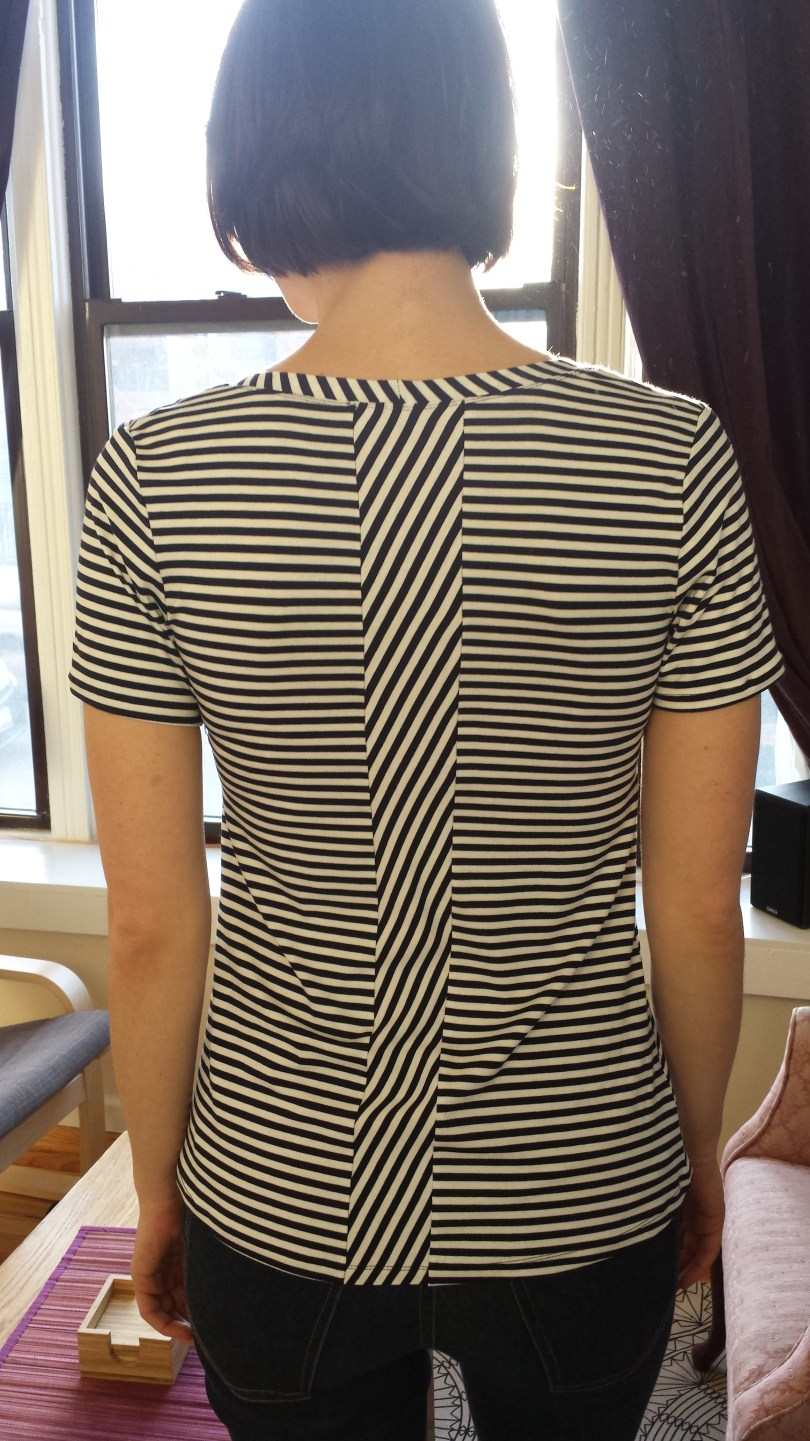
This time around, I added fullness to the back of the shirt using this Grainline tutorial. I then cut the back into four separate pattern pieces and added seam allowances. I sewed the whole shirt up on my serger and used a twin needle for the hems.
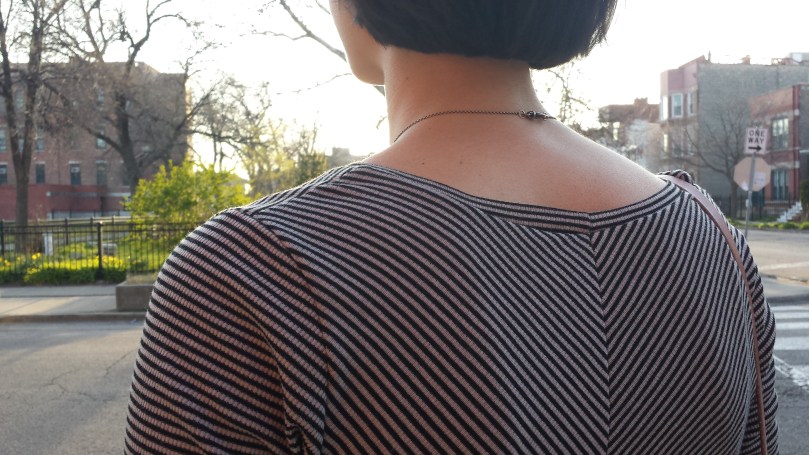
As you can see, I love me some stripe interplay. For the sleeves, I went with this above-the-elbow length, which is great for this “transitional” weather we’ve been having in Chicago. #optimistic

I don’t have too much else to say that I haven’t already covered in previous posts. As far as free sewing patterns go, this one’s a winner.
Are you good at sewing basics? With Me Made May coming up, I could use a boost in the basics department. Speaking of Me Made May—who’s in?! I still need to pledge…
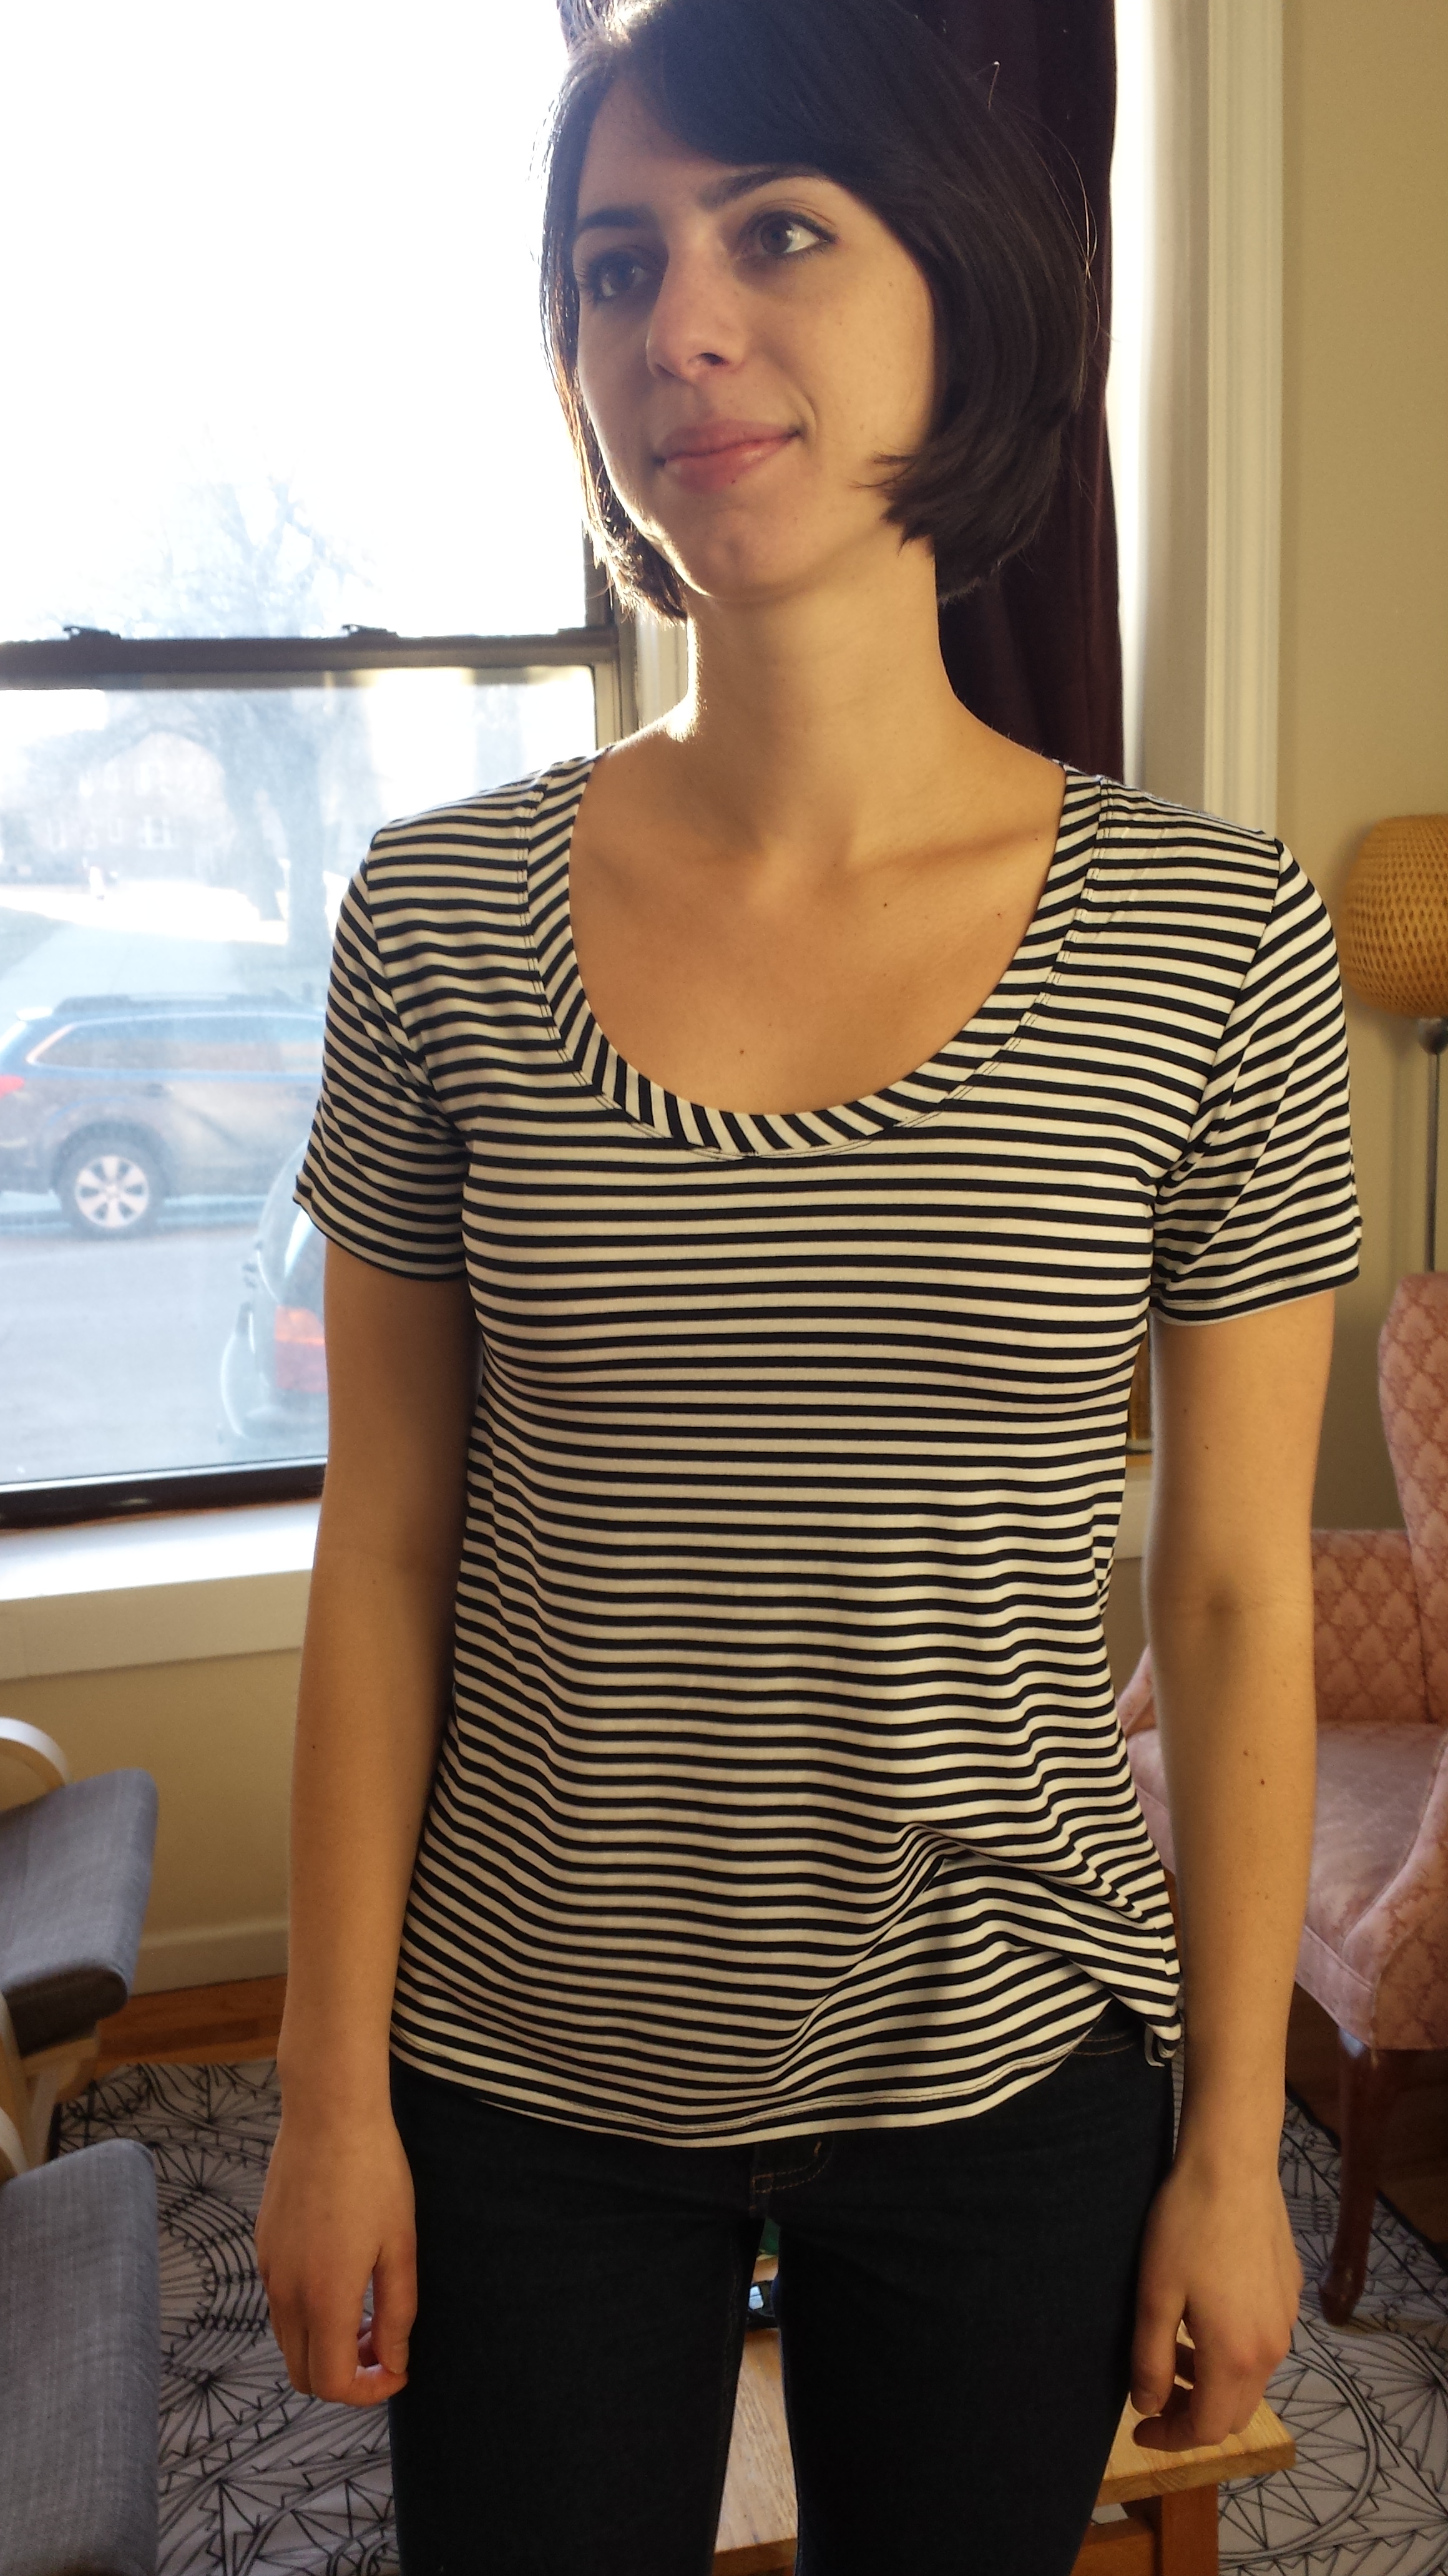
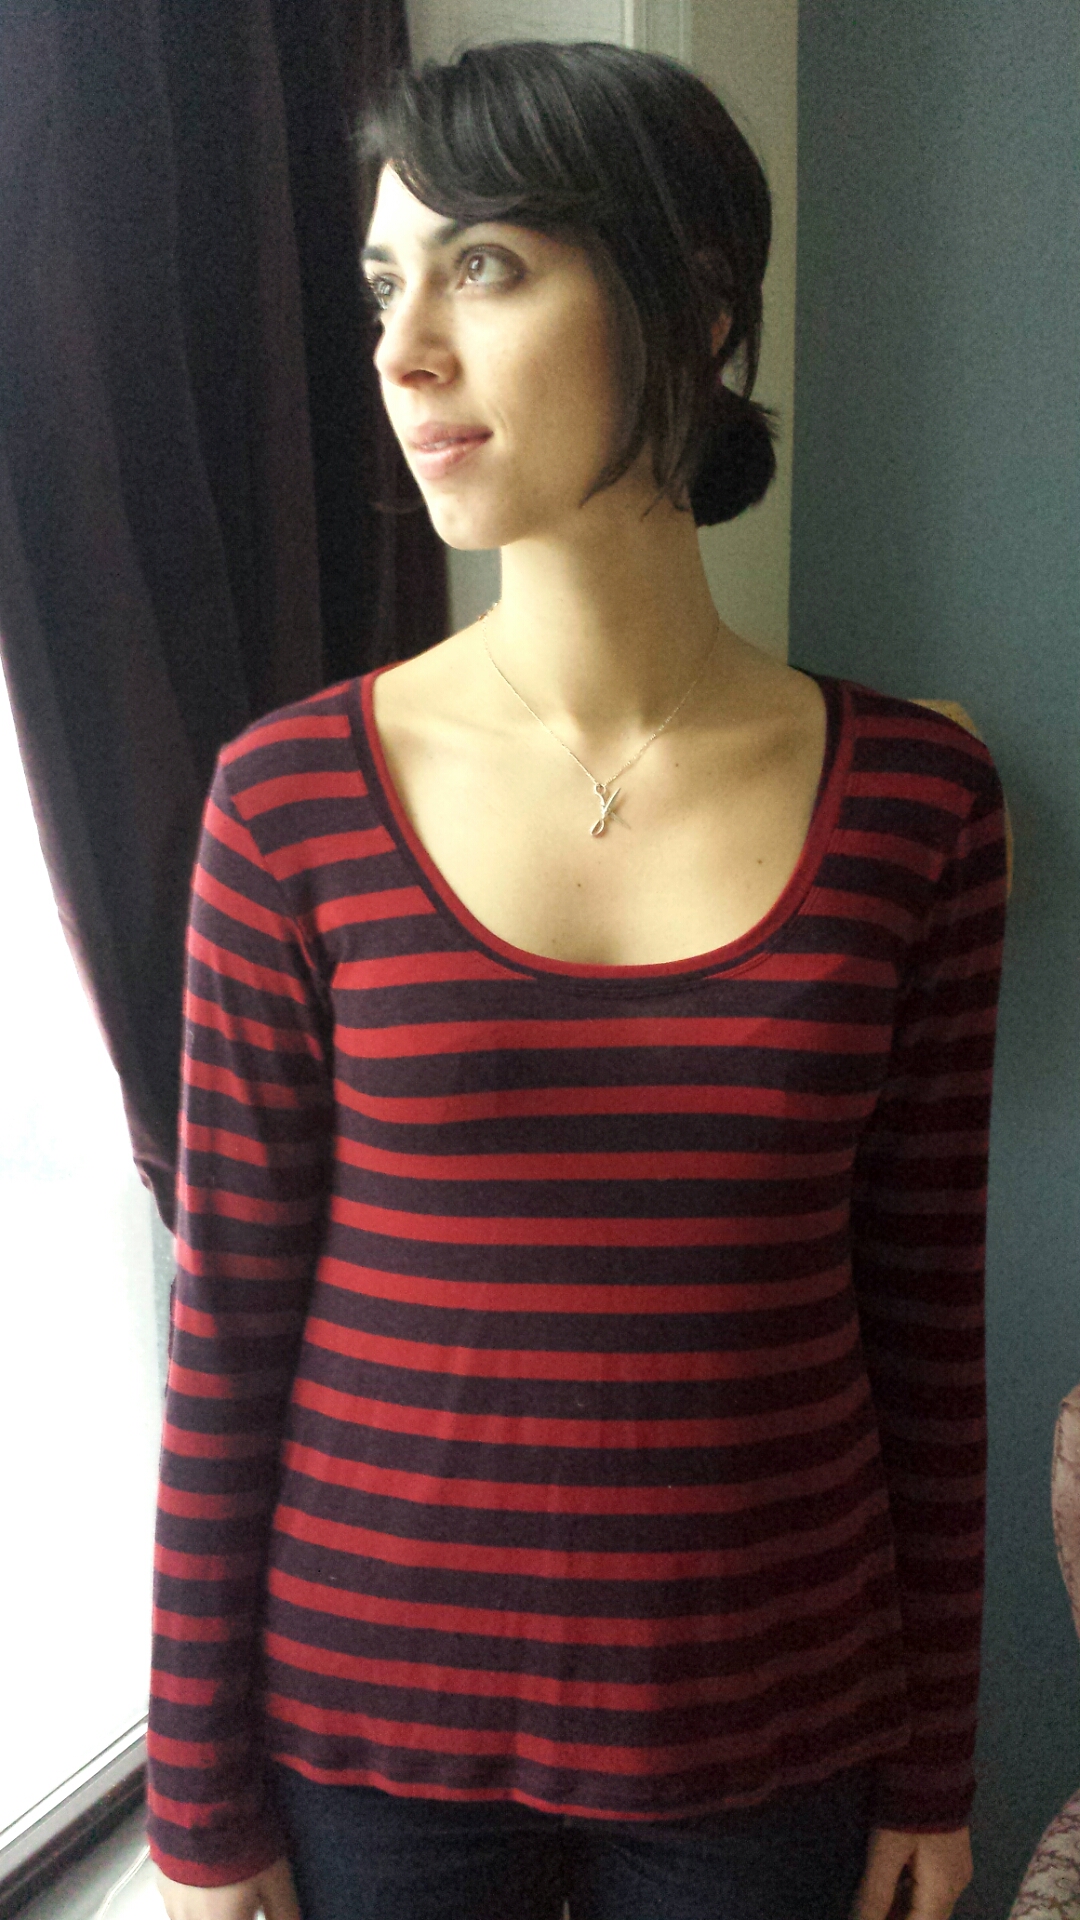
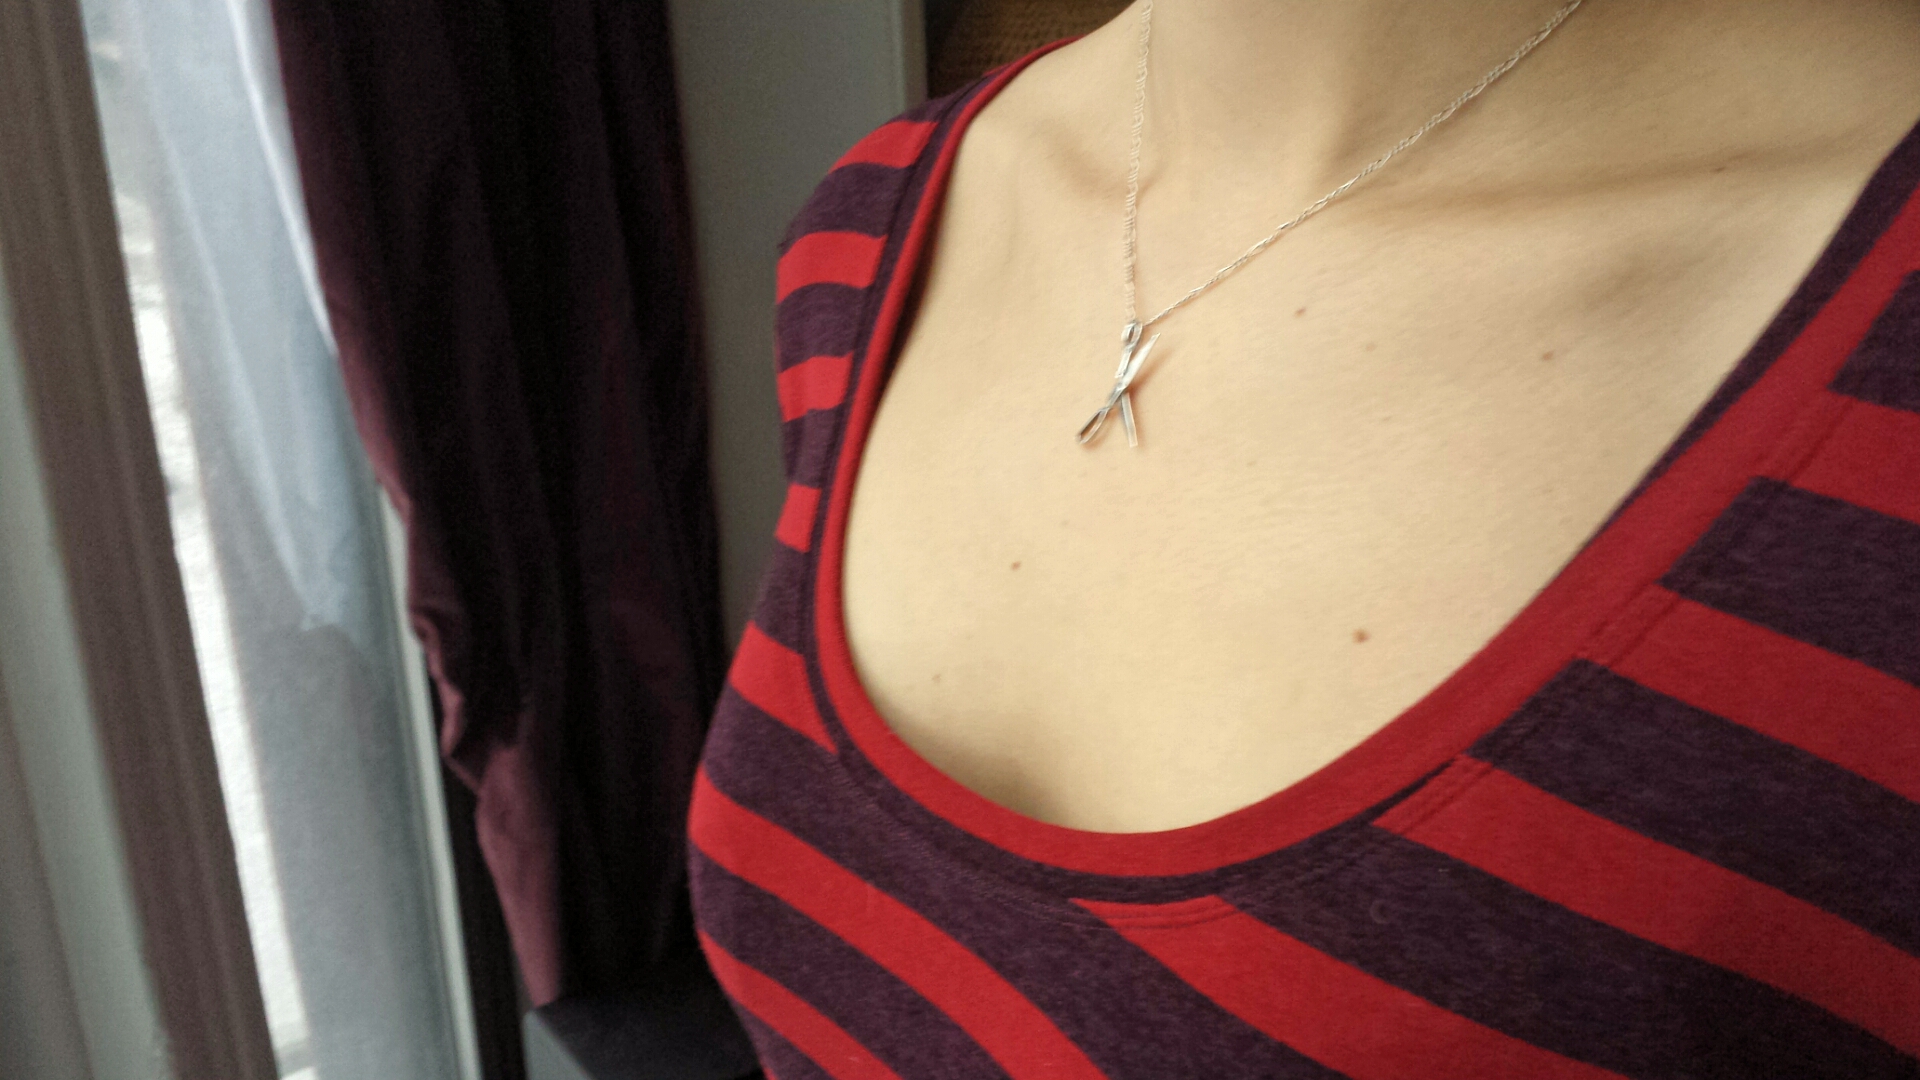
This T-shirt is a phoenix. It has risen from the ash pile that was an impulse-bought, rarely worn maxi dress lying in a heap in my closet for nearly a year. I really tried to give the maxi/midi dress trend a go last summer, but I ended up feeling kind of silly wearing that much material. Plus, I run warm, temperature-wise, and HOT DAMN maxi dresses do not let your bottom half breathe. Thus, the stripy knit tee was born.

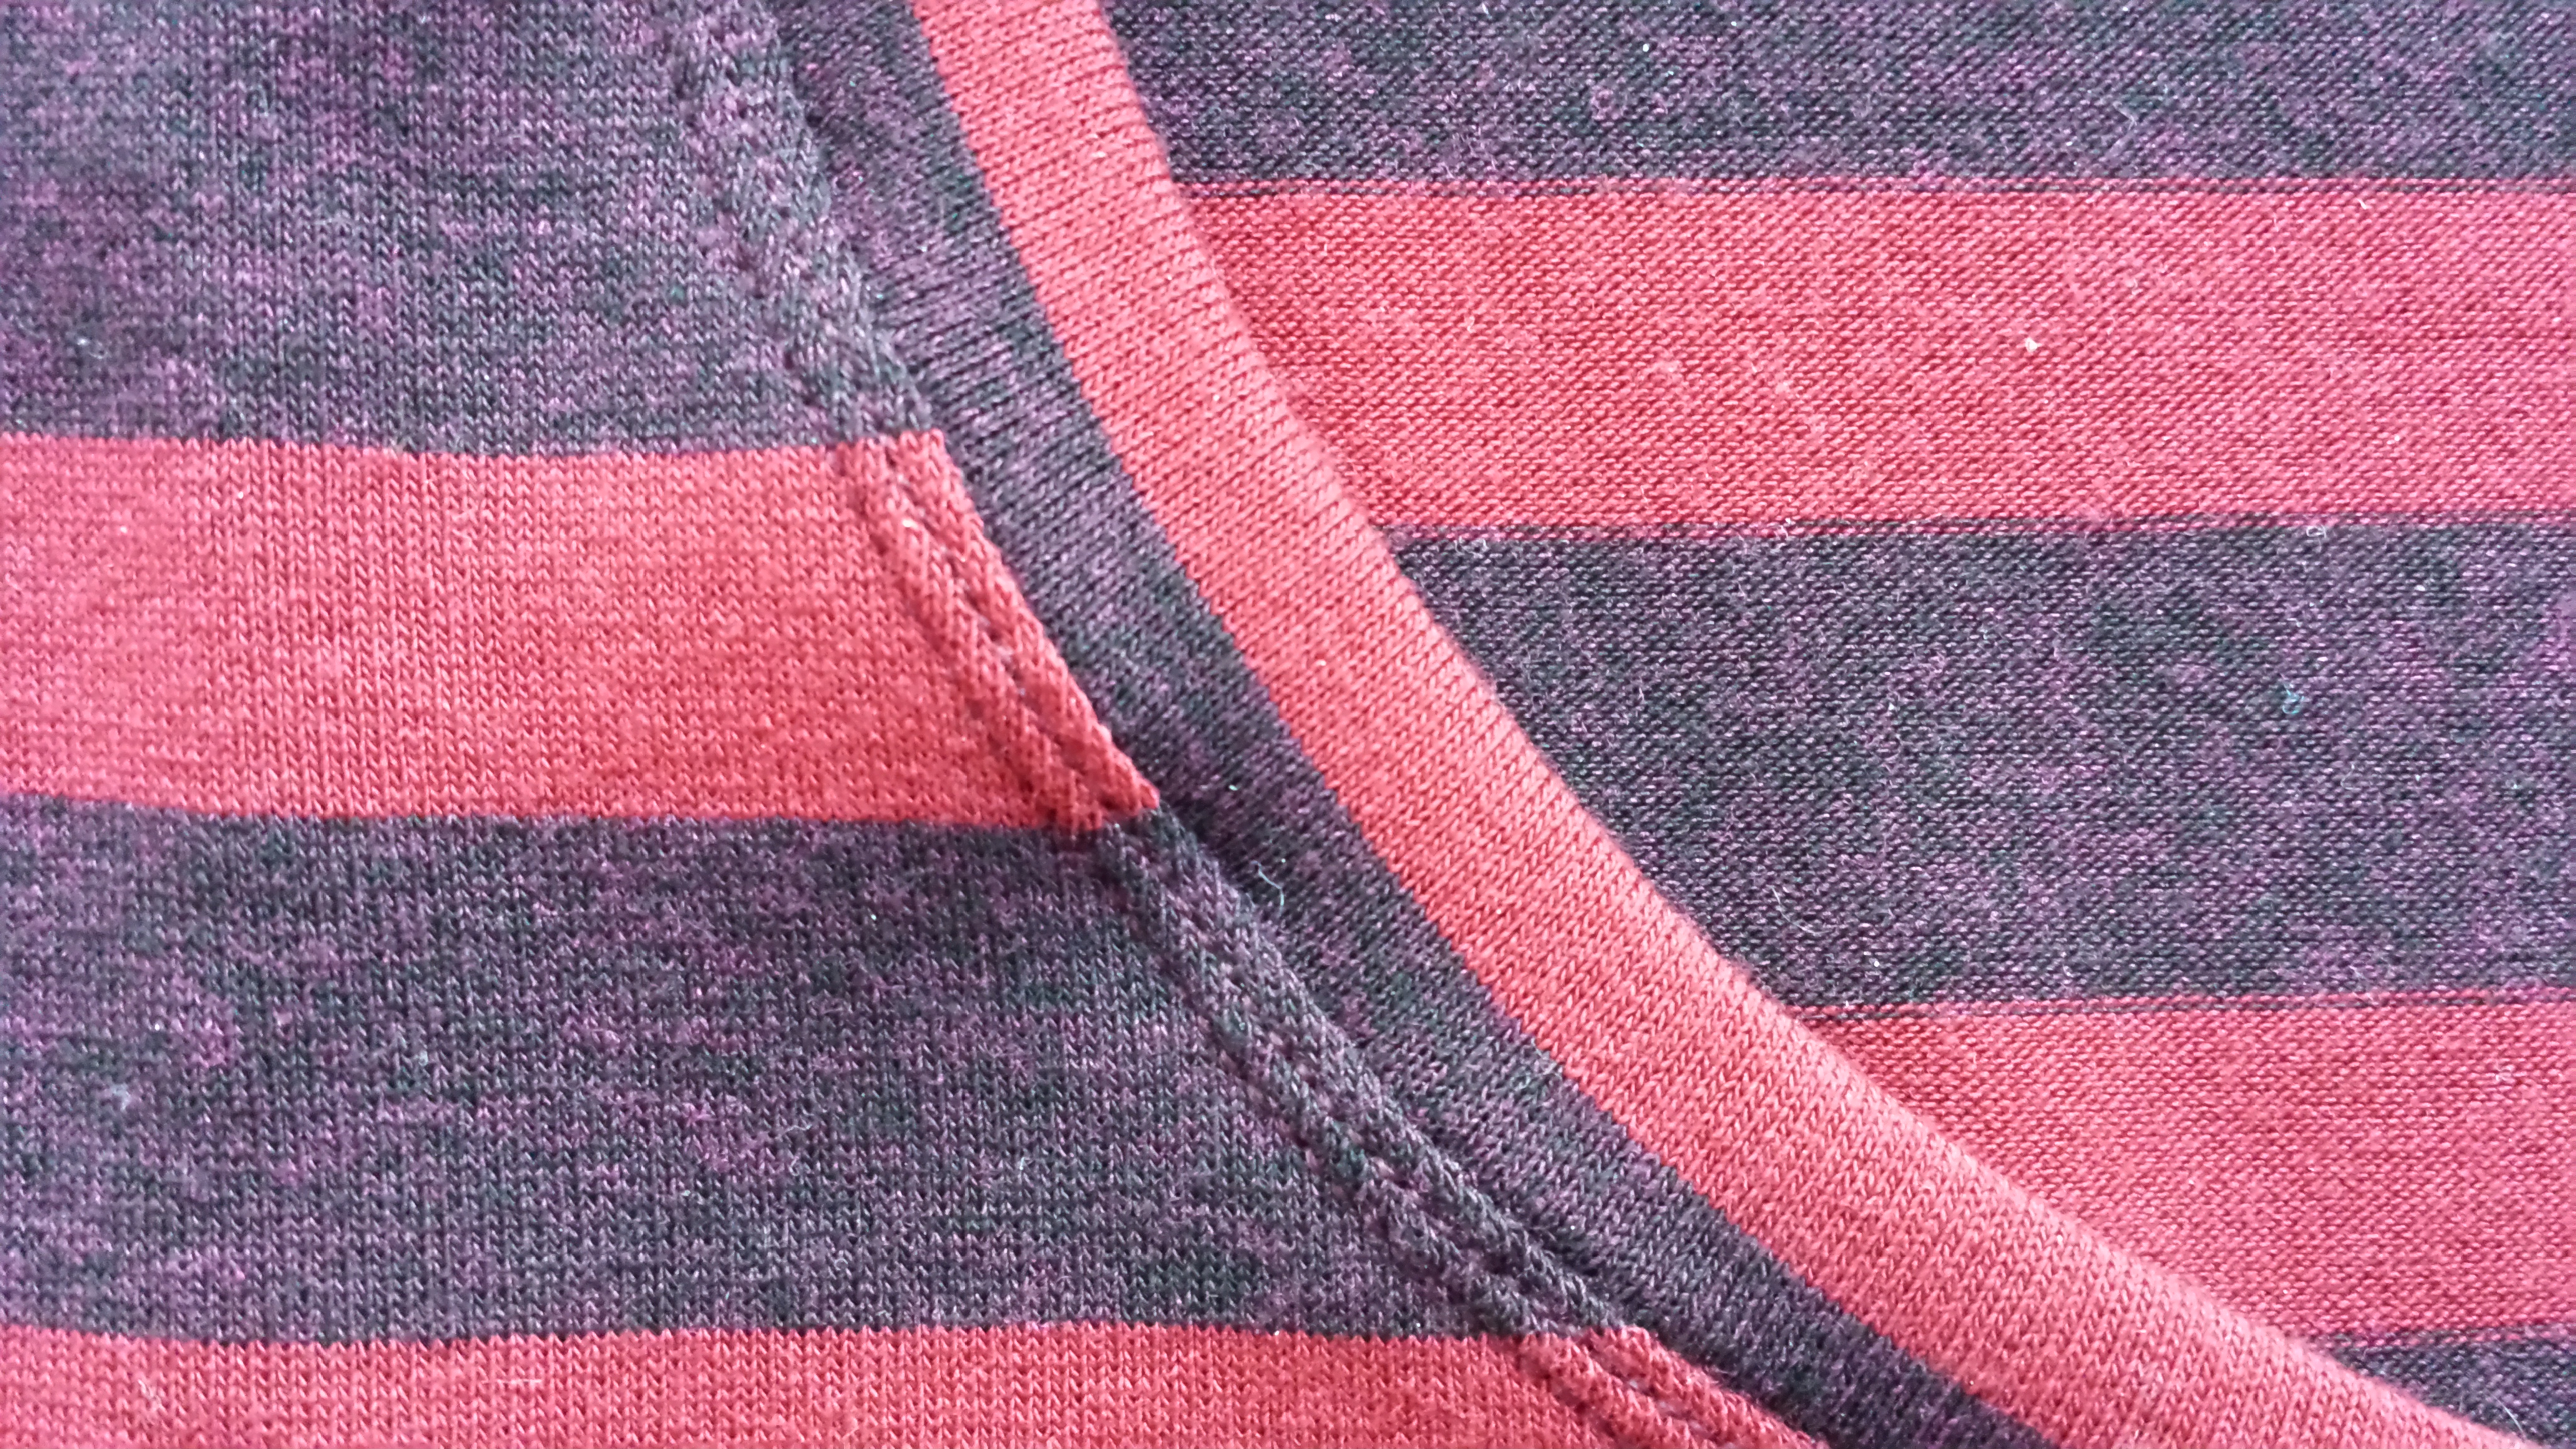
Maxi dresses are probably the easiest thing to upcycle since you have so much material to work with. I was able to cut the front on the fold, but I had cut the back in two pieces. That’s where this ~*~funky~*~ bias-cut back panel came in, and it’s by far my favorite part of this otherwise basic shirt. That’s one of the great things about sewing: a problem often transforms into an opportunity for a unique design element.
As far as fit goes, I used the same sizing as my first Plantain tee, cutting out a straight 40 and adding 1″ to the body. Lacking fabric, I cut the short sleeves this time. The viscose/poly material is wonderfully drapey and comfortable, but its fluidity made sewing the neckband a little tricky. I ended up not catching the band in one spot in the front and had to rip some stitches out and re-sew (SO annoying when you’re using the lightning bolt stretch stitch). I managed to patch it up well enough, and it’s safe to say that this tee will get plenty of wear this spring and summer.
I’m thinking I’ll take part in Me Made May this year, and tops like this will be great to have in the everyday arsenal. Have you taken part in MMM before? What am I in for?
This shirt almost didn’t get made. Not because it’s tricky to sew; in fact, it’s a pretty easy make if you’re familiar with knits. The reason it almost landed in my scrap bin is that I carelessly snipped a hole in the sleeve when clipping down the excess seam allowance. Gah! After about 15 minutes of hysterics, I realized that I had more than enough leftover fabric to cut a brand new sleeve. Crisis averted—well, almost. Unpicking an entire row of zigzag stitches in a slinky knit proved to be very tedious, and the shoulder seam isn’t as smooth as the other because I had to sew it with a teensy seam allowance. Aside from those misfires, the shirt turned out just fine.
The pattern is the Plantain T-Shirt from French company Deer and Doe, who released it in January of 2014. You’ve probably already seen versions of this shirt floating around the Internet, and for good reason: it’s amazing! Here’s why:

(Note: To take the picture on the right, I taped my phone to the window, set it on the Best Face mode, and jumped back with just enough time for it to capture this grainy photo. (I need a real camera and tripod.) Marc took the other photos, but as the sun was setting and we were inside, the colors are totally wonky. Stupid winter daylight!)
Minus the sleeve-cutting fiasco, construction was a breeze. I cut out a 40 (European sizing) and added about 1″ of length to the body and 1/2″ to the sleeves. Those adjustments worked out great for my 6’0″, size 6/8 frame. My material is a cotton/spandex jersey from The Needle Shop. For the seams, I used a ballpoint needle, stretch stitch, and my walking foot, which turned out to be an absolute necessity with this lightweight knit. I used a little bit of basting spray to attach the elbow patch the the sleeve before stitching to make sure it didn’t slip all over the place. I’m not sure if that’s kosher to use with a knit… but it didn’t burn a hole through my material, so that’s good.
I finished the neckline, cuffs, and bottom hem with my twin needle and walking foot, but the bottom hem still managed to turn out a little wavy. Maybe next time I’ll use some tissue paper underneath the fabric to stabilize it. Overall, I highly recommend this pattern, especially since all you need is fabric and thread. It’s the perfect stash buster, and it’s great if you’re a beginner wanting to test the waters with knits. Let me know if you make it, or if you have some surefire tips for wave-free hems!
