Springtime Quarter-Circle Skirt

Circle skirts are the epitome of Sewing 101. But since I seem to do everything backwards, I have nary a full- or even a half-circle skirt under my belt. Naturally I decided to remedy that on Easter morning, just hours before a family party. Ahem. I was mentally prepared for a disaster that might result in me wearing dirty jeans and a Mars Volta T-shirt on Easter afternoon, but miraculously my new skirt turned out pretty well.

spring quarter-circle skirt

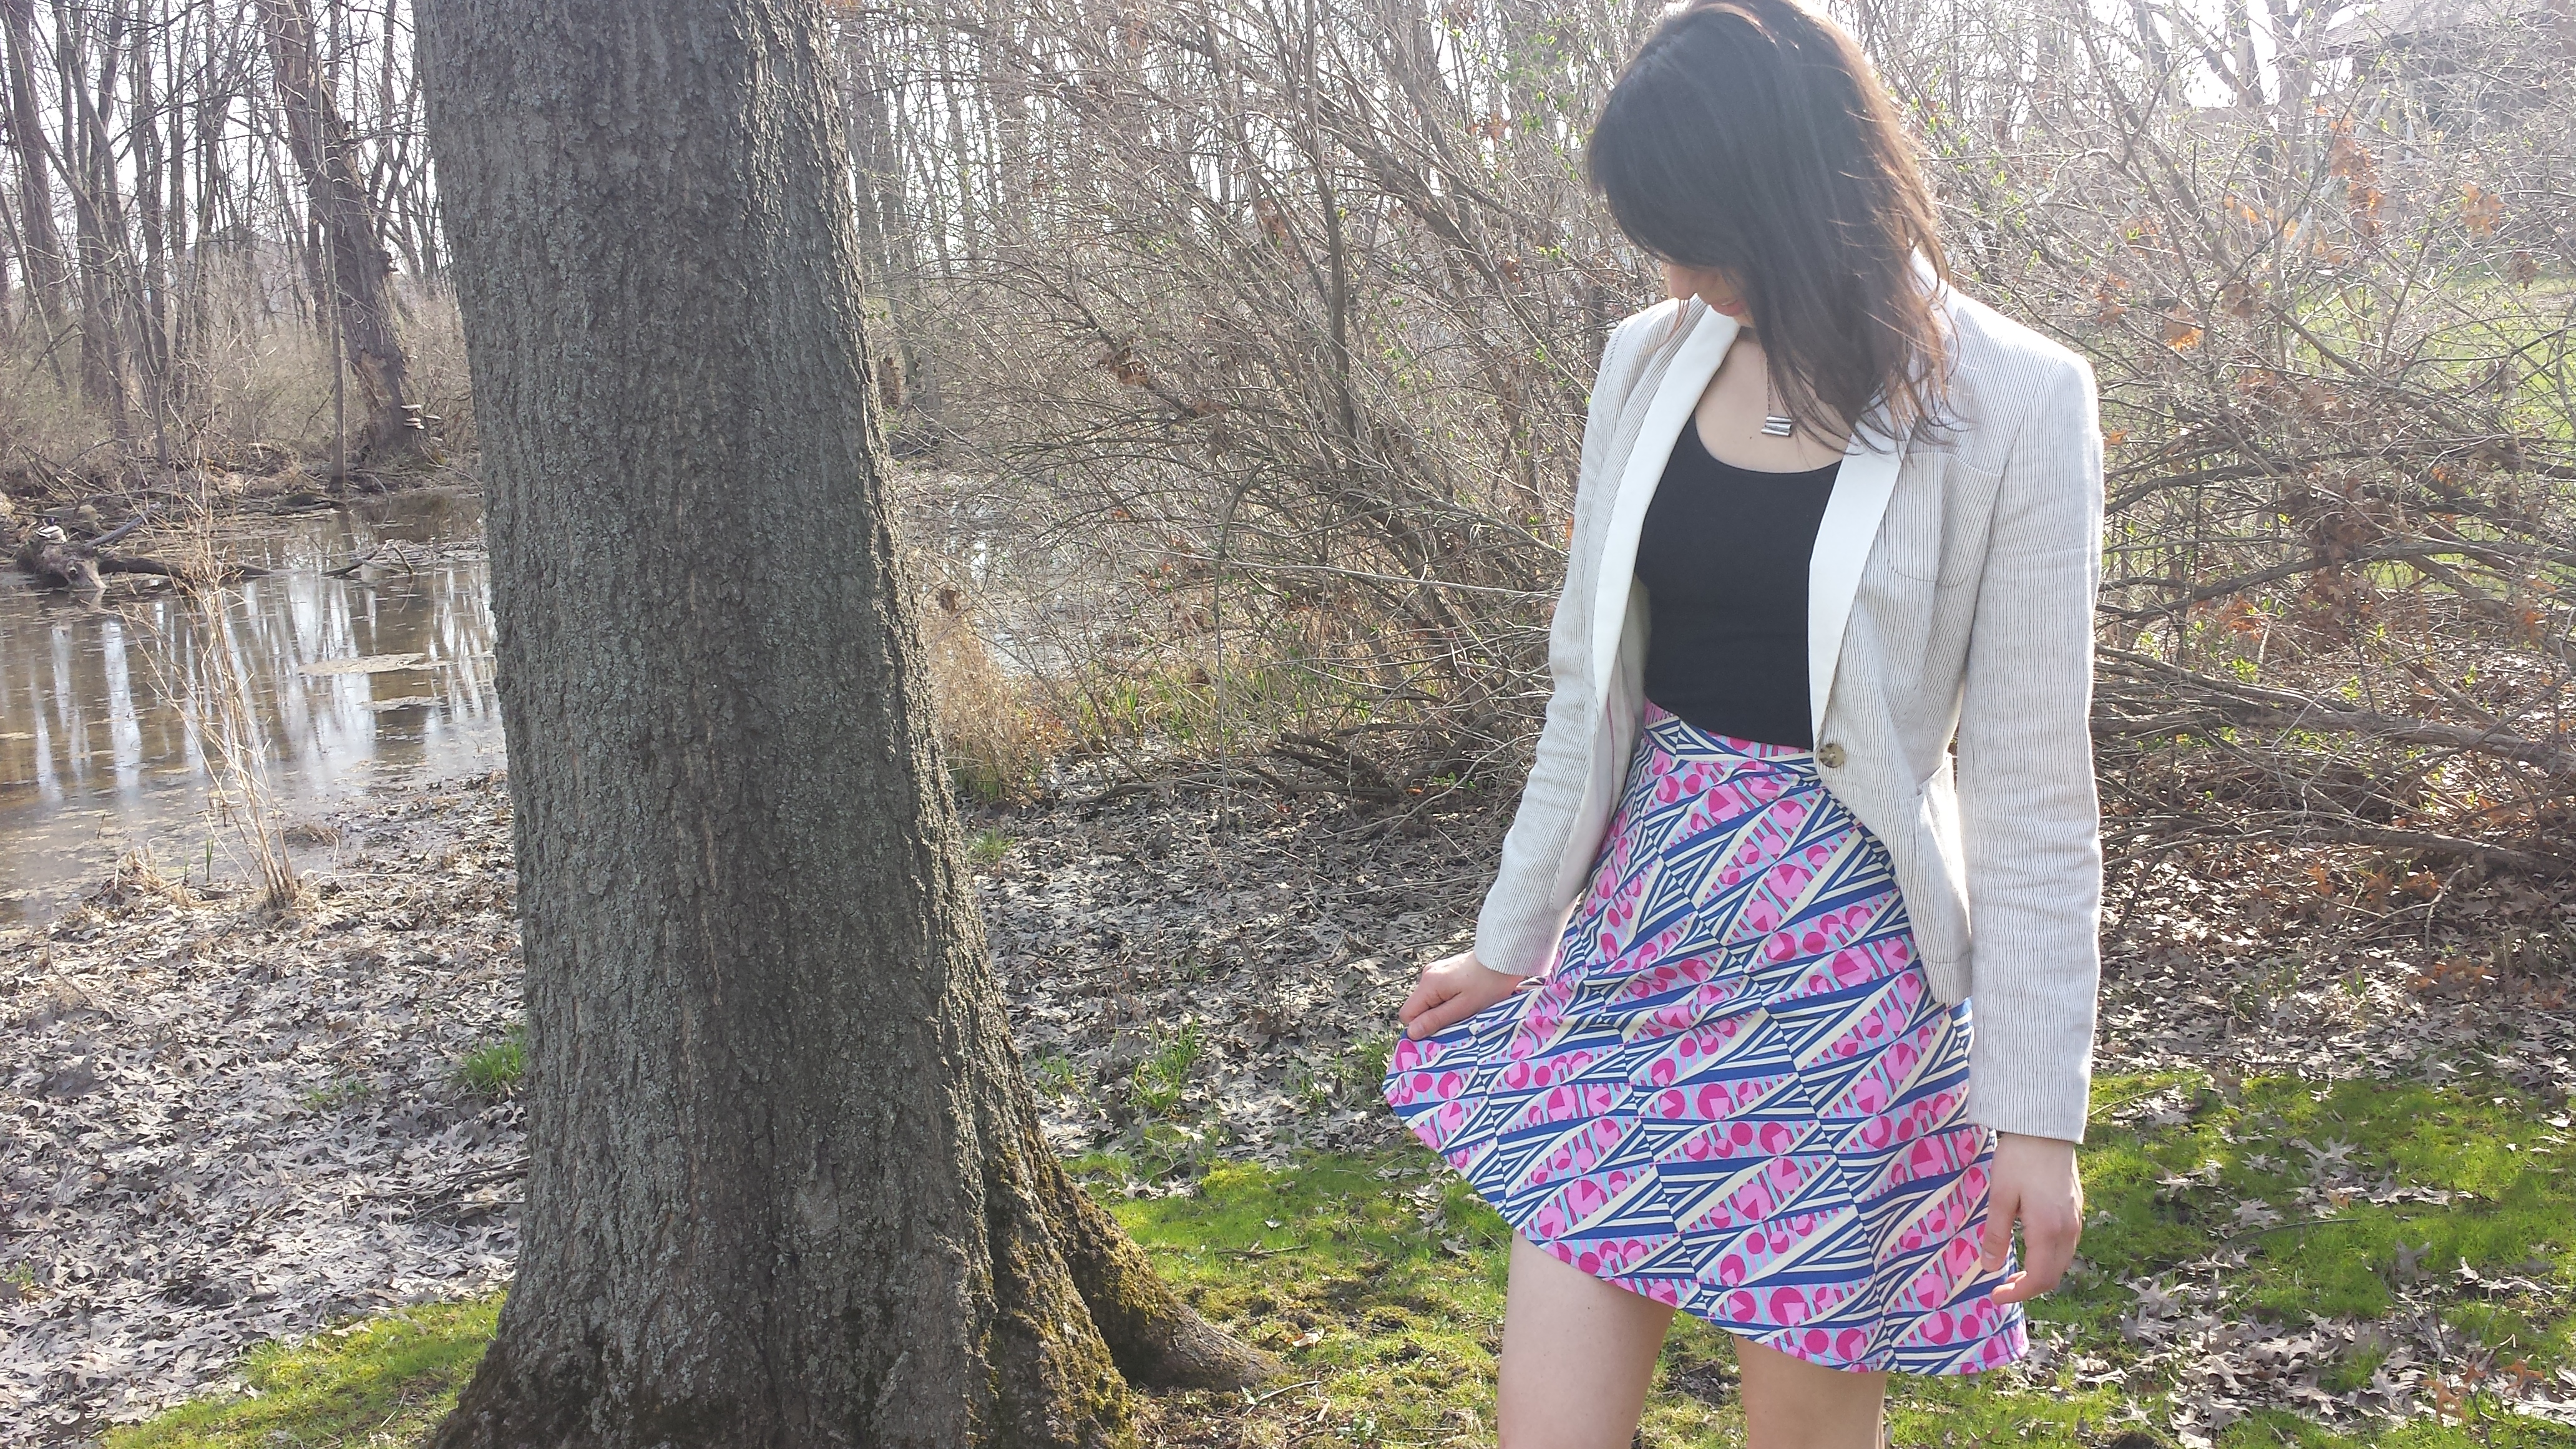
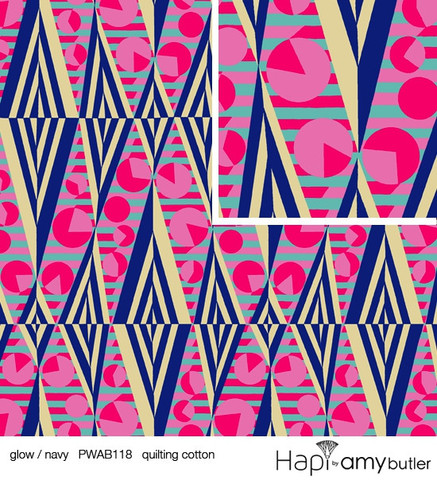
I should start by mentioning that this isn’t a standard circle skirt. It’s a quarter-circle skirt, which I like to think of as the flirty, yet sophisticated cousin of the full circle. It falls like a classic A-line but with a bit more movement and flow. I initially wanted to make a half circle, but it turns out that the Amy Butler fabric I fell in love with at The Needle Shop comes in 44″ wide bolts, which just wouldn’t leave enough fabric for anything but a quarter. (Unless you have like a 20″ waist or something.)

Amy Butler Hapi fabric

To figure out how much fabric I needed and how to cut it, I used this fantastic Circle Skirt App from By Hand London. You simply choose your desired fullness and length, plug in your waist measurements, and click “Do the maths, please!” (Sidenote: Do British people say “maths”? Am I an anglophile for thinking this is kind of charming and not dumb?) Anywho, the app spits out your waist radius and the fabric length required—seam allowances included. It also tells you whether or not your skirt will fit onto 45″ or 60″ wide fabric.

circle skirt measuring

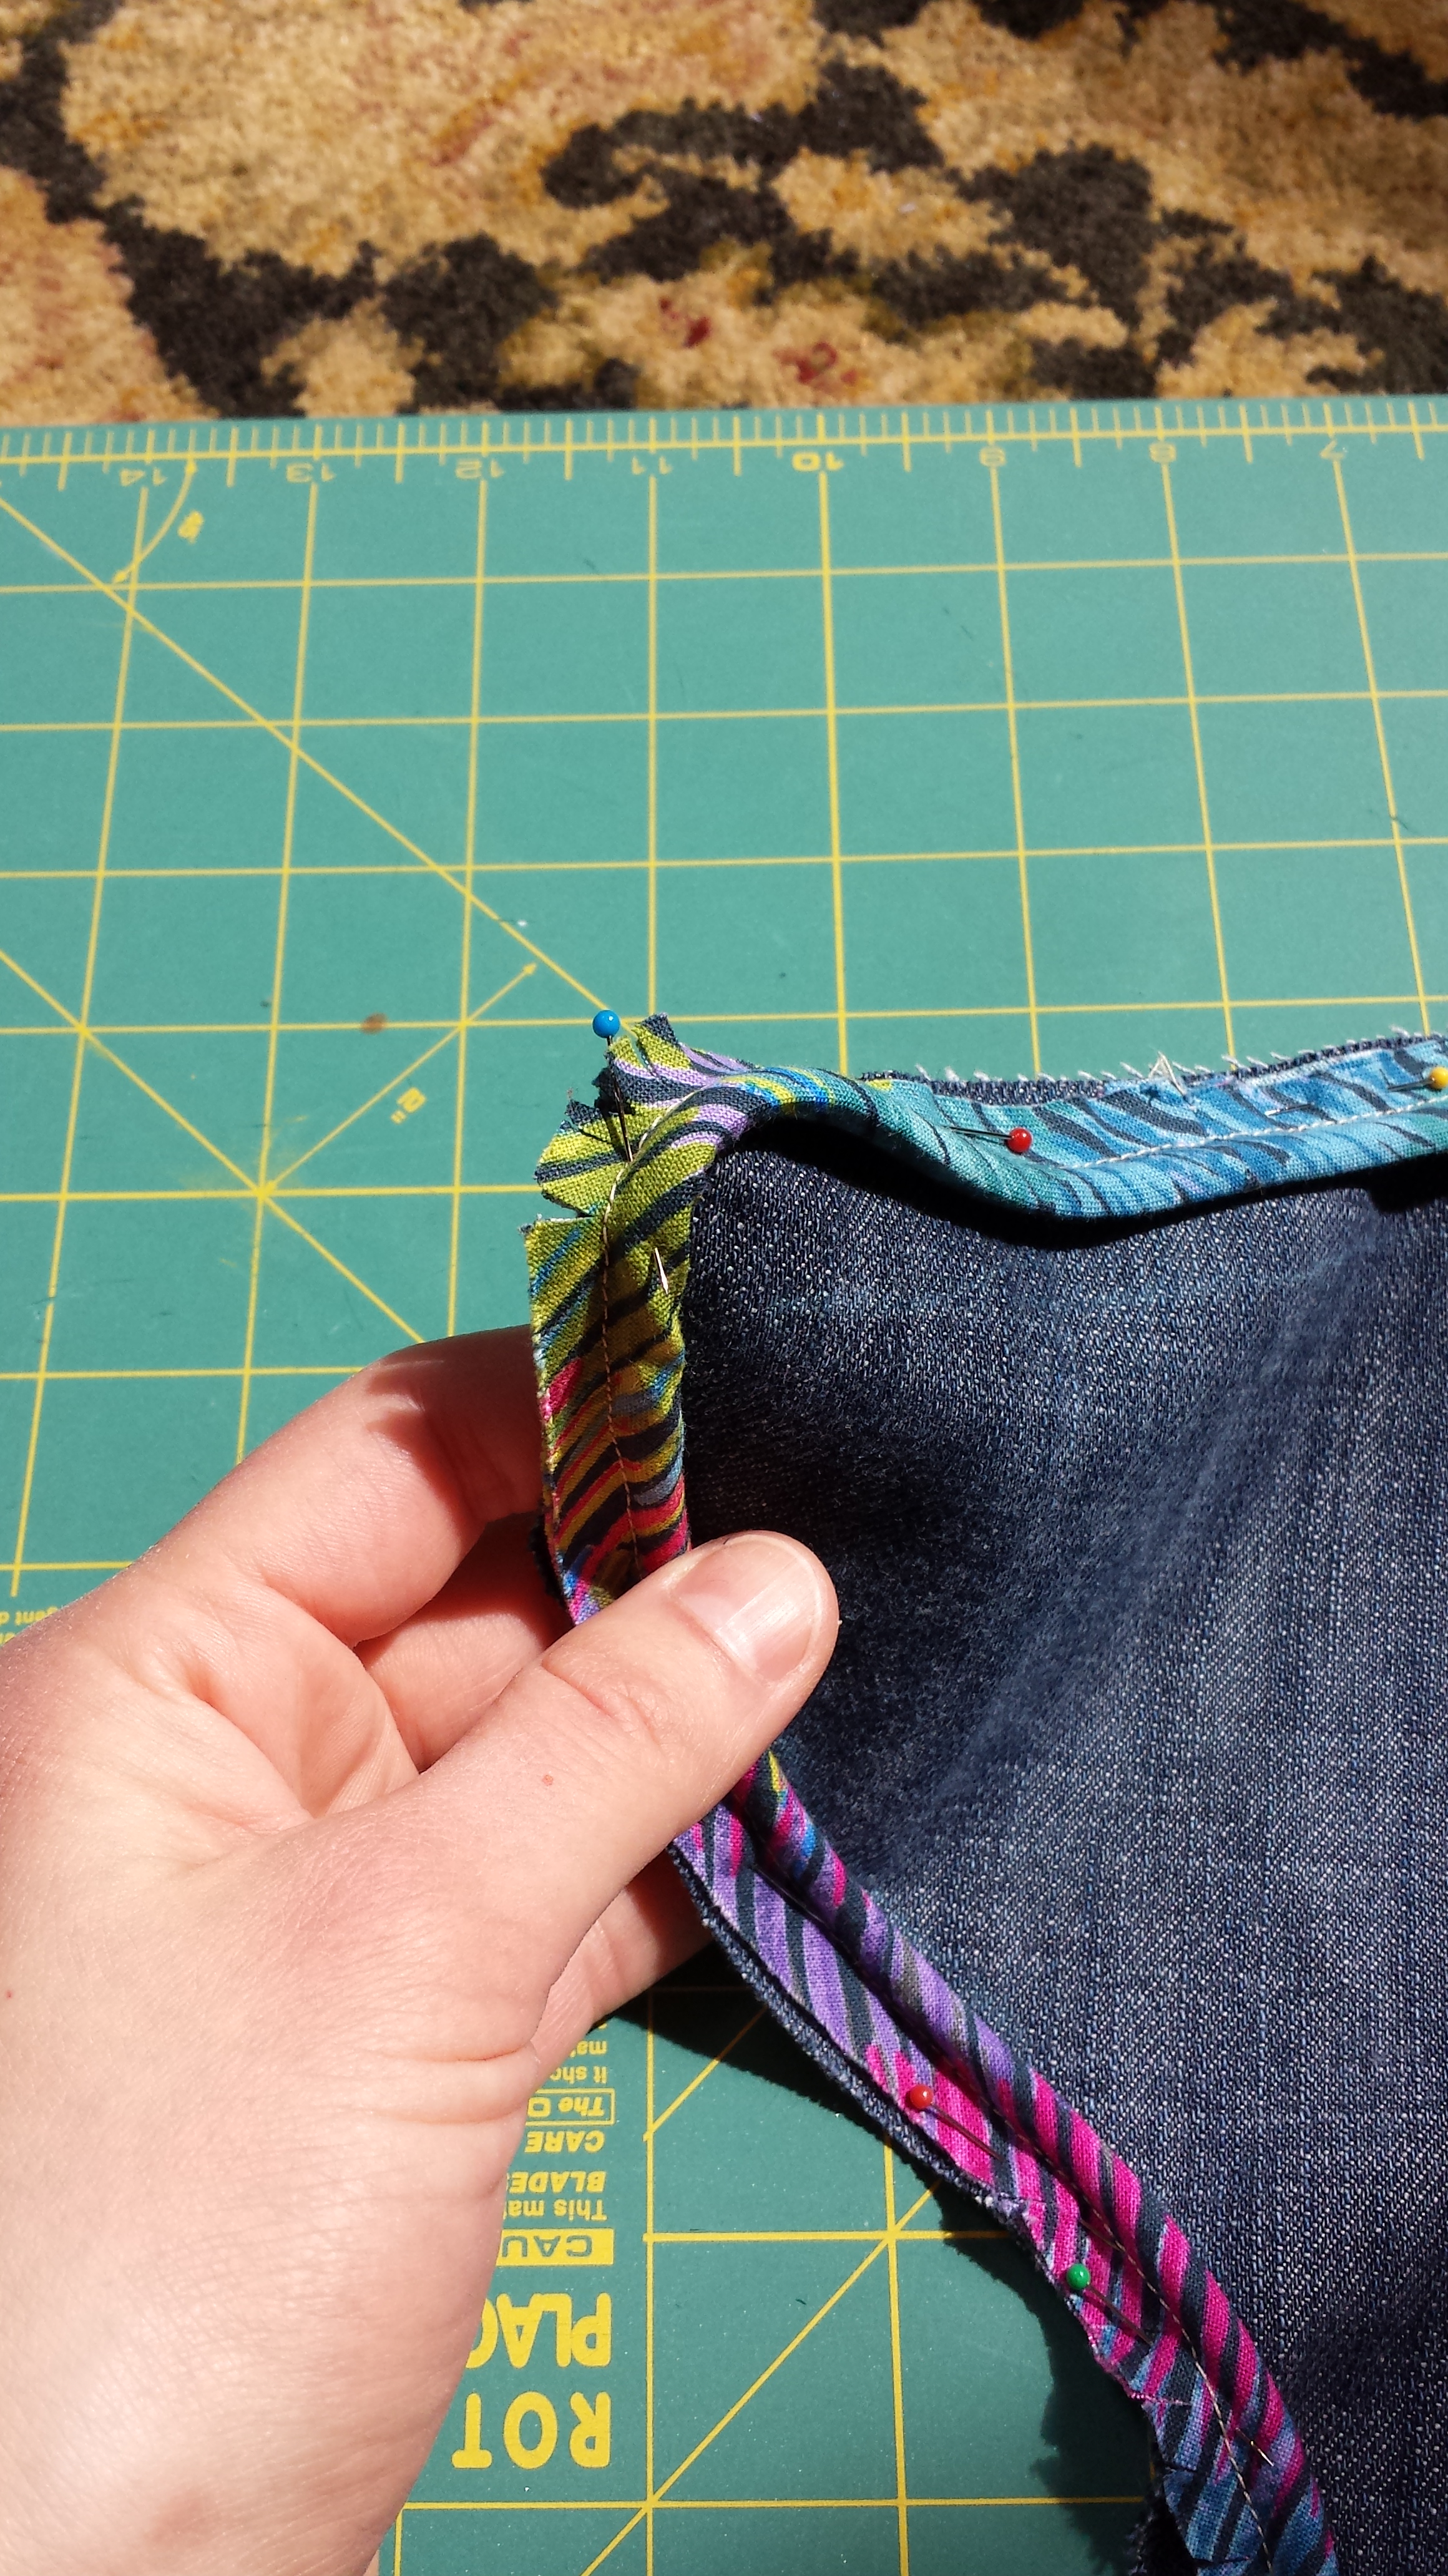
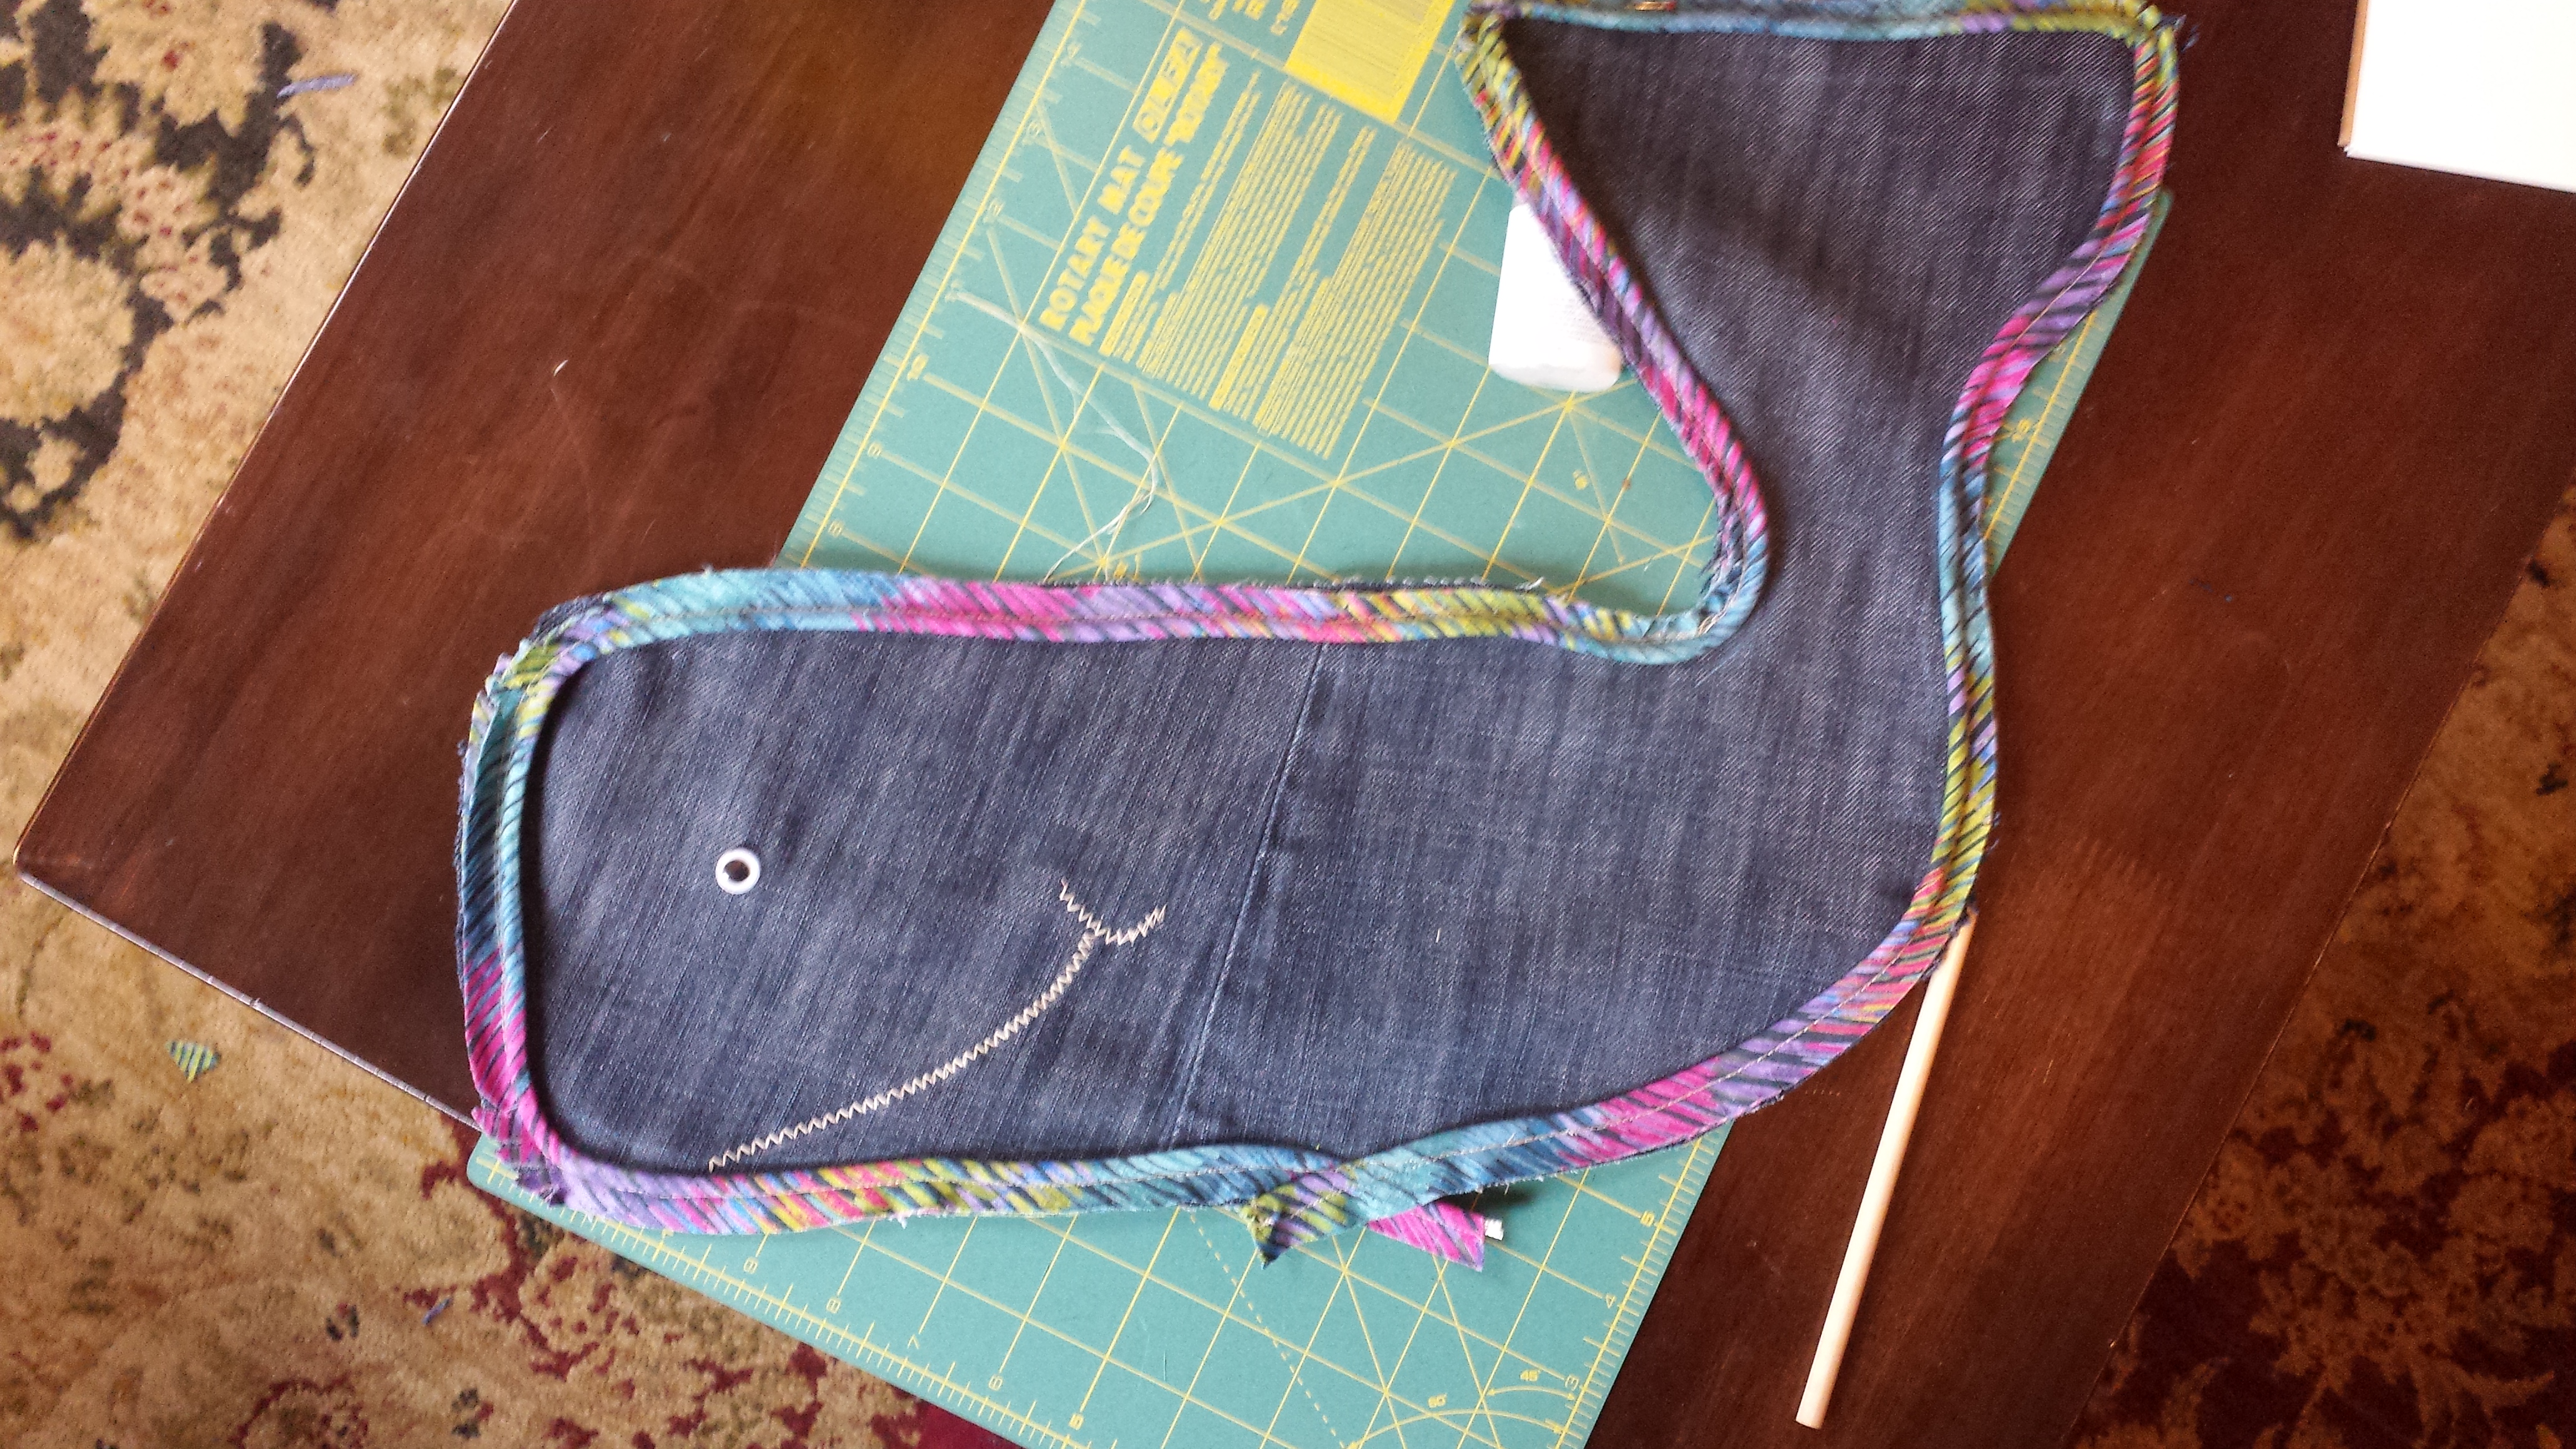
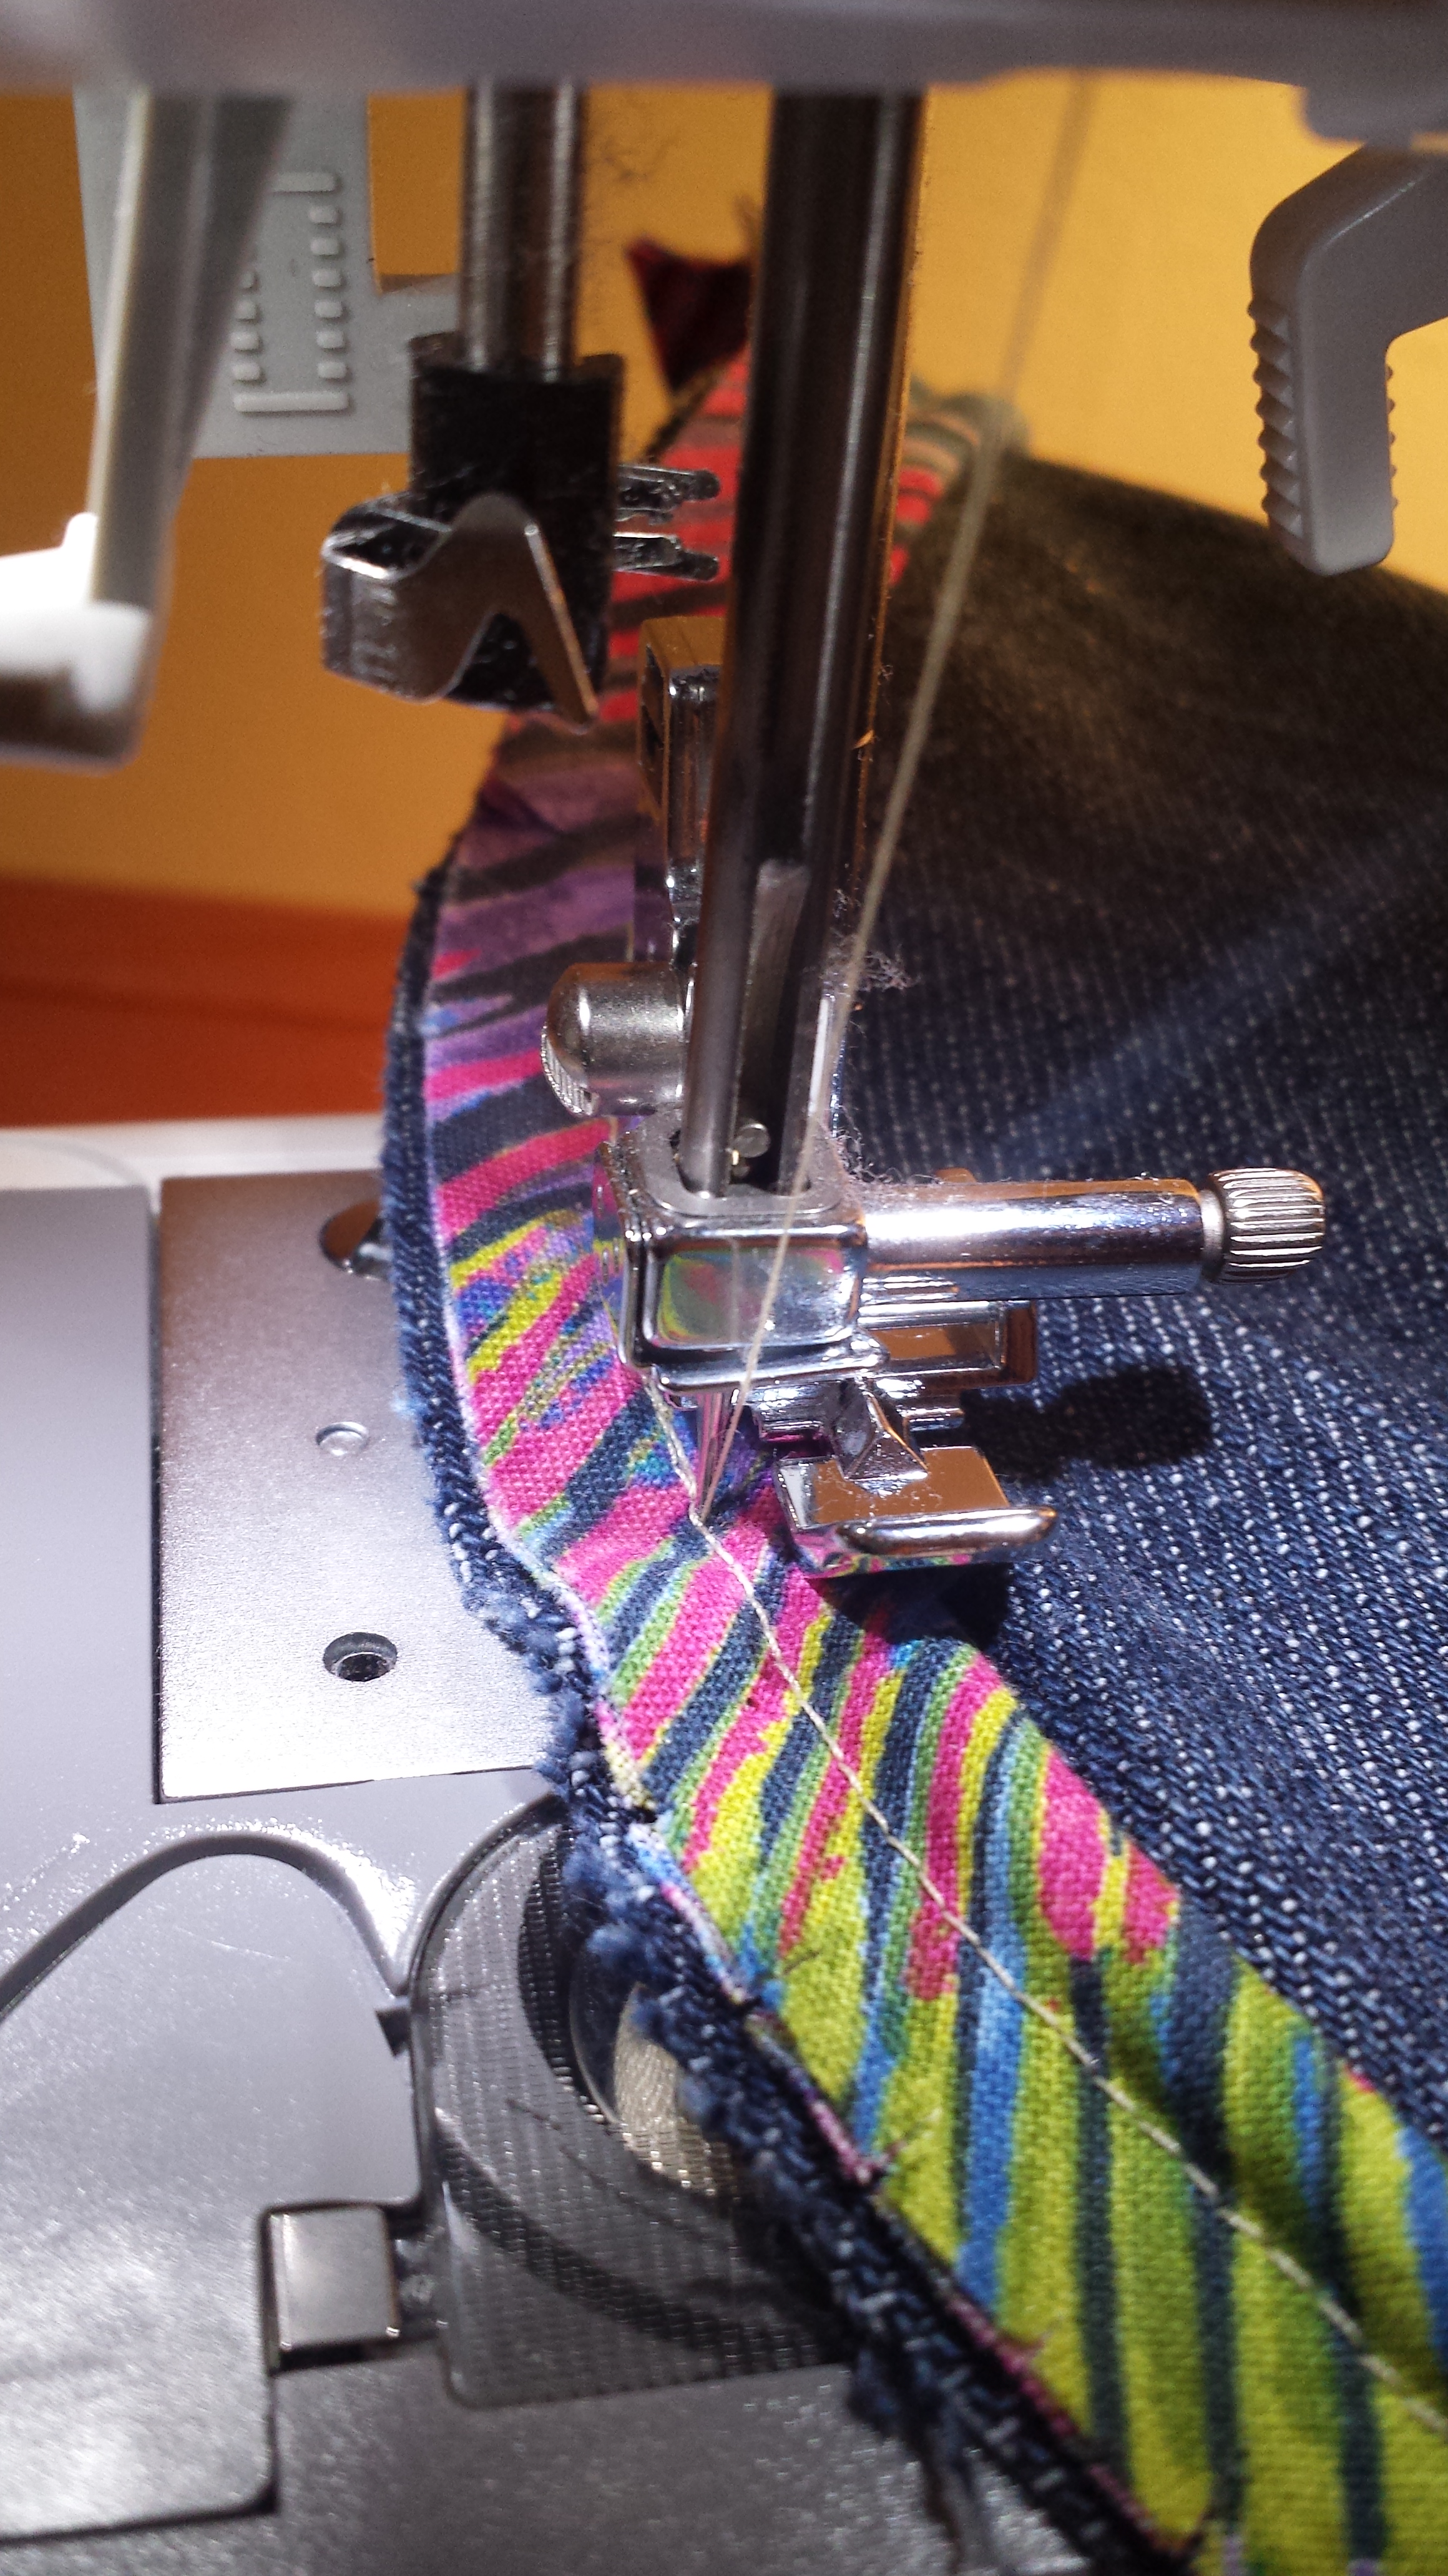
After marking my waist radius and fabric length, I drew the arcs using a janky handmade compass—also known as a piece of twine tied around my marking pencil. I then used a combination of this youtube tutorial and this By Hand London tutorial to sew up the skirt, insert the invisible zipper, and create and attach the waistband. I went for a lapped waistband with a hook-and-eye closure.

lapped waistband

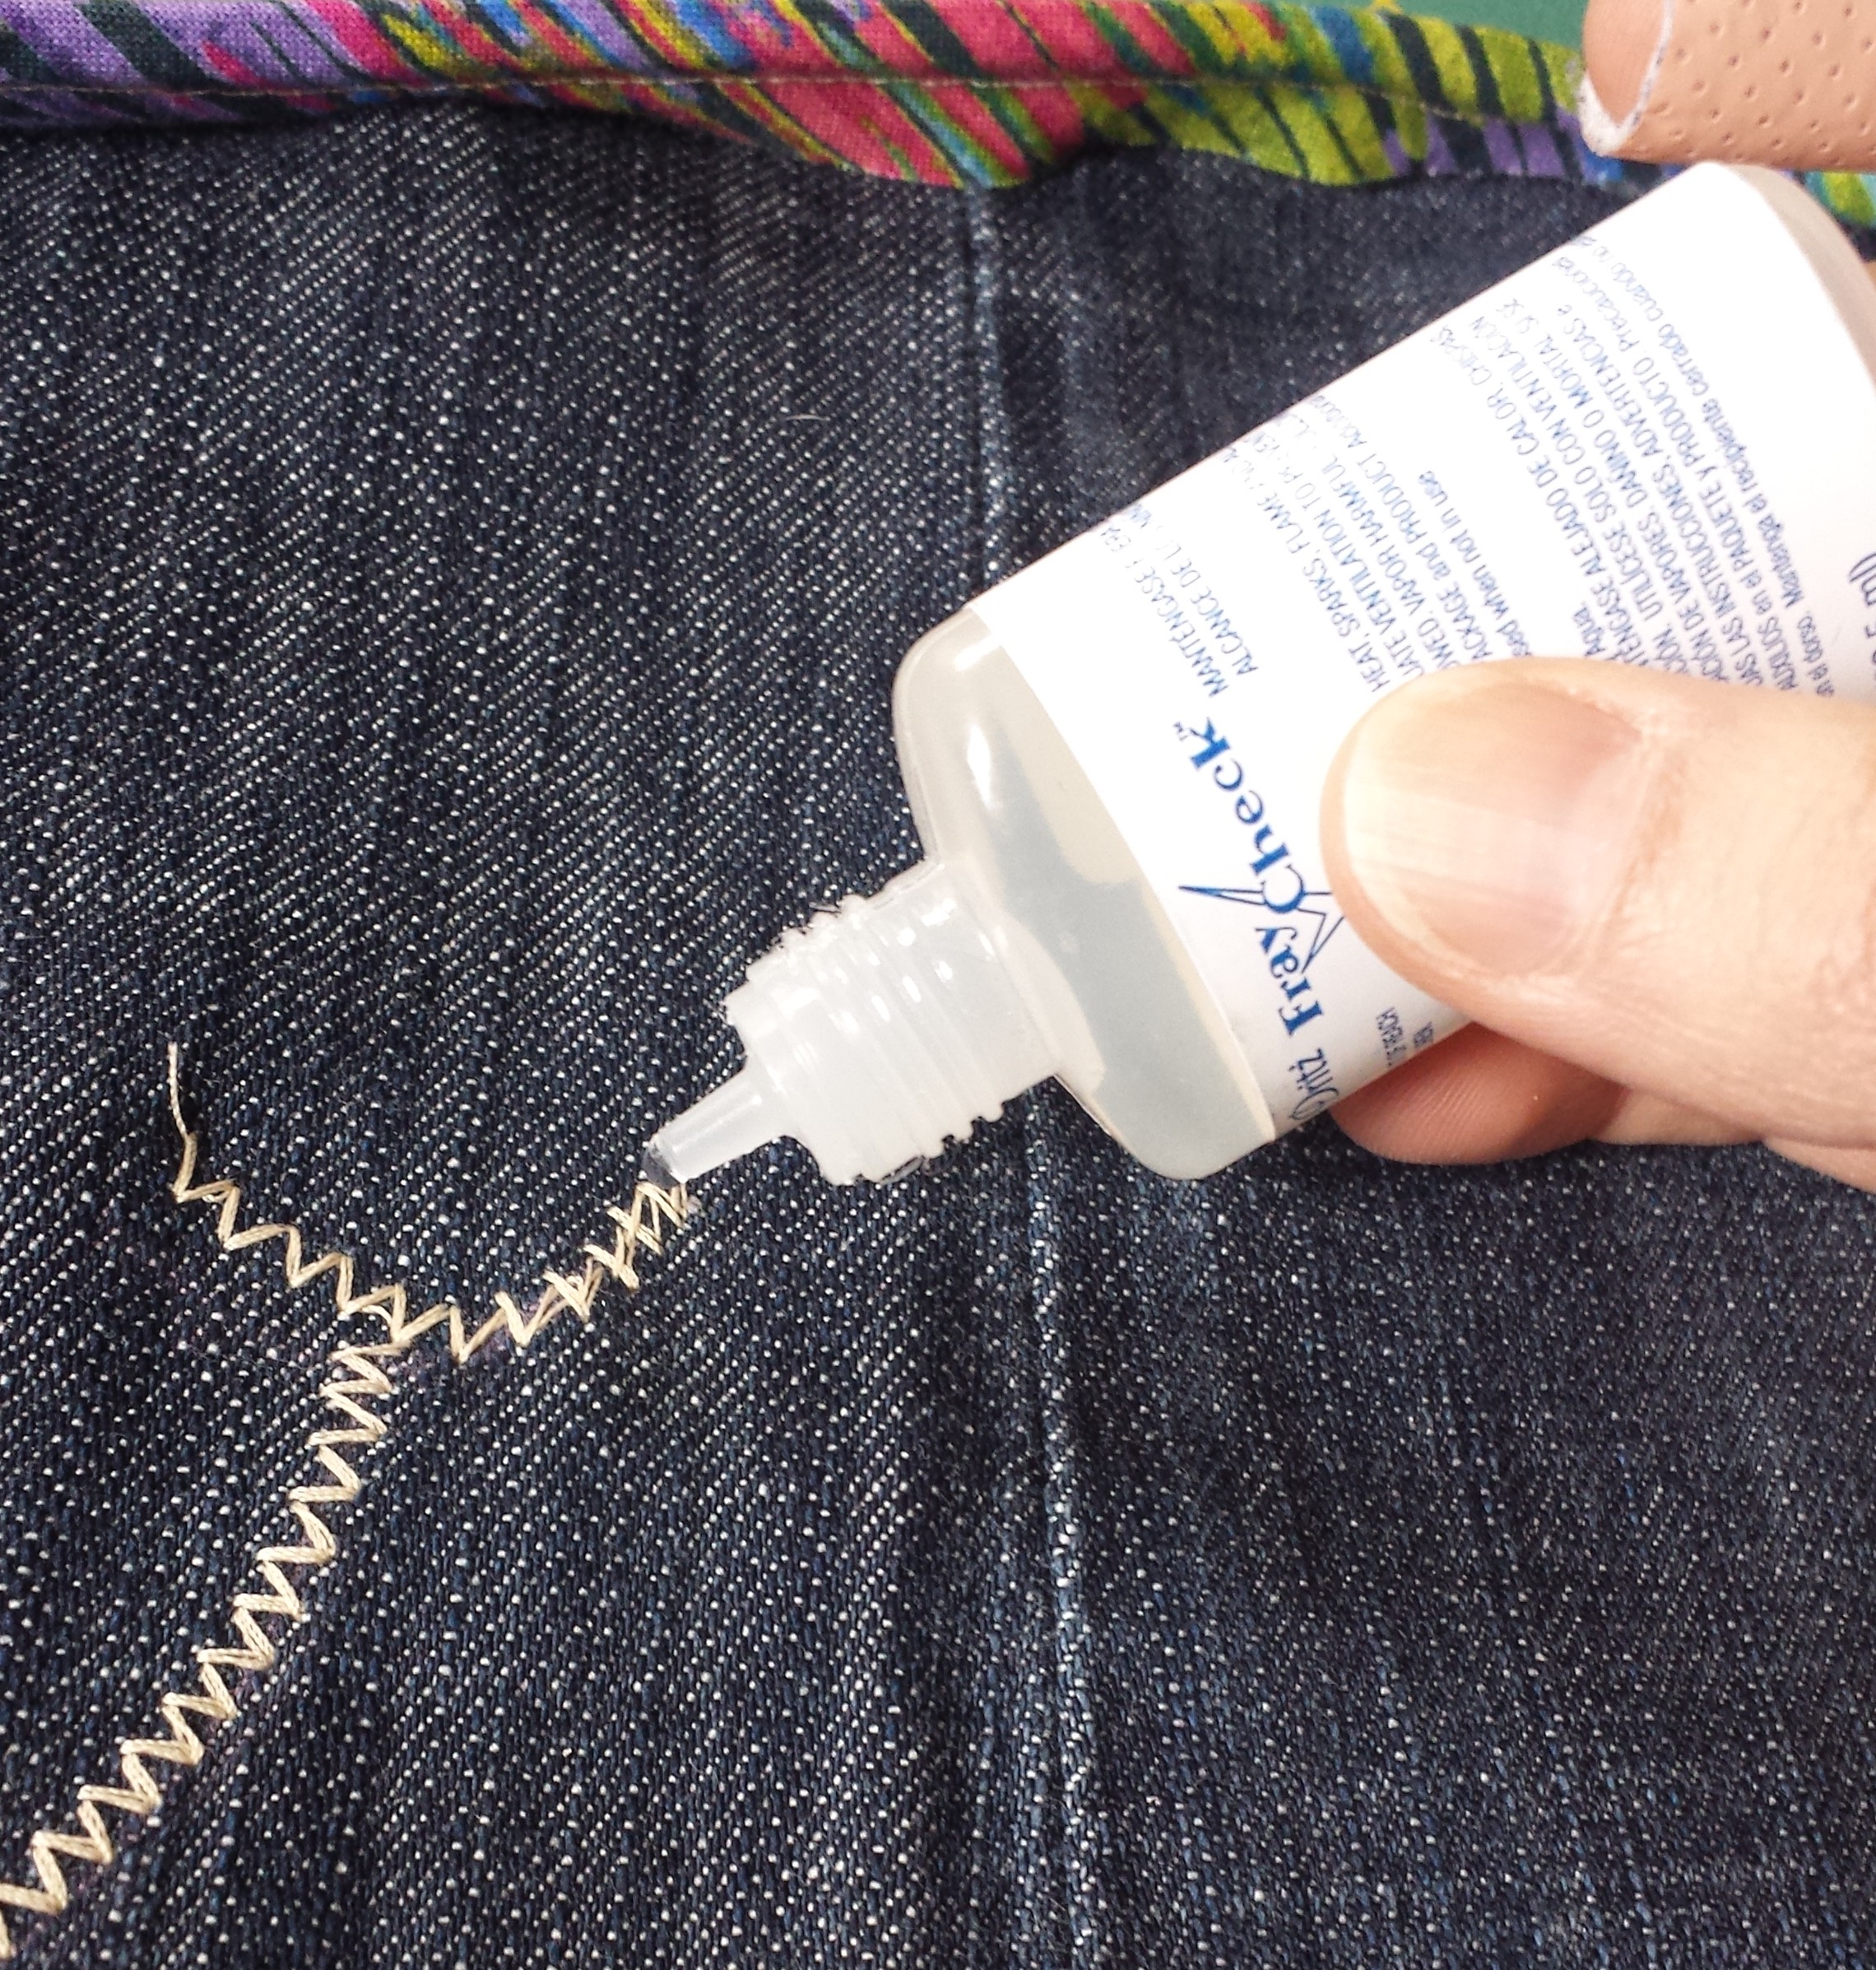
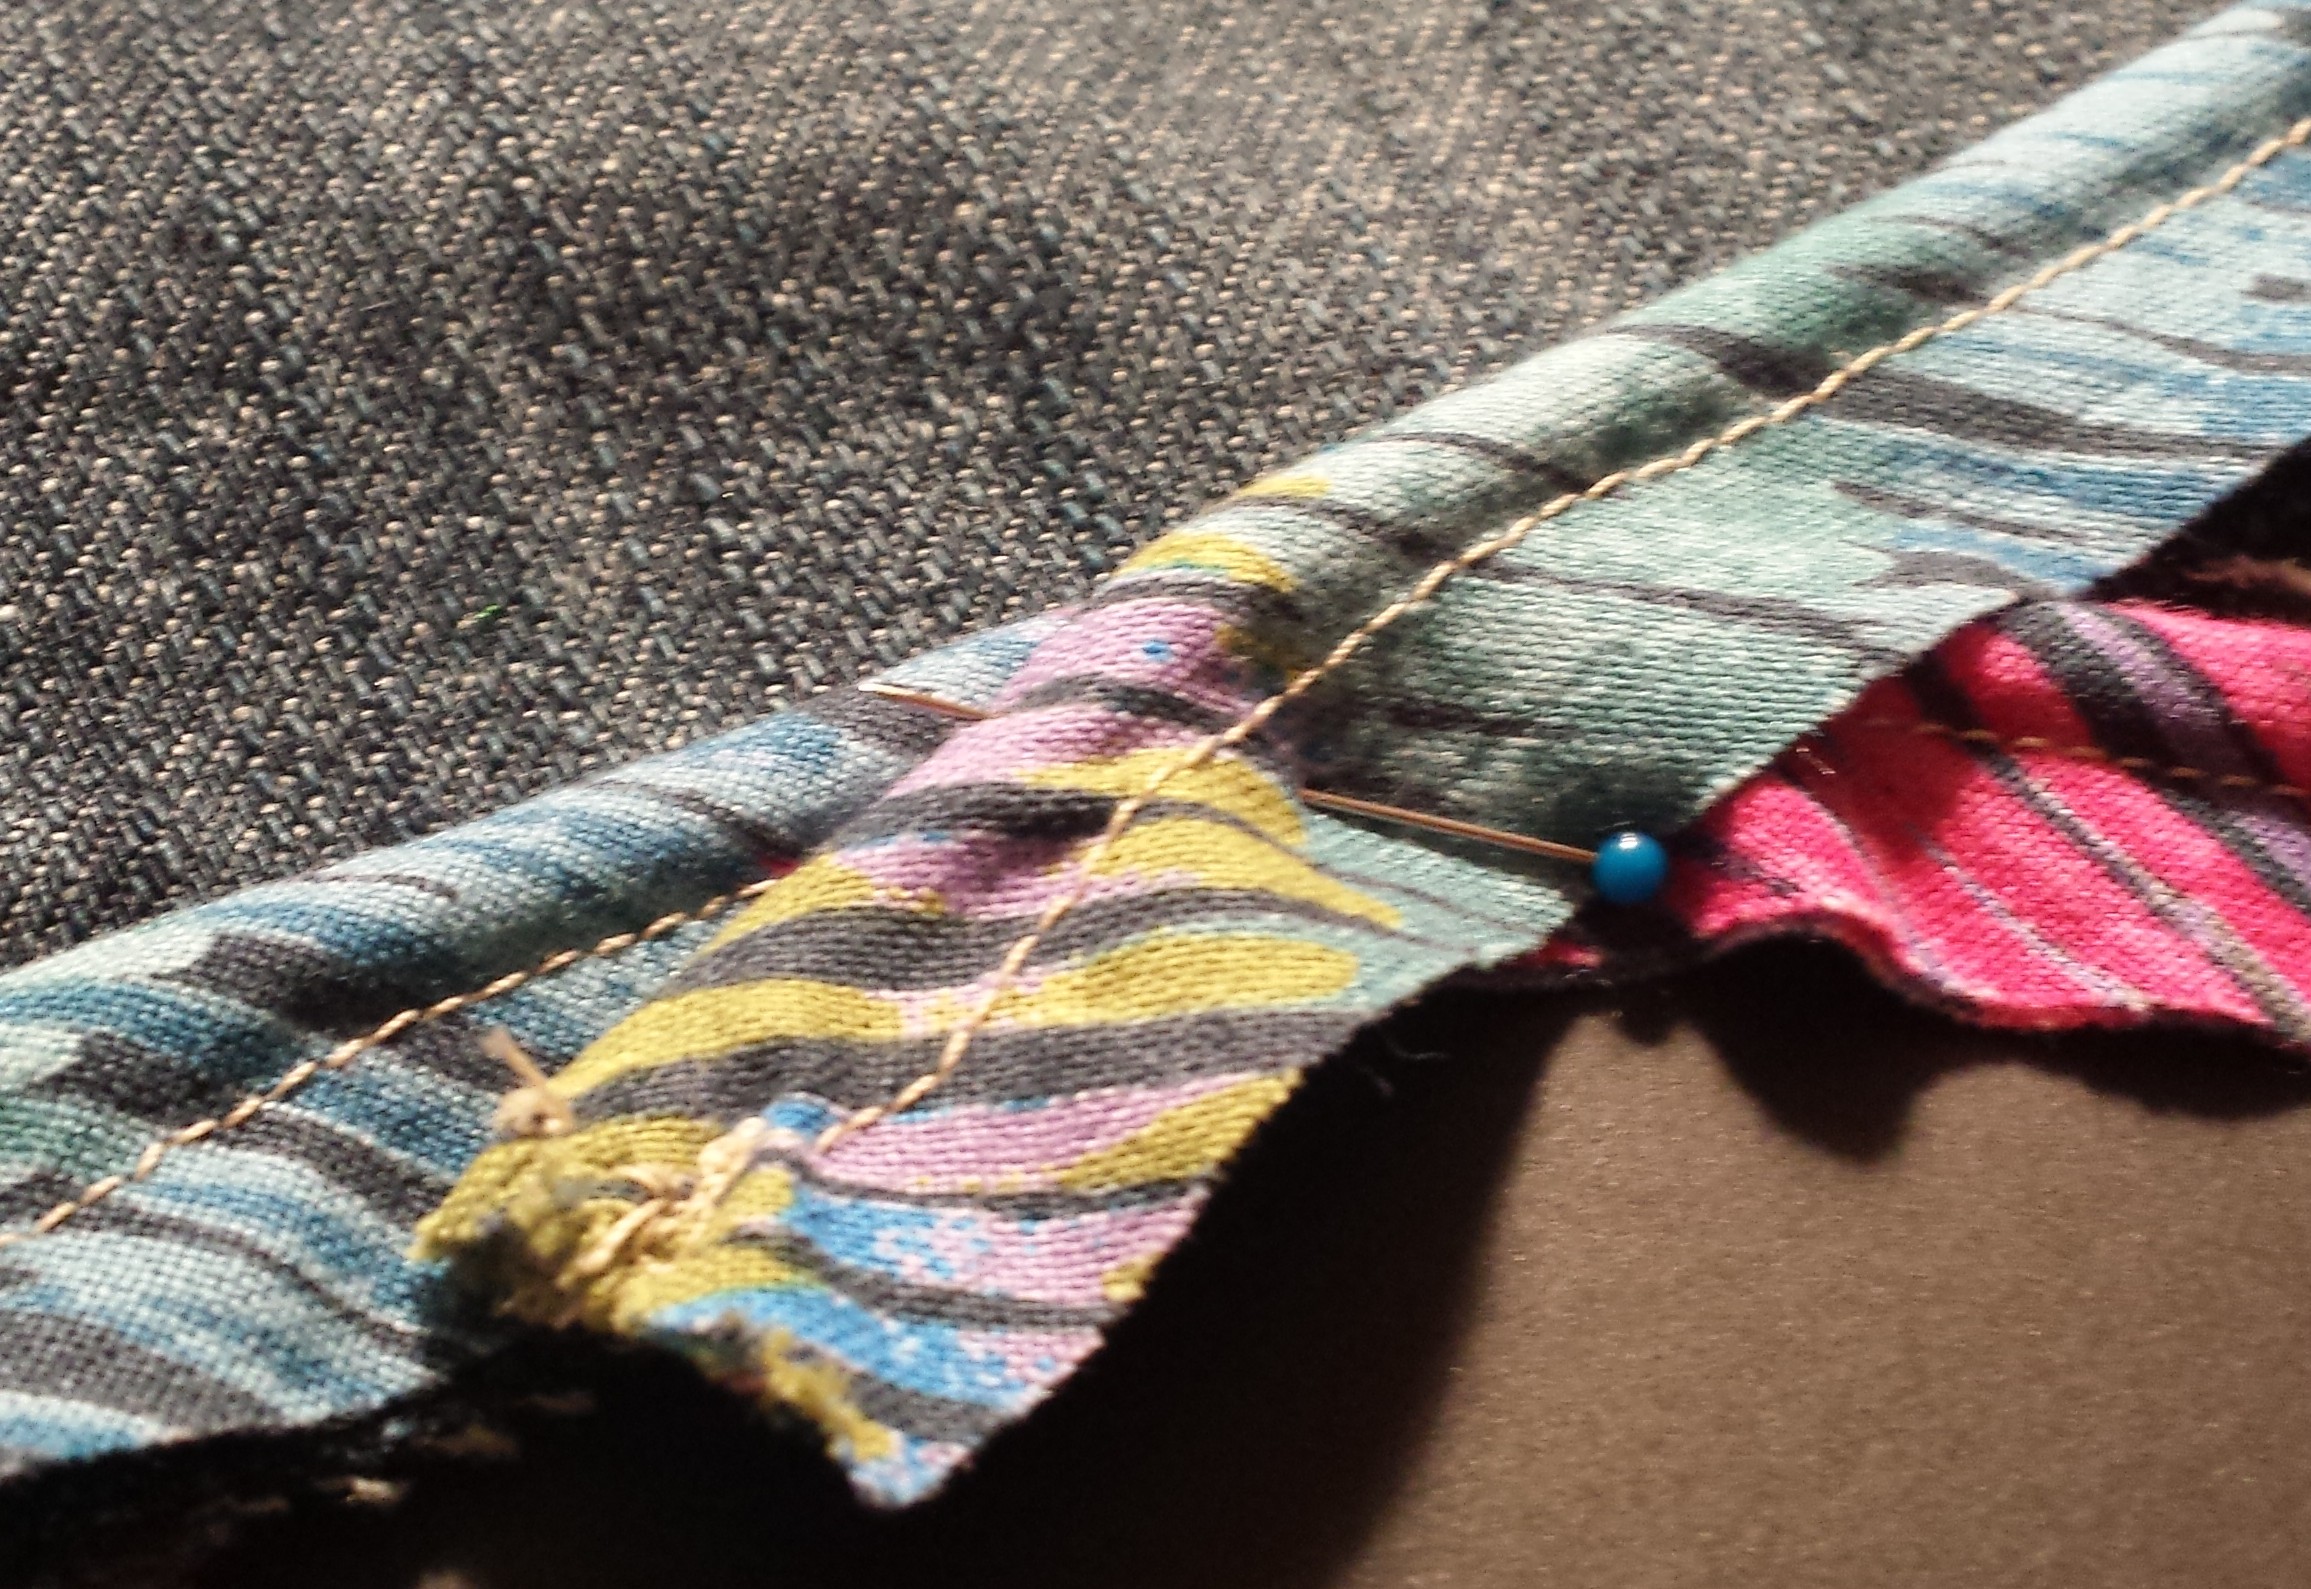
To finish up, I sewed a narrow hem all the way around. If you’re not familiar with hemming round edges, check out this super helpful Coletterie tutorial.

As a whole, I really love this fabric and the fall of the quarter circle. Next time I make a circle skirt (and there will be a next time), I’m going to add another 1″ or so to my waist measurement. After a big family-style meal, I was mildly afraid that my hook-and-eye was going to burst off and get lost in the lemon meringue pie. Luckily that didn’t happen.

quarter circle skirt

Hope you had a relaxing holiday filled with many sweets and salty meats! Have you ever made a circle skirt? Any suggestions?


James Bond vesper martini

James Bond Got It Right with the Vesper Martini

Shaken, not stirred.”

We all know this is how Bond likes his martinis. But in Casino Royale (the movie and the book), we learned just exactly what makes 007’s cocktail so singular.

James Bond drinking a vesper
Jimmy sippin’ on a Vesper (image: cinefantastiqueonline.com)

In this clip, Bond orders a drink that’s three measures Gordon’s gin, one measure vodka, half a measure Kina Lillet, and a thin slice of lemon peel for garnish. Lillet doesn’t make Kina anymore, but Lillet Blanc—aka white Lillet—is Kina rebranded into a similar formula.

I’ve had this version of the Vesper before, and it’s strong, yet dangerously drinkable. The vodka you use should be smooth—you don’t want its “flavor” to overpower the drink. I usually add a little bit more Lillet than what’s called for, and sometimes even a squirt of fresh lemon juice if I’m in the mood.

At least that’s the recipe I was planning on sharing before I stumbled onto Q Lemon: lemon-flavored tonic water that’s light, tart, and subtly sweet. Its the perfect complement to the Vesper’s components, plus who doesn’t like a few bubbles in their glass?

ketel one, boodles gin, Q lemon, Lillet Blanc

The Bubbly Vesper
  • 1 oz. vodka
  • 1 1/2 oz. dry gin
  • 3/4 oz. Lillet Blanc
  • 3/4 oz. Q Lemon
  • Lemon peel

007 Bubbly Vesper Martini

Shake the vodka, gin, and Lillet over ice until chilled. Strain into a martini glass and top with chilled Q Lemon. Garnish with a lemon peel. Tastes best when gambling for millions in your best cocktail attire.

Classic Cocktails: Aviation at Marion Street Cheese Market

image

The Aviation: a drink that looks positively radioactive and tastes like heaven. The floral notes from the gin and violet liqueur balance the dash of sweet cherry, and fresh lemon juice adds a tangy brightness at the end. The only thing wrong with this drink is that it took me way too long to try one.

Marion Street Cheese Market’s Aviation:
Letherbee gin
Creme de violette
Luxardo Maraschino
Lemon juice
Lemon twist for garnish

I can’t wait to whip one of these up at home, maybe with a cherry garnish in lieu of the lemon twist. Next stop: Binny’s for some violet liqueur!

DIY Whale Pillow from an Old Pair of Jeans

Upcycled whale pillow

I dig whales. As a kid, I was obsessed with the beluga whales at the John G. Shedd Aquarium. There’s even a picture of my older brother and I “riding” Shamu at Sea World at the respective ages of 6 and 4. (I definitely talked myself into believing that ride happened.) My latest whale obsession is this Marushka whale-print sweatshirt—pictured above—from Study Hall, a similarly nautically obsessed boutique in Ukrainian Village. I’ve been living in this sweatshirt every weekend, and it inspired me to sew up some whale decor for the apartment. The best part about this project is that you don’t even need to buy fabric (except for piping). So grab an old pair of boot-cut jeans and let’s get to work!

What you need:

  • Old pair of jeans (the wider the leg, the better)
  • Button for the whale’s eye
  • Contrasting thread
  • Polyester fiber stuffing
  • Piping
  • Marking pencil
  • Fray Check

1). Draft a pattern. This step leaves some room for creativity depending on the shape you want to end up with. Whatever you decide, make sure that you first draw the whale as you want it to look, then add a 5/8″ outline around it. That will act as your seam allowance. You can do this on the actual pattern, or just add 5/8″ once you lie the pattern down to cut it. I traced my pattern on a paper grocery bag since it’s got a little heft.

whale pattern
Coasters help weigh down the pattern so its easier to trace

2). Deconstruct your jeans. This part is actually pretty fun (and therapeutic if you have anger issues). Cut a notch on the bottom hem of the leg near one of the side seams, and then rip upwards until you reach the back pocket. Cut a clean line right under the pocket so you have one flat piece of fabric. Iron out any creases.

3). Trace and cut out two mirror image whale pieces. You might be able to use one pant leg if you have enough fabric and don’t mind cutting slightly against the grain.

4). On the wrong side of one pattern piece, draw a mouth. Make sure to account for the seam allowance when making your placement. Using contrast color thread and a fun decorative stitch pattern, sew on the mouth. Remember to backstitch! I also used a little Fray Check at the ends so the thread won’t unravel later.

fray check

5). Mark a spot for the eye and hand sew a button on.

6). Pin the piping around the edges of the pattern piece with the mouth and eyes. I made my own piping for this project using this handy tutorial, but you can buy premade stuff at most fabric stores.

sewing piping
Adventures in DIY piping

With the rolled edge of the piping facing toward the center and the flat edge flush with the raw edge of the pattern, pin the piping around the exterior (to the right side of the pattern). Pinning around all the curves and corners of the whale’s tail can be a little tricky. Clip around the edges so it’s easier for the piping to lie flat.

wpid-20140406_134816.jpgwpid-20140406_134853.jpg

When you get back to where you started pinning, overlap the edges.

whale pattern

piping

7). Now it’s time to sew the piping on. This part requires some elbow grease and a lot of patience. Using your longest stitch and a zipper foot, baste the piping to the pattern following the stitch line that creates the piping. Go as slowly as you need to. When you get to the overlapped section, just sew straight through, following the same line you were sewing before.

sewing piping on

8). Pin the pattern pieces together, right sides facing. Make sure you’ve switched back to a regular sewing machine foot and standard stitch length. Stitch the two pattern pieces together by following exactly along the basting stitched you just made on the piece with the piping. Make sure to leave enough space on the bottom of the whale to turn the pattern inside out when you’re done.

9). Clip excess fabric from the seam allowance. Grade around the curve of the whale’s tail and clip the corners.

clip and grade

10). Turn the pattern inside out, starting with the tail. Push out the corners with something sharp—a pair of scissors or eraser end of a pencil works. You’ll see that the overlapped section of piping isn’t too noticeable.

overlapped piping

11). Starting with small handfuls of filling, stuff the whale. I always start with the tail since that seems to be the trickiest part. Make sure you use enough stuffing so the whale tail stands up on its own.

12). Blind stitch the seam closed…

whale pillow sewing

…and you’re done!

Here’s hoping that making some maritime-inspired decor will bring summer around a little sooner. Happy upcycling!

The Best Cocktail I’ve Ever Made

Martinez cocktail

In my quest to find cocktails that utilize Luxardo Maraschino liqueur, I stumbled on a real gem: the Martinez. This subtly sweet drink gets its bite from a base of Old Tom gin, another one of my recent go-to liquors. If you’ve never had Old Tom, it’s a pre-Prohibition-era libation that’s what I assume gin would taste like in the 1920s. This old-school blend is lightly sweetened with sugar and aged in oak barrels—that’s what gives it it’s light-brown, bourbon-like color. At least that’s the case for the Ransom that I’ve been drinking. I can’t speak for many other brands, but Ransom’s Old Tom is great.

wpid-2014-04-02-14.32.38.jpg.jpeg

But enough about good ol’ Tom. The Martinez is kind of like a Manhattan-on-steroids when you look at the components: gin that resembles bourbon, sweet vermouth, maraschino, and a dash of bitters. For cocktails like this, the kind of sweet vermouth you use can really make a difference. When I first started making cocktails, I bought the kind that you can get at nearly every grocery store: $6 Martini Rossi. Then someone suggested Dolin Vermouth de Chambéry Rouge, which runs about $13/750mL at Binny’s. I can’t pretend to be an expert on vermouth, but what I do know is that Dolin is a lot smoother and lighter than cheaper stuff. But what really makes the Martinez so delicious is the added cherry kick of the Luxardo Maraschino. You can use less if you’re not a huge fan of cherry, but if that’s the case then you are a monster this might not be the drink for you. I, on the other hand, love me some maraschino.

wpid-2014-03-26-15.48.05.jpg.jpeg

The Martinez

Recipe adapted from Post Prohibition

  • 2 oz. Ransom Old Tom gin
  • 3/4 oz. Dolin Rouge sweet vermouth
  • 1/2 oz. Luxardo Maraschino
  • Dash of Angostura bitters
  • Lemon twist

Pour all liquid ingredients over ice and stir until chilled. Strain into a martini glass and garnish with a twist of lemon. If you’re feeling really crazy, you could swap out the lemon and garnish with a cherry. Warning: once you start making these, you will probably crave one around 7 p.m. every night. Enjoy! And sip slowly. (Or don’t. It’s your liver.)

My 5 Favorite Sewing Projects

sewing, pincushion

“I’m never sewing again!”

I’m not proud that I’ve uttered those words. I’m not a quitter. But to be fair, as far as hobbies go, sewing can be pretty frustrating. There are times when I just can’t grasp a pattern direction or tutorial. Other times I’m defeated by a tricky fabric or stick a pin through my finger (ouch). But then I force my impatient self to take a step back and look at the big picture. When I compare when I first started sewing to now, the difference is night and day. In fact, it took sifting through the archives of my old Tumblr to realize just how much my skills have evolved in the past 1.5 years. From learning the difference between a hand needle and a machine needle to discovering which weird-looking foot to use for knits, digging into this new hobby has been exciting—and infuriating. Here’s a look back at a few of my favorite projects—some good, some strange—from the first 1.5 years of my hopefully never-ending sewing journey.


January 2013

The beer sleeve that started it all. This was made from a $1 fabric remnant from JoAnn. I think the prototype of this had an ugly, sickly little arm, and then I overcompensated and went too big with the sleeves on this guy. Thus, the beer dashiki was born. Magic Hat Brewing even retweeted my pic, which to this day is the height of my Twitter fame.


sewing, sweater-knit top, pattern drafting

September 2013

This top is simple, but it’s a significant piece since it marks the first time I made a wearable piece of clothing without a pattern. I have a handful of slouchy shirts that I practically live in, so I used some leftover sweater-knit fabric and pieced together this shirt. Sure, the neck’s a little wide and the armholes gape a bit, but it’s comfy and it drapes nicely. If only I would’ve realized that you need a different needle and machine foot to sew knits… I’ll just chock that one up to the learning process!


spring roll, sewing

October 2013

This was a big Halloween. For years, my talented mom had been making me pretty unbeatable sewing costumes. (I was the Titanic in second grade. Like, the actual ship.) But this time, I wanted to see if I could create something completely on my own, from concept to finished product. I’d been eating a lot of shrimp spring rolls that fall and figured it wouldn’t be too tricky to create a dress version of the cylindrical food. I sewed up a simple shift with some $2.99/yd. velour, then made orangey-pink shrimp pillows and hand-sewed them onto to dress. The vermicelli noodles are rope. Sadly this grainy picture doesn’t do justice to the felt cilantro and basil hiding under the tulle rice paper, but you get the gist.


clutch, DesignSponge tutorial, sewing

January 2014

Anyone who knows me knows about my unhealthy obsession with things that are comically undersized. Tiny hats, Barbie-sized Coke bottles, little armchairs, you name it. When I finished up sewing this simple clutch, I had a little bit of leftover fabric. Naturally, I decided to make a baby wallet that could fit inside the already modest-size clutch. I’ve been using the clutch as my primary wallet for months now, and I still haven’t gotten rid of its teensy counterpart. Where else am I supposed to keep my inspiring fortune cookie fortunes and lucky pennies?


bodycon knit dress, sewing

January 2014

Finally—I used the right equipment for a knit! It turns out that using the right tools—in this case ballpoint needles and a walking foot—can make all the difference. This dress is a Tracy Reese Vogue pattern that’s ruched on the sides and lined throughout the body. I used a stretchy mesh for the lining, and the outer fabric is an ugly-sweater knit from The Needle Shop. Whenever I sew a dress, I always extend the torso 2–3 inches, since roughly 80% of my 6 feet of height lies in my torso. That lengthening really helped with the overall fit and fall of the dress. It’s one of the more flattering items I’ve worn, and I’m really proud of it! The ruching is surprisingly forgiving—it even masked my bloat after my birthday dinner, during which I ate 10 pounds of sushi and drank my weight in sake. Nomnom.

So, there you have it. Not necessarily all the best, but definitely five of my favorite sewing projects thus far. Hopefully that gave you a little taste of things to come! (Halloween’s only seven months away, after all.)

Classic Cocktails: The Greyhound

wpid-IMG_20140322_094012.jpg

It’s grapefruit season! Wahoo! “But isn’t it always grapefruit season?” The short answer is yes. The long answer is boring. Anywho, I had a couple of big, juicy Texas red grapefruits on my hands and decided to have one for a healthy snack and the other for a healthy cocktail. I’m a big fan of simple cocktails with a twist, so I went for a Greyhound made with Boodles gin and a splash of Luxardo Maraschino, my newfound libation obsession. It’s a light, refreshing drink that’ll help you shake these never-ending-winter blues.

wpid-20140329_170641.jpg

Greyhound

  • 2 oz. fresh grapefruit juice
  • 1.5 oz. gin
  • 0.5 oz. Luxardo Maraschino

Pour all the ingredients over ice and shake until chilled. I served mine in a stemless martini glass (because I was feeling fancy) and garnished with a section of fresh grapefruit. Happy citrus drinking!

wpid-20140329_175919.jpg
Cocktails and sewing machines all day