Knit Half-Circle Skirt

knit half-circle skirt

I tend to gravitate toward prints. There’s something about sewing with a colorful floral, geometric print, or even an ugly-sweater knit that makes me feel happy. Plus, if I’m going to invest planning, labor, and money into an article of clothing, I want it to be more vibrant than something I can buy off the rack. The one-of-a-kind factor is part of what makes this hobby so gratifying.

Unfortunately, this obsession with bold prints means that I haven’t sewed many everyday wardrobe staples. I’m a creature of habit, and this summer the habit has been wearing the same store-bought chambray skirt roughly twice a week. It’s comfy, it goes with nearly everything in my wardrobe, and it’s weighty enough to stand up against the ridiculous Chicago wind.  But I’ve put the poor thing through the ringer, so I figured it was high time to add another versatile skirt to my wardrobe.

half-circle skirt

I’ve already gone the bold-print quarter-circle skirt route, so this time I went for a half-circle in a black ponte knit from JoAnn. I used the trusty By Hand London app again for the waist radius and length measurements, but since I was working with a knit I also heeded iCandy’s tips about subtracting 2″ from the waist measurement before plugging it into the app. Keep in mind that the app adds in 5/8″ seam allowances.

screen shot by hand london app
By Band London app screen shot

I used a homemade twine compass to trace the waist radius and length, although that part was tricky since my tracing pencil kept dragging the knit fabric along with it. I ended up marking a series of dashes that I followed with my rotary cutter. Note to self: buy marking chalk! That’d probably be more friendly on a knit, right?

For the waistband, I followed iCandy’s suggested dimensions:

Length: waist measurement minus 2″ plus 1.25″ for seam allowance

Height: double your desired waistband height plus 1.25″ for seam allowance

knit half-circle skirt sewing

The step-by-step construction of this skirt is amazingly easy. I don’t have a serger, so I attached my machine’s walking foot, inserted a ballpoint needle, and used a zigzag stitch for the seams. After stitching the back seam, I attached the waistband per the directions of the straightforward iCandy tutorial. After clipping the excess seam allowance and ironing the waistband, I hemmed the bottom of the skirt with a roughly 1″ hem. This isn’t technically required since it’s a knit and won’t fray, but I like a clean finish.

half circle skirt sewing

And that’s about it! It’s really a sewing 101 project, and an especially good one if you’re looking to break into the world of knits. I didn’t add a zipper since the material is stretchy enough to get on and off (gently) over my head, but I might try another version with a short zipper and see which is more comfortable. I’m a little afraid this material will stretch out over time, but it wouldn’t be the end of the world since that would just mean the skirt would sit a little lower.

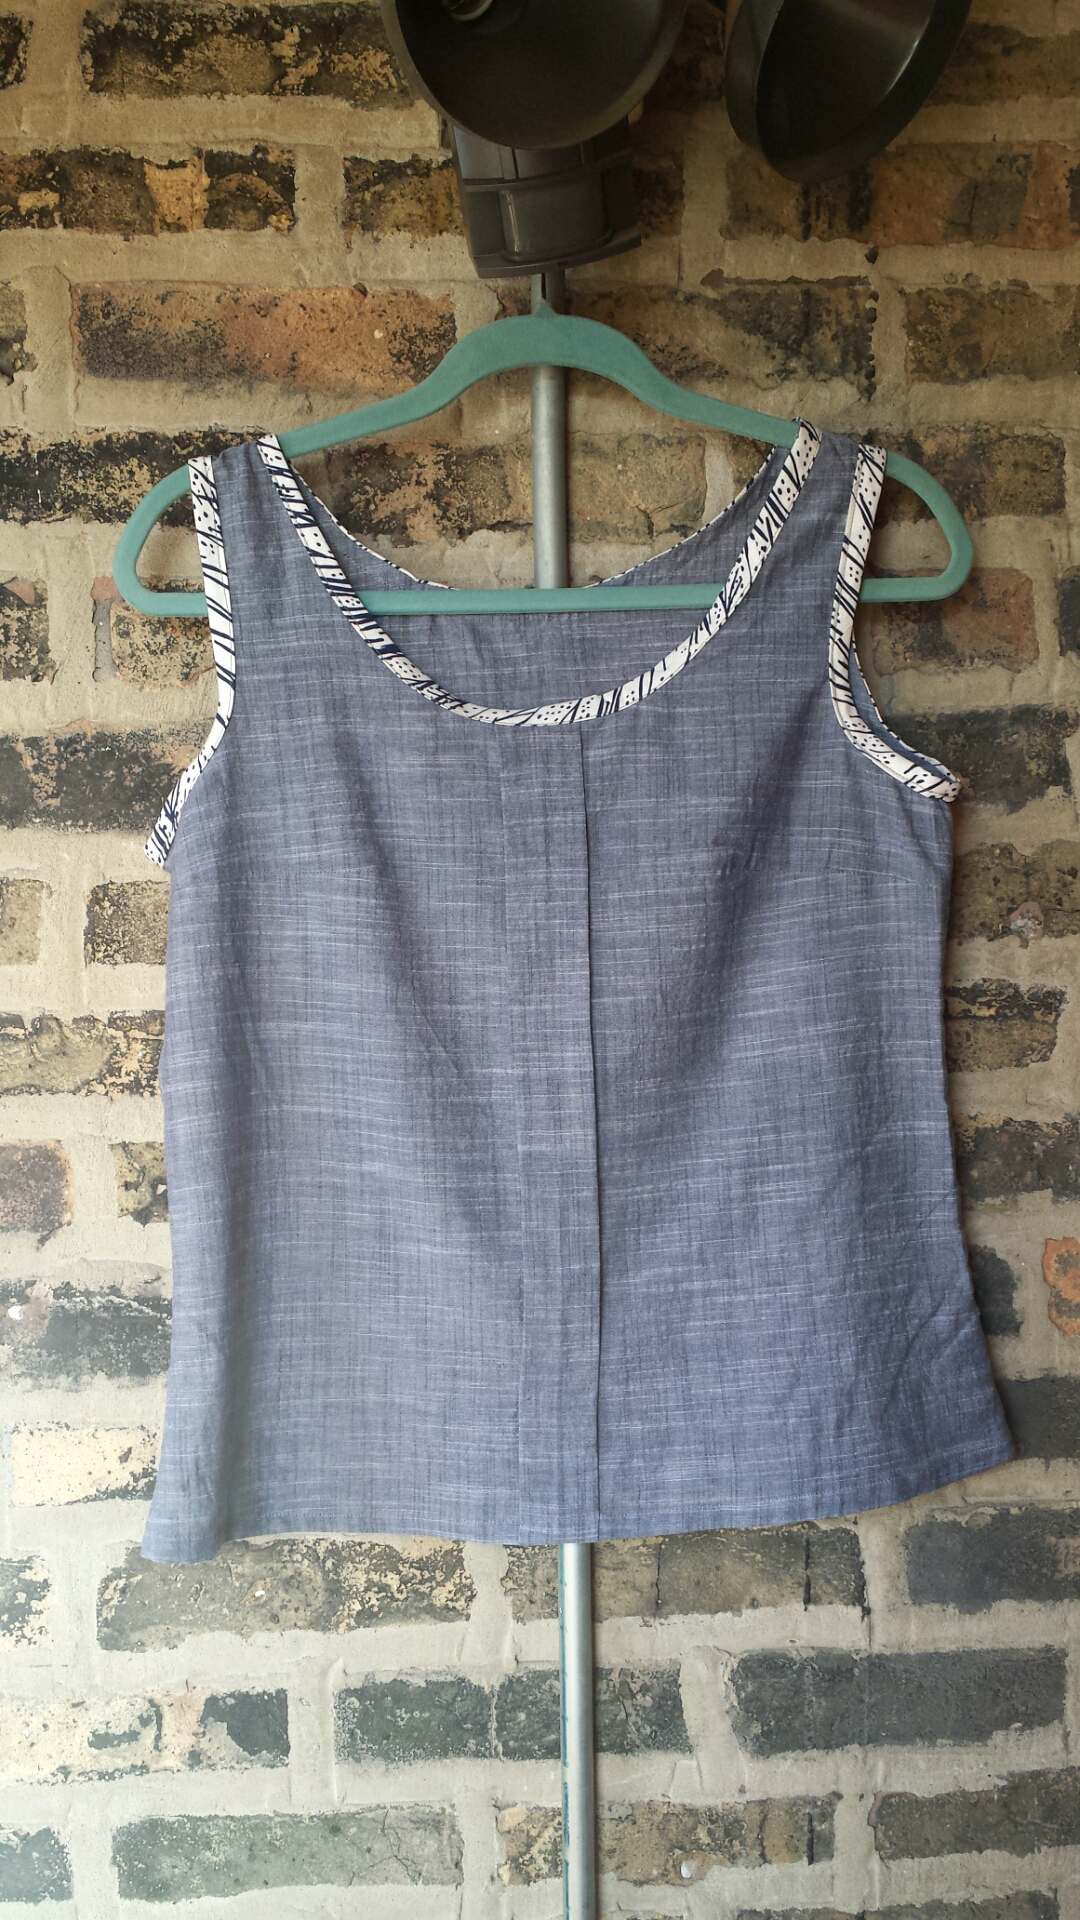
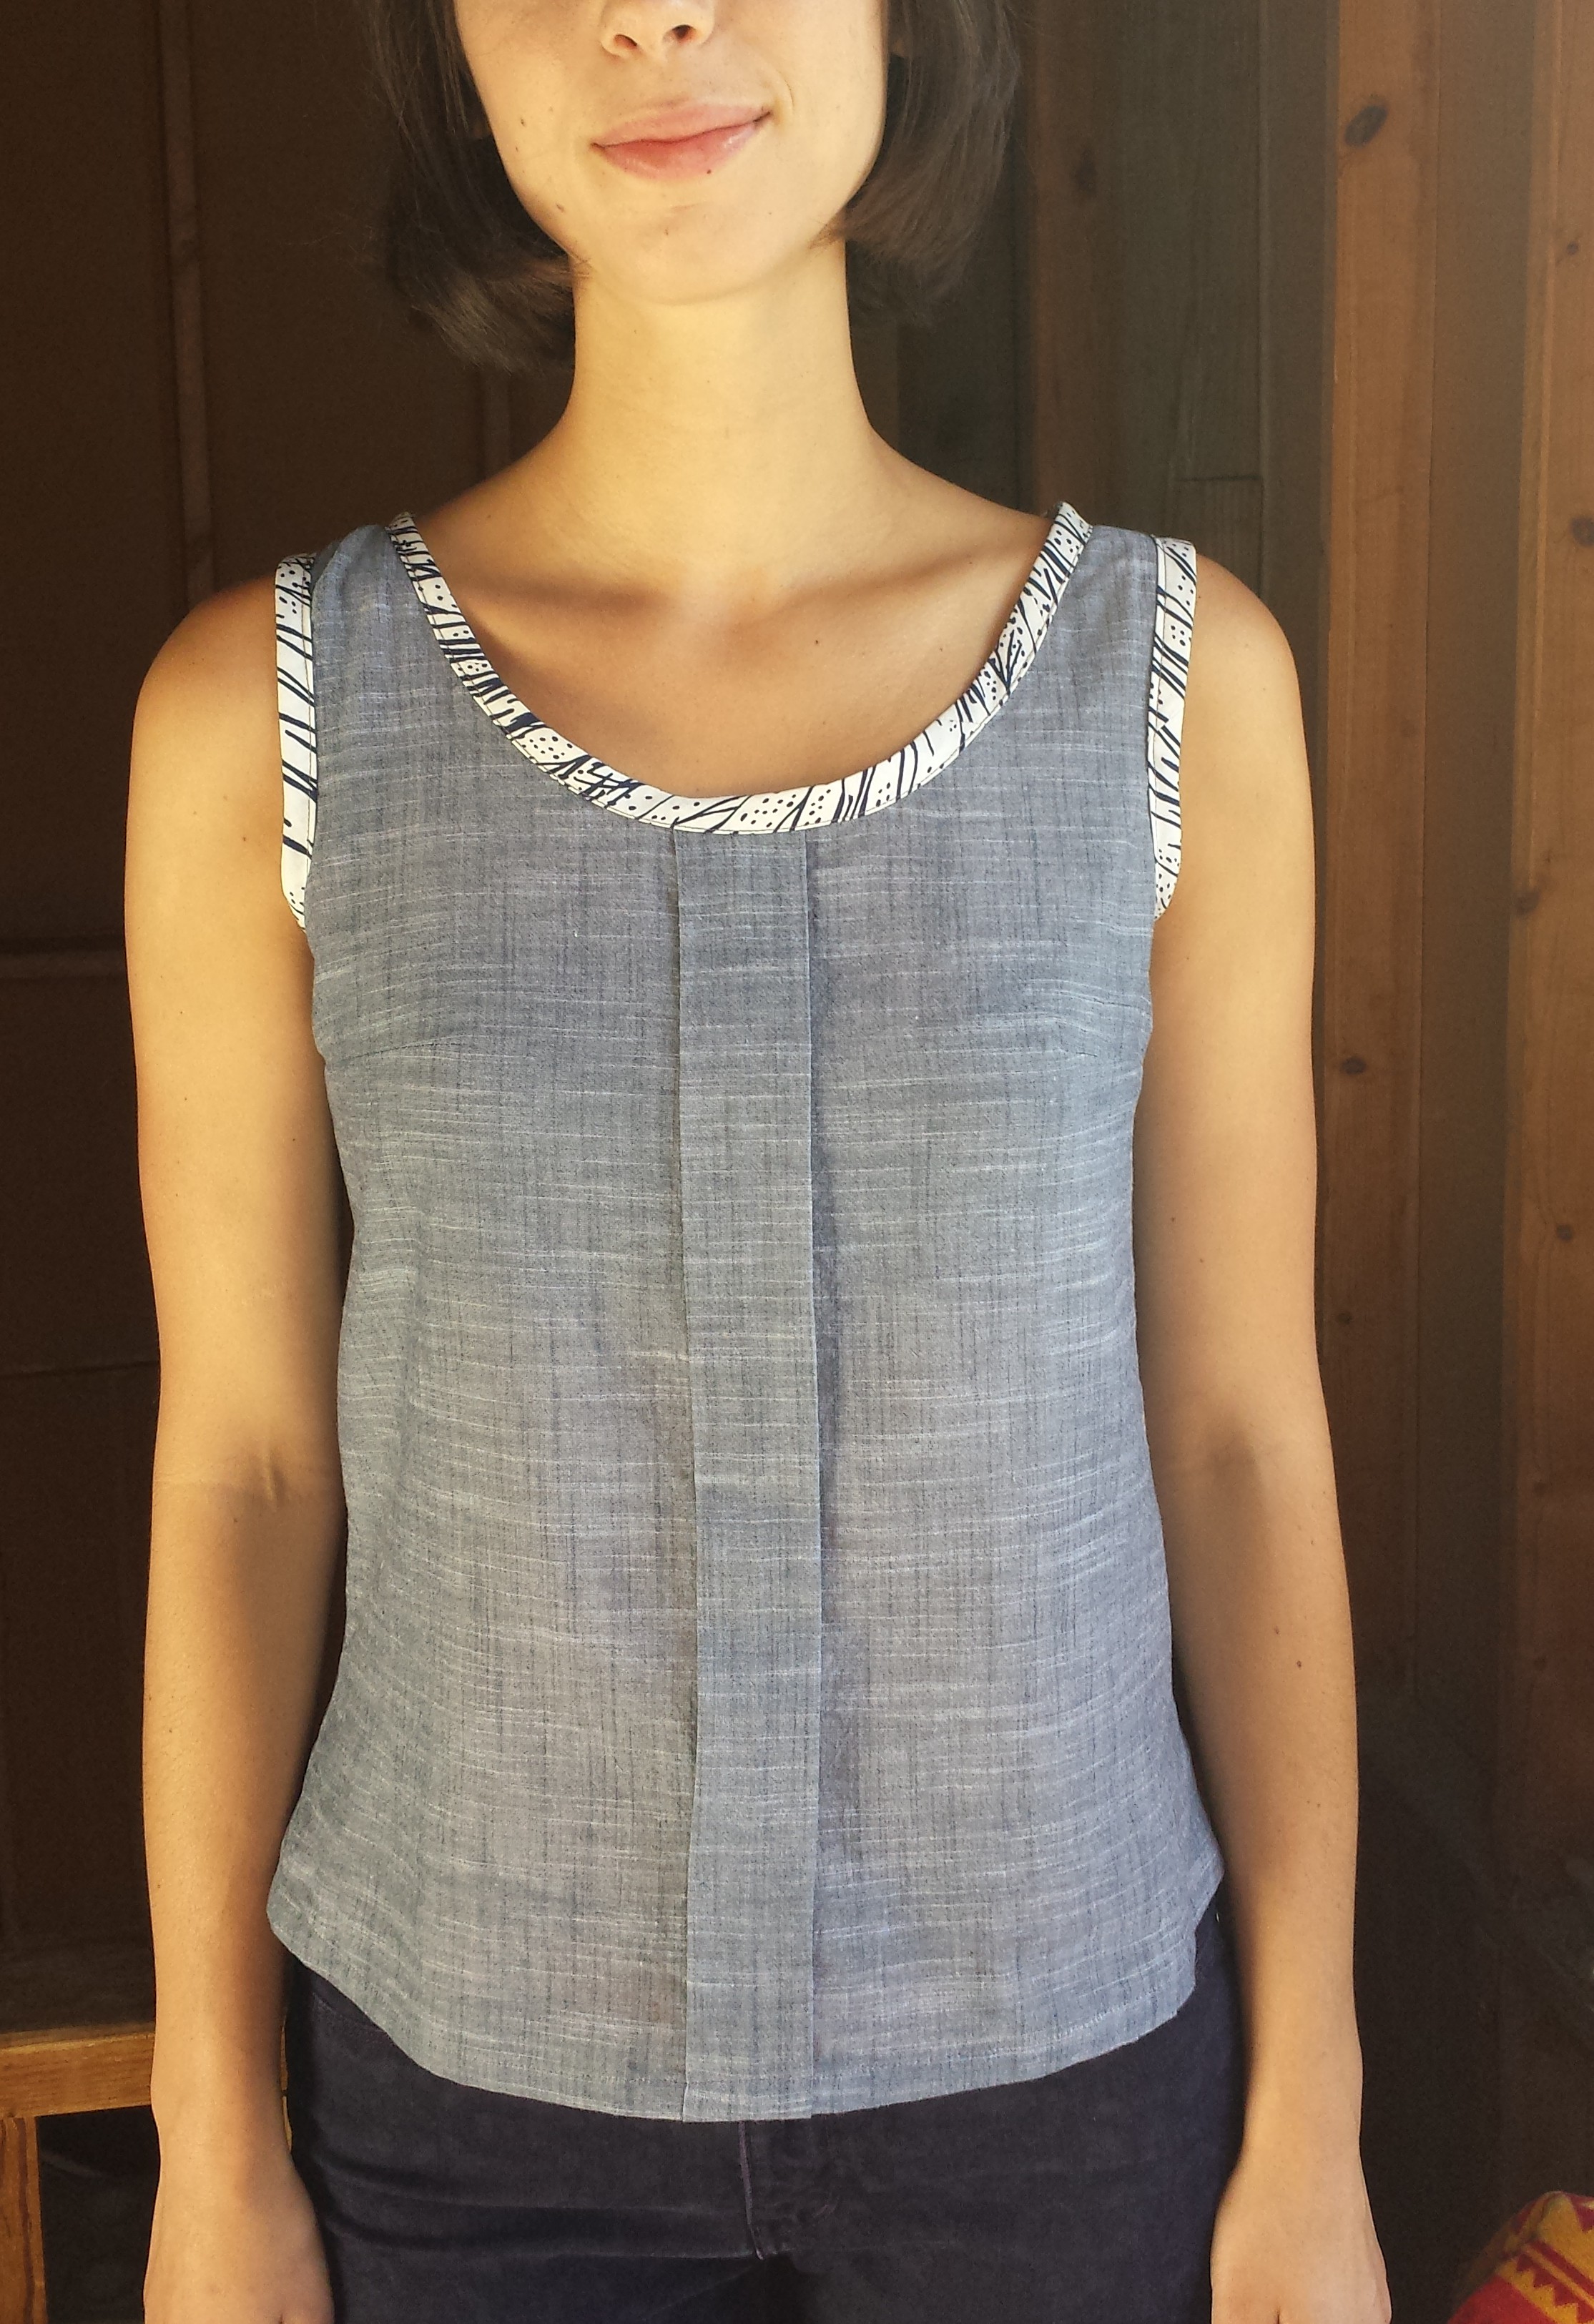
It’s not an earth-shattering make, but it’s comfy, it fits great, and it cost under $7 total. Not too shabby for a new wardrobe staple. I’ve already paired it with my Colette Sorbetto crop top (pictured) and a tucked-in tee, and both are comfy.

What’s your most versatile piece of self-made clothing?

Portside Travel Set Dopp Kit (and the Little Pouch)


sewing portside dopp kit by grainline studio

I must subconsciously wish I was left-handed. Of the many silly mistakes I made when crafting this dopp kit, I sewed on two zippers the “wrong” way. With the dopp kit, I cared enough to get my seam ripper out, but the pouch didn’t get such special treatment. That little guy will forever open the left-handed way, or the “right” way for 10% of the population and 71% of current and former presidents for the past 40 years.

sewing portside dopp kit by grainline studio

My right-handed self found sewing this dopp kit to be a little trickier than anticipated. That might be due to my accessory-sewing rustiness; I haven’t sewn anything but apparel since I made an easy button wallet more than a year ago. Or maybe I was so excited to work on this Grainline pattern that I went at it a little too hastily. The truth is, this pattern took two days of prep before I even sat down at the sewing machine.

Because the Portside Travel Set includes three pieces (a duffel bag, dopp kit, and pouch), the PDF pattern pieces took awhile to tape together and cut. I reserved the next evening for cutting everything out and applying the fusible interfacing. And on the third night, she collapsed in a pile of the sewing-room (aka office/closet) floor, her hand hanging limp in an empty Mexican take-out container. That’s partially true. But really, on the third day I got to work whipping up the dopp kit.

sewing portside dopp kit by grainline studio

Fabrics: Robert Kaufman red floral cotton for the self fabric, J. Crew gray linen-cotton blend for the contrast, and HeatnBond medium fusible interfacing

I love the Marimekko-like floral print, and it’s a decent enough weight for a bag. The gray contrasting fabric, however, is a little too lightweight for my liking, plus it wrinkles super easily. Next time I’ll use heavier duty fabric, or try interlining the bag with sew-in interfacing (like the pattern recommends if you’re looking for a heftier feel).

sewing portside dopp kit by grainline studio

I won’t go into supreme detail on every step of the sewing, but here is a list of things I’ll keep in mind for next time:

Transfer all of the pattern notches on the actual fabric. I somehow failed to do this for every piece, and when it came to sewing the rounded edges of the top and sides, it was a little hairy. I think that’s why my bag is slightly misshapen.

When sewing multiple layers, pin properly! I thought I was done when I noticed a raw edge peeking out on the front of the kit:

sewing portside dopp kit by grainline studio

Not a good feeling, especially when you’ve just finished hand-sewing the lining into place and have to rip out yet another set of stitches.

Don’t forget to topstitch the strap. In my late-night sewing delirium, I misplaced the strap I’d already sewn together and topstitched. After a fruitless 5-minute search, I sewed another strap. No big deal, except that when I attached it to the dopp kit, I forgot to topstitch the damned thing! This is what happened when I tried to machine topstitch when it was already sewn on the bag:

sewing portside dopp kit by grainline studio

Yeah… I immediately ripped those stitches out and now the strap is less structured than I’d like, but at least it’s not looking superjanky.

portside dopp kit

Double-check the cutting layout. I ended up short one piece when it came to Step 25, which calls for a “self front piece” when creating the pocket. I’m still not sure where the problem stems from. (Scratches head.)

And that’s the gist of it. My dopp kitt, though a little floppy, is already growing on me. Oh, and the pouch! Pretty straightforward zipper pouch, although it’s even floppier than my dopp kitt because it didn’t call for any interfacing or lining.

sewing portside pouch by grainline studio

It doesn’t really need it though, especially if you buy a heavier fabric and are planning on using it like me: to hold only crisp, new $2 bills. Just don’t forget to sew the zipper on the right way, y’alls!

And now for some gratuitous shots:

sewing portside dopp kit by grainline studio
Toiletries… and a mysterious sumo wrestler.
sewing portside dopp kit by grainline studio
Whip stitchin’
sewing portside dopp kit by grainline studio
looks friendly enough…
sewing portside dopp kit by grainline studio
… but there’s something devious about those eyes!

sewing portside dopp kit by grainline studio

sewing portside dopp kit by grainline studio
Thanks for modeling, thumb-wrestling sumo man. Now I know why you have a constant look of angered surprise on your face.

Next up: the Portside duffel bag?

Boozy Grapefruit and Lillet Popsicles

boozy grapefruit lillet popsicles

Let me start by saying that yes—I do realize that these popsicles slightly resemble… weiners. That was not the intention, but it happened. The silver lining is that they’re also delicious, plus they’d probably make a great treat for a bachelorette party. (Feel free to insert all the innuendos your heart desires, but I’m going to stop comparing these ice pops to a pale male anatomy part starting now.)

wpid-2014-07-23-13.07.06.jpg.jpeg

After an attempt to make Aviation popsicles with some overly slushie, albeit delicious, results (too much alcohol to freeze!), I decided to go for a less boozy variation. These Campari Citrus Pops from the Kitchn caught my eye last month, and I took their cue with the proportions. But instead of bitter Campari, I subbed in one of my favorite aperitifs, Lillet Blanc.

lillet blanc

The lillet has a lower ABV than Campari, so I figured these popsicles would freeze just fine—and they did! These turned out perfectly tart like I like, but you can always add in a little more simple syrup if you prefer a sweeter popsicle.

Boozy Grapefruit and Lillet Popsicles

Adapted/inspired by the Kitchn. Makes four twin pops or eight small single pops.

  • 6 oz. Lillet Blanc
  • 2 cups fresh grapefruit juice
  • 2/3 cup simple syrup

Mix all the ingredients together, and pour them into your popsicle molds. Freeze overnight and enjoy! I kept the grapefruit pulp in because I like a little bite of fresh fruit in my popsicles. And yes, I bite my popsicles because they taste better that way, duh!

boozy grapefruit lillet popsicles wpid-20140723_124844.jpg

These separating Tovolo twin pops were the best thing I could find at the Grand Avenue Bed Bed and Beyond. I would’ve preferred a single larger mold, but these force you to be nice and share, or you can be like me and shamelessly devour the whole twin pop in 30 seconds.

Beware, the alcohol makes these popsicles a little softer than your standard sugar ice pop, but you shouldn’t have a hard time finishing it before it starts dripping. If all else fails, you can always invest in the Ice Cream Glove, one of many genius ideas straight from the brain of Ali G.

Sew Quilted Coasters with Leftover Fabric

Sorry for the dinky length of this post—I’m headed to Minneapolis this evening to be reunited with a dear college friend and his cat Barbie (whom I am not plotting to steal), but I didn’t want to neglect the blog for a full week. So, coasters!

sew quilted coasters

I made these quilted coasters months ago following a simple Martha Stewart tutorial, and I use them nearly every day. Whether you make 1 or 20, they’re a great way to use up leftovers from your Island of Misfit Fabric Remnants.

sew quilted coasters

The best part about these coasters is that you can throw them in the wash when you inevitably spill coffee or red wine on them.

Obviously I had to make some gratuitous comically undersized coasters:

comically undersized quilted coasters

comically undersized coasters
coasters for all of your drinking needs!

If you have any clever ways to utilize leftover fabric, post in the comments below. Happy sewing!

Caipirinha Cocktail Recipe

caipirinha cocktail recipe with cachaca

You know those words that you pronounce incorrectly 100 times before you finally get them right? Otolaryngology, the name Saoirse, etc. This particular drink involves two of those words: the name of the cocktail, caipirinha (kai-pur-EEN-yuh), and its main component, cachaça (ka-SHA-suh). At least, that’s how my non-Portuguese-speaking self understands them to be pronounced.

caipirinha cocktail cachaca Brazilian recipe

The caipirinha is Brazil’s national cocktail, and cachaça—a distilled liquor made from sugarcane juice—is the country’s most popular liquor. I was hoping to whip up a pitcher when Brazil played Argentina in the final of the World Cup… (insert the tears of 190 million Brazilians). Sadly, consolation third place cocktails will have to do!

caipirinha cocktail recipe Leblon cachaca

I picked up some Leblon cachaça and used the classic caipirinha recipe found on the back of the bottle:

Caipirinha

  • 4 lime wedges
  • 2 tsp. superfine sugar
  • 2 oz. cachaça
  • Ice

In a rocks glass, muddle the lime and sugar. Top with ice (I had cubes in my freezer but will probably used crushed in the future), add the cachaça, and stir. Add a lime wedge for garnish. It doesn’t get much simpler than that!

caipirinha cocktail recipe leblon cachaca brazil world cup drink

This drink was a little stronger than expected, but that might have to do with the fact that I used a past-its-prime lime that didn’t produce a ton of juice (bad form, I know). The Leblon also had a surprising banana-esque aftertaste. This cocktail would probably lend itself really nicely to some fresh-fruit flavors—maybe strawberry or blackberry? Thoughts?

Happy sipping, and may Brazil redeem themselves with a third place victory on Saturday!

Sorbetto Part II: The Crop Top

colette sorbetto crop top

Weekend sewing > weekday sewing. I don’t remember the last time I’ve churned out two items of clothing within a four-day span, and it feels gooood. On an average weekday, I might break into a cold sweat at the thought of making and applying bias tape sometime in between an after-work run and dinner. This glorious morning, I sat with a cup of coffee while listening to Marc Maron’s charming neurotic rants, happily pinning bias tape to the edges of my nearly finished Sorbetto #2. Having nowhere to be and nothing to do on Sunday mornings has become my favorite (non)pastime. That and screaming at the TV during World Cup games. I had no clue soccer was so full of drama and biting! Anywho, on to the garment:

colette sorbetto crop top

I’m a big fan of the structured, polished crop tops that have been dominating runways and fashion blogs this summer, but I couldn’t seem to find what I envisioned (or one that was worth the $70 at Topshop). After whipping up my first Sorbetto a few days ago, I thought it might be the perfect candidate for a pattern-hack crop top.

All I did to alter the pattern (which I’d already tweaked for the last Sorbetto) was take off 3″ of length and decrease most of the flare that occurs toward the hem.

colette sorbetto crop top
a “headed to the pharmacy” selfie

I love this Amy Butler fabric—it’s billed as a quilting cotton, and I think the added heft really helps achieve a more structured look. At 3″ shorter than the original, the length is perfect. Here, I’m wearing the top over a lightweight jersey slip dress (I’m all for the no-skin-showing crop top), but I can see pairing this with a midi skirt or even some pants or shorts if they hit high enough on the waist.

colette sorbetto crop top
blurry pic + derpy face

The one thing I dislike about this top is the armholes. Somehow, these armholes are higher than my first Sorbetto, even though I cut them from the same pattern. I wore this top around for a few hours today, and it was comfortable, but my armpits could definitely stand for some more breathing room. I’m wondering if it just feels tighter since this top is a thicker cotton, rather than a lightweight chambray? Either way, I’m going to give it another wear and then decide whether or not I want to hack those armholes down.

Now that I’ve made a couple Sorbettos, I feel like I owe it to the ladies at Colette to cough up for a non-free pattern of theirs. Any favorites?

Hope you had a relaxing holiday weekend filled with lots of fireworks and patriotic Jell-O molds!


Chambray Colette Sorbetto Top

Colette Sorbetto top

For the July installment in the Summer of PDF Sewing Patterns, I went with a pattern that cost $0. That’s right—the Colette Sorbetto top is a FREE download! If you sew, this is probably super old news. I admit that I’ve seen images of this shirt (and hacks of this shirt) floating around the blogosphere for awhile now, but I’d never actually taken the plunge myself. Am I glad I finally did? I…. think so.

After reading what felt like 10,000 reviews of Sorbetto, I decided to make a few adjustments to the pattern before cutting out my fabric. For the record, I’m 6’0, wear a size 6/8 in dresses, and have a broad back and a long torso. Using Colette’s sizing chart as a guide, I cut a 6.

Colette Sorbetto pattern

Some reviewers mentioned that the top cut into their armpit, so I cut the armhole down to where it is for the size 12. I also cut the neckline down about 1″, because I get a little sweaty/panicky with high-cut necklines. My clavicle needs to breathe, y’alls. For length, I added 2″ to the waist area and about 1/2″ to the hem.

One of the most common complaints I’d seen was that the bust darts were waaaay too high. Since my whole upper half—from shoulder to hipbone—is long, I figured I’d need to lower the bust dart. Full disclosure: For some reason, I hate tracing bust darts onto fabric. That said, I tried to trace equal darts onto both side of the bodice, at roughly where the size 12 darts lie north/south and where the size 6 darts lie east/west.

On to the actual sewing!

Colette Sorbetto top

Pros

  • The pattern was super easy to follow. The directions are spot on, and thanks to their in-house continuous bias binding tutorial, I now know how to make tons of bias tape from a measly 10″x10″ fabric leftover.
continuous bias binding
Scrap of fabric destined for the trash becomes…
bias binding
…nearly 100″ of binding. Magic!
  • The pleat! I’ve never made anything with a pleat before, and I love it. It was super easy with the help of a nice steamy iron. (Sidenote: my old starter Rowenta has a broken handle and leaks water everywhere—any tips on good irons?)
  • It requires very little fabric. I bought 1.5 yards of this Robert Kaufman lightweight chambray, and I probably have enough leftover to make another shirt.
  • Comfort. It feels like I’m wearing pajamas. (Hell, maybe it looks like I’m wearing pajamas, too.)

Colette Sorbetto top

Cons

  • It’s short. Even after adding length in the torso and the hem, it felt a little cropped. Maybe that’s just the style of the shirt. Either way, I prefer my tops a little longer, especially if they’re woven.
  • The darts are too high. Surprise! My half-assed attempt to place these darts didn’t work. In fact, one was almost a full inch higher than the other (it was barely grazing boob at this point), so I had to seam rip that sucker and re-sew it. This was after I’d already sewn the side seams. Needless to say, I’m very happy my lightweight fabric stood up the the challenge of exasperated me + a seam ripper.
  • The bottom is slightly flared. It doesn’t necessarily look bad, it’s just not my style.
  • It’s a little tight in the upper back. It’s not uncomfortable, but since the rest of the shirt is so breezy, I’d like a little more breathing room for my oversize ribcage.

Fourth of July outfit

Overall, I’d say the pattern itself is well-drafted and includes amazing directions. (Colette really lives up to it’s motto, “Patterns that teach.”) Because a lot of Colette’s patterns are vintage-inspired, I think they might run a little short for me. I like the Sorbetto I made, but it’s a little swingy at the bottom for me. With it tucked into my red-white-and-blue shorts, I might just have a Fourth of July outfit on my hands. Now all I need is a Budweiser and a ketchup stain running down my chest.

Colette Sorbetto top

Anywho, I’m excited to take another stab at Sorbetto with a different fabric, maybe trying one of the fun modifications I’ve seen (like this scalloped edge) or trying a crop top version. Has anyone tried a crop? I’m curious to know before I go wasting fabric and end up crying in a heap of leftover thread and crumpled pattern pieces. (This has never happened.)

Happy Fourth!

Ruby Red Grapefruit Beergarita

grapefruit beergarita recipe

 Vacation brain.

Heard of it? I feel like I’ve been suffering from some serious vacation brain ever since I came back from a glorious week of relaxation in Florida, followed by a fantastical three-day Beyoncé-themed bachelorette party in Nashvegas.

Needless to say, it’s been a little painful getting into the swing of my everyday office life. To ease the burden of entering back into normalcy, I’ve been making what I like to call Summer Break Cocktails. My current obsession: the beergarita.

grapefruit beergarita recipe with Corona

If you like a super-sweet frozen margarita/beergarita, then by all means pick up one of those delicious concentrate cans that you pop into the blender—that’s all I was drinking on vacation. This particular beergarita is a less sweet, on-the-rocks version, which I think makes for a more refreshing summertime drink.

grapefruit and lime beergarita recipe


Grapefruit Beergarita

Makes two servings

  • Juice from one large ruby red grapefruit
  • Juice from one lime
  • 4 oz. blanco tequila
  • 1 oz. orange liqueur (I used Cointreau)
  • 12 oz. bottle of Corona (or similar)
  • 1–2 tablespoons of sugar (to taste)
  • Optional: kosher salt and chopped rosemary for the rim

If you like a salted rim, combine chopped rosemary and kosher salt on a plate.

rosemary salt rim beergarita recipe

Moisten the rim of a mason jar with a lime, dip in the salt mixture, and set aside to dry. Combine the grapefruit juice (I kept the pulp) and lime juice, and stir in the sugar until it’s dissolved. In a cocktail shaker filled with a handful of small ice cubes, combine the juice mixture, tequila, and Cointreau, and shake until chilled. Pour the contents (including the ice) into the mason jar, and top off with cold beer.

grapefruit beergarita recipe

Side note: these pics were taken on an enormous floral Pendelton beach towel—an Easter gift from my mom that I’m a littttle too excited about Anywho, you could always omit the beer and serve this in a martini or margarita glass.

grapefruit margarita recipe

Enjoy! What’s your favorite beer cocktail?