El Grito Tequila Cocktail with Sriracha Ice Cubes

el grito tequila cocktail

After a weeklong Florida vacation full of sun, sand, and tropical cocktails—Piña Coladas, Beergaritas, Mojitos, and Caipirinhas galore!—it finally feels like summer.

I’m nothing if not a sucker for the spirits of the season. In summer’s case, this usually means opening my mind and liver to two liquors I don’t usually drink: rum and tequila. (Chances are you know at least five people who’ve had “a really bad night” with tequila and generally stay away from the stuff. My really bad night involved too many Tequila Sunrises mixed with a smidge too much freshman-in-college idiocy.) Tequila agrees with me well enough now, especially if I mix it with margarita mix and a Corona to make the all-powerful Beergarita. I could go on about Beergaritas for days, but I’ll save that for another time.

The original recipe for the El Grito calls for a smokier reposado tequila, but I enjoyed the blanco tequila from Espólon so much on vacation that I decided to swap the brown tequila for white. I should note that Marc found this recipe in Spirit—the in-flight magazine for Southwest Airlines. I’d always thought that airline reading was limited to learning about dog stairs in SkyMall and perusing those terrifying “In Case of Water Landing” safety cards. Who knew!
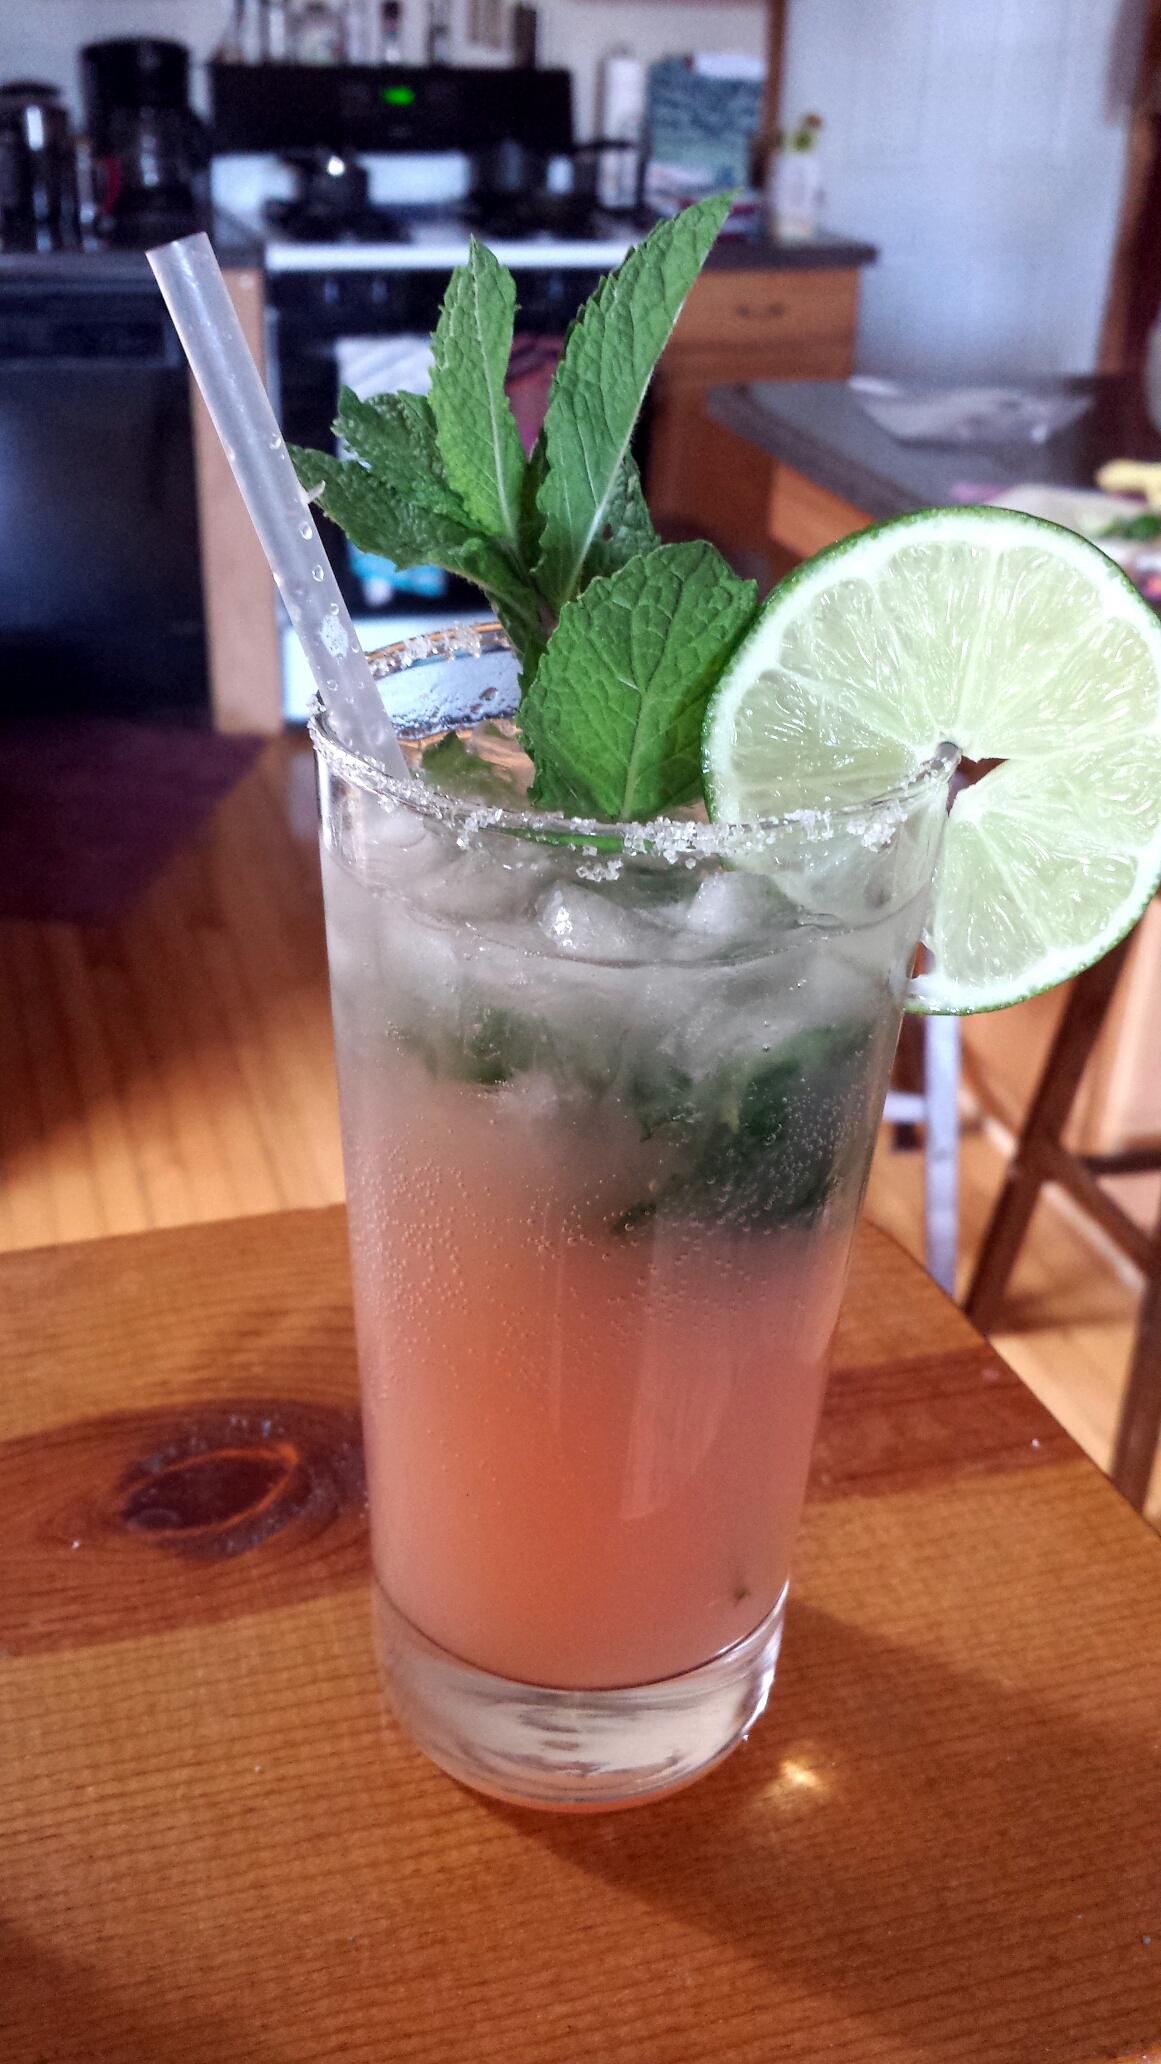
el grito tequila cocktail

El Grito

Adapted from Aaron Post’s recipe in Spirit magazine

  • 1 oz. Sriracha and 3 cups water (for Sriracha ice cubes)
  • 2 oz. blanco tequila
  • 1 oz. Cointreau
  • Juice from half a large lime (or about 1 oz.)
  • Kosher salt
  • Sprig of rosemary

Mix the Sriracha and water and pour into ice cubes trays. Freeze overnight. Shake the tequila, Cointreau, and lime juice in a cocktail shaker with a few ice cubes. Moisten the rim of a tall, skinny glass with a lime wedge, then twist in kosher salt to coat. (I used a Collins glass at first, but it was too big.) Pour the drink over three to four Sriracha ice cubes. Garnish with a fresh rosemary sprig.

Sriracha ice cubes

The ice cubes melt as you drink, infusing the cocktail with that spicy, smoky Sriracha flavor as you sip. And it’s definitely a sipper. Enjoy!

Grainline Studio Scout Woven Tee

sewing project grainline studio scout tee

I think it’s safe to say that Grainline Studio’s Scout Woven Tee is the darling of the indie pattern world. I’ve read rave reviews from probably 15+ bloggers at this point, most commending the pattern for its sizing, breezy fit, and ease of construction. Not to mention that it makes it really easy to highlight a fantastic print.

But, being slightly cynical, I wasn’t quite sold by the blogosphere’s near-unanimous praise. A slouchy, loose-fitting T-shirt with no bust darts (no darts at all, actually), to be made with a nonstretch woven fabric. Uhhh, I’m all for embracing this summer’s boxy shirt trend, but I was a little afraid this would veer into the “looks like you’re wearing a tent” arena. Still, at only $6.50 ($7.50 total because of dumb Illinois tax), I had to give it a shot.

Scout calls for a lightweight woven fabric. Per usual, I hit up the Needle Shop in Chicago’s North Center, where I found a beautiful Leah Duncan hyacinth fabric (not in stock anymore).

It’s 100% cotton and super soft—really an awesome print for summer with its crisp off-white color and pops of navy. I washed and dried it, then got to work laying out my PDF pattern pieces and cutting out the fabric.

There are only four pattern pieces total—the front, back, sleeves, and bias neckline binding—making the cutting process a total breeze. The pattern includes seam allowances (my last PDF pattern did not), which is another huge plus in my book. So far, so good, Scout.

scout tee bias neckline sewing

After sewing the back and front pieces together, I used Grainline Studio’s tutorial, Getting Flat Bias Necklines, to finish the scoop neck. If you haven’t visited the Grainline Studio website, check it out. Jen Beeman, the brain behind Grainline, sells her PDF patterns there and also shares super helpful tutorials and tips that complement her designs. Plus, I read an interview that revealed she lives in Chicago and likes Black Dog Gelato, the best dessert in the city/state/world. OK, done fan-girling and pining for goat cheese cashew gelato. Back to the pattern!

I finished the bottom with a simple double-fold hem. Next were the sleeves, and the directions call for a double row of basting stitches in order to gather the sleeves when attaching them to the bodice. The sleeves went in without a hitch, and I finished each edge with another double-fold hem and gave the whole thing a quick press.

At this point, I was… done?! How could it be!? Surely this was too good to be true. I’d never sewn a (wearable) shirt in less than 90 minutes, so naturally I assumed it would look wonky when I tried it on.

To be honest, I wasn’t 100% sure about it when I first tried on the finished product. I usually wear more fitted tops or ones that are cinched at the waist. This tee is kind of the opposite of all that. The garment details aren’t lyin’ when they say that “this top falls into a loose shape below the bust.” But within 15 minutes of wearing Scout, I was converted. It’s loose, yet somehow manages to skim the body in a flattering way. It’s also insanely comfortable. I can see pairing this shirt with everything from linen shorts to skinny jeans or even tucked into a pencil skirt with a belt thrown on top. This is really a great, simple pattern and I can’t wait to sew up a few more. Maybe I’ll try Jen’s Madewell Scout variation next.

Grainline Studio Scout woven tee sewing

And that’s about it! PDF pattern #2 complete for my summer challenge. If they’re all as easy and awesome as Scout, I might need to up the ante and start sewing two or three per month! Any personal favorites?


Salvage a Long Sleeve by Turning it Into a Short Sleeve

turn a long sleeve into a short sleeve

My boyfriend’s wardrobe consists almost entirely of slim-cut button-down shirts, which look great but don’t last forever. A few of the older ones have started fraying and two of them have developed the dreaded elbow hole. Since it’s summer (THANK GOD) and elbow patches don’t sound too appealing right now, I decided to chop off the sleeves and hem them so the shirt’s still wearable.

I found this simple tutorial from The Mother Huddle, and the process is nearly as straightforward as it seems.

sewing a long sleeve into short sleeve

First, find an existing short-sleeve shirt to act as your guide.

use a rotary cutter

Using a rotary cutter, cut parallel to the line of the short sleeve, leaving an extra 1.5″ for hemming purposes.

cut the sleeves

You should be left with something like this. (Sorry for the clashing floral carpet/plaid. My eyes!)

Fold the raw edge of each sleeve up 3/4″. Give this fold a quick press so it stays uniform and doesn’t unfurl.

ironing a sleeve hem

Fold the sleeve edge up again another 3/4″ and press thoroughly. You might want to try the shirt on at this point to make sure the sleeves are even.

And now for the slightly tricky, but manageable part: stitching around the cuff without having the seam pucker. For whatever reason, there was a little extra fabric leftover the first time I hemmed the sleeve, causing it to pucker where the stitches ended. After ripping those suckers out, I tried again. I avoided the seam pucker the second time by starting the stitch about 1/4″ past the underarm side seam. That way, the small amount of leftover fabric can be folded directly under the side seam, hidden from view.

Keeping that in mind, back to The Mother Huddle’s directions:

On the right side of the sleeve (from the starting position mentioned above), sew a row of stitches at 5/8″ from the bottom of the cuff. Take your time with this, keeping the stitches uniform all the way around. Sew another row at 3/4″ from the bottom. Don’t forget to backstitch! Press the finished double-row stitching. Repeat for the other arm.

short sleeve into long sleeve

The hem should look something like this.

upcycled short sleeve shirt

And it’s really that simple. No more throwing away holey shirts or using them as expensive dish rags. Happy upcycling!


Phony ‘Groni with Luxardo Bitter

Luxardo Bitter Negroni recipe

Faux Negroni? Doppelgröni? Call this frankensteined cocktail whatever you like, except a “Negroni.” Apparently, one without Campari just isn’t a Negroni—the bitter aperitif is essential to the drink.

I first learned of Campari at about 16, when I was reading the Gossip Girl YA book series well before Blake Lively ruined it for me on TV. In the books, these Upper East Side high school WASPs drank Campari on the rocks. Naturally, I assumed the drink was some sort of sweet, fruity concoction, probably because all I’d tasted at the time was Watermelon Pucker and Malibu Coconut Rum.

Negroni recipe with Luxardo Bitter

Eventually I learned that Campari is a bitter liqueur, but I was still surprised by its intense taste the first time I had a Negroni. It took me a couple tries to warm up to the flavor of the drink, but now I crave ’em. Unfortunately I don’t have any Campari in my bar yet, so when I saw Luxardo Bitter on sale at Binny’s Beverage Depot, I snagged it up. (Apparently $9.99 is an insanely low price.) I’d heard it was a good introduction to bitter aperitifs, and god knows I can’t pass up a 50% sale on booze.

Here’s the recipe for the slightly controversial drink. Admittedly, it isn’t quite as punchy as a standard Negroni, but it still tasted great and quenched my craving for a bitter pre-dinner cocktail.

Luxardo Bitter Negroni recipe

Phony ‘Groni

  • 1.5 oz. dry gin
  • 1.5 oz. Luxardo Bitter
  • 1.5 oz. sweet vermouth (I used Dolin)
  • Splash of soda (optional)
  • Slice of orange peel for garnish

Fill a lowball glass with ice. Pour the gin, Luxardo Bitter, and sweet vermouth into the glass and gently stir to mix. I added a splash of soda, but that part’s up to you. Add a slice of orange peel for garnish.

Enjoy! Have you used Luxardo Bitter before?

Floral Linen Shirtdress

handmade shirtdress

Living in Chicago, I’m all for changing with the seasons. In the spring and summer, that means walking everywhere, eating on patios, and drinking a lot less bourbon and lot more gin. It also means ditching boots and sweaters for—finally—all the skirts and dresses.

handmade floral linen shirtdress

But when I flipped through my closet recently, I realized that there’s a particularly large hole in my wardrobe in the form of shirtdresses. And I love me a good shirtdress, since all you need is a belt and a pair of sandals and you can go anywhere from work to a family party to a metal-blasting burger bar. (I speak from experience).

Salme Patterns 149 shirtdress pattern

Enter my first foray into sewing up a PDF pattern (also part of my summer sewing goal).  This one is Salme Pattern’s Buttonless Shirt Dress (#149), which calls for cotton, a cotton/poly blend, etc. Linen wasn’t a suggested fabric, but I couldn’t resist this abstract floral print. Plus, if there’s any fabric that begs to be worn on a hot, sticky summer day, it’s linen. Or mesh, but that ain’t happening. (Not for a shirtdress at least.)

handmade floral linen shirtdress

I took the better part of a weeknight to cut out the pattern, tape it together, cut out my size, and finally cut the fabric pieces. My next step was fusing interfacing to the collar pieces and the inner front, from the bottom of the slit to the neckline. After that I got to work sewing the whole thing up. Other than a few hitches here and there with fit, it was pretty straightforward. I’d definitely recommend this to a beginner/intermediate seamster.

back of the shirtdress

A few things I’ll keep in mind for next time:

  • The sizing runs large. Even if your measurements match a particular size, I’d suggest going down one. I’m usually a US 6/8 in dresses, and my measurements matched up to a US 10/UK 12. It was definitely too big, and I had to compensate by taking it in after I’d sewn the side seams.
  • The collar directions are a little confusing. My collar turned out slightly unfinished at the very edges, and I’m still not sure why. Next time I’ll do some more research about attaching standup collars, and hopefully I’ll have a more polished end product.
  • I have a long torso, so  I added about 1 inch to the pattern at the waist before cutting out the fabric. It didn’t seem entirely necessary, but I think it helps if you’re going to pair this with a belt (which I always do).
  • Since I added length at the waist, I figured that meant I should place the belt loops an inch lower. WRONG. For whatever reason, the PDF directions that place the belt loops at 7 7/8″ below the armhole are pretty spot on.
  • I opted for a brown leather/elastic belt, worn over the belt loops. The matching fabric belt works, too, but I like the edge of this darker color to balance the pretty floral.

handmade shirtdress on the rooftop

Luckily, Monday’s storm held off long enough to snap some photos from the top of my building. There’s nothing like an 80º day on the roof to drink in that ridiculous Chicago skyline. (Even with a few trees in the way).

Anywho, have any of you sewn a Salme Pattern before? I’d love some suggestions for great PDF patterns—leave a comment if you’ve found any gems!

salme pattern 149 buttonless shirt dress

The Summer of PDF Sewing Patterns

Lately, I’ve been in a bit of a creative sewing rut. I could say it’s because I’ve been busy with other life stuff,  but really, sometimes I’m just overwhelmed by the sheer number of options at my fingertips. I think too much of a good thing can be stifling sometimes. Step away from the Bloglovin’ feed, Dani. But instead of abandoning the sewing machine until inspiration strikes, this time I’m taking a more proactive approach. I know it’s risky to say (type?) a goal out loud, in a public forum with the Internet as my witness, but here goes:

My goal for the spring/summer is to sew at least one PDF pattern from an independent designer each month.

Whew, that wasn’t so hard. Yesterday I bought, pieced together, and cut out my first pattern. Here are the deets:

Spring/Summer of pdf patterns – May

Brand: Salme Patterns

Pattern: 149, buttonless shirt dress

Price: $8 on Etsy

Fabric: Floral-printed linen blend

floral linen fabric

I’m excited to get started! Have any of you sewn up this pattern before? Any tips?

mint-infused cocktail recipes

Make Mint Simple Syrup, and Then Make These 3 Cocktails

It’s confession time.

I’m becoming somewhat of a cocktail fiend, and up until last week, I had never made simple syrup. What was I waiting for?! Not only is it pretty damned easy to make, you can also infuse it with nearly anything your heart desires: berries, herbs, spices, tears—you name it.

After a slight mishap with some blackberry-basil simple syrup (I used too much basil and it smelled like Fruity Pebbles pesto), I decided to go with a simpler infusion: mint. I used raw cane sugar, so the color of this simple syrup isn’t the most appealing, but I swear it’s delicious.

make your own mint simple syrup

I (mostly) followed a recipe from The Hungry Mouse, which goes something like this:

Mint Simple Syrup

  • Chop up roughly 1 cup of mint leaves and transfer them to a heat-resistant container.
  • Bring 1 cup of cold water and 1 cup of sugar to a boil, whisking occasionally to dissolve the sugar. Remove pot from heat when the sugar is completely dissolved.
  • Pour the sugar over the chopped mint, and cover with foil or plastic wrap. The steam helps to infuse the mint flavor and fragrance into the syrup.
  • When it’s cooled, pour the mixture over a strainer (I used cheesecloth), making sure to press or squeeze the mint to extract every ounce of flavor.
  • Store in an airtight container in your fridge, where it’ll last for up to three weeks.

And now for the best part: mixing up your drinks. Try these three mint-infused spring and summer favorites to get your creative cocktail juices flowing.

wpid-img_20140430_174226.jpg

Mint Julep

  • 1 tablespoon mint simple syrup
  • 2 oz. Kentucky bourbon
  • Crushed ice
  • Mint for garnish

Pour the simple syrup and bourbon in a glass, then top with a hefty amount of crushed ice. Add a sprig of mint for garnish. Oh, and if you have a silver mint julep cup, obviously use that.

This one’s a little time-sensitive, what with Derby Day being this Saturday, but this potent drink is great all summer long thanks to the refreshing mint and generous amount of crushed ice. Lots of recipes call for you to muddle mint leaves with sugar, but this one is actually the official recipe of the Derby. (Minus the Early Times). It’s best consumed when wearing a giant floppy hat and screaming obscenities at the TV for 2.5 minutes straight.

mojito recipe with mint simple syrup

Mojito

  • 2–3 teaspoons mint simple syrup
  • 1.5 oz. white rum
  • Juice of half a lime
  • Club soda
  • Ice

In a tall glass, combine the simple syrup, rum, and fresh lime juice. Fill the glass with ice (preferably crushed) and top with club soda. You can garnish this however you’d like; I usually use a slice of lime and some extra mint leaves for an added burst of freshness with each sip.

watermelon mint agua fresca with vodka recipe

Watermelon Agua Fresca with Vodka

(Makes about 5 servings)

  • Quarter of a large watermelon, seeded and cubed
  • 1/2 cup water
  • Mint simple syrup, to taste (I used about 3 tablespoons)
  • Juice of 1 lime
  • 5 oz. vodka
  • Lime slices and mint leaves

In a blender, puree the watermelon and water. You can leave it as it is for a pulpier drink, or you can strain it through cheesecloth for a thinner, more juice-like consistency. In a glass pitcher/large container, combine the puree with the lime juice and simple syrup, tasting as you go to determine your preferred level of sweetness. Then add the vodka (this part is also to taste). Fill serving glasses with ice, dropping a lime slice and a few mint leaves into each one. Pour the agua fresca over the top and serve.

watermelon agua fresca with vodka recipe

I can’t wait until it’s warm enough to enjoy these refreshing cocktails on the roof after work. Happy sipping!

guava mojito recipe

Guava Mojito Recipe

The mojito might be the most polarizing drink on the Internet. Stirred, shaken, or just plain poured? Simple syrup or sugar? And then, what kind of sugar—coarse or confectioners’? Is it okay to add a flavor?

So. Many. Questions.

Maybe one day I’ll subscribe to the whole “there’s a right and a wrong way to make a cocktail” mantra, but for now, I’m going with what tastes good. And if there’s one tasty cocktail that I’ve been jonesing for to remind me that summer still exists, it’s the mojito. More specifically, the delicious fresh guava mojito at Paladar Cuban Restaurant and Rum Bar in Logan Square. It was really love at first sip with that cocktail, and I’ve been unable to order anything else with my cuban sandwich ever since.

guava mojito recipe

To make my own version, I had every intention of buying a whole guava and trying to puree it in my blender. Unfortunately, Mariano’s produce department forsook me and I was forced to buy bottled guava nectar. The brand I bought, Hero, turned out to be pretty delicious, plus it doesn’t have any pesky high-fructose corn syrup.

guava mojito ingredients

I used Cruzan white rum, because apparently white rum is the one absolutely necessary component to a mojito—the brown stuff just won’t do. Feel free to play around with the proportions of this recipe or swap out the guava nectar for another juice.

Guava Mojito

  • 10 fresh mint leaves
  • Juice of half a lime
  • 1/2 to 1 teaspoon cane sugar (to taste)
  • 3 oz. guava nectar
  • 1.5 oz. light rum
  • Crushed ice
  • Soda water

In a tall glass, gently muddle together the mint, lime juice, and sugar until very fragrant. If you’re like me and don’t have a muddler handy, the back of a wooden spoon works just fine. Add a generous amount of crushed ice, then top with the rum and guava nectar. You can adjust the amount of sugar or guava nectar depending on your desired sweetness. Fill the glass to the top with soda water, and give it a quick stir. It might not be traditional or “right,” but hopefully it’ll be tasty and refreshing!

guava mojito recipe

Have you made mojitos at home before? Any tried-and-true tips or tricks?