Woven Hudson Pants

woven hudson pants true bias aw shucks

Well folks, they can’t all be winners. I won’t call these woven Hudson Pants a fail—they’re still wearable and hella comfy. But even after some major surgery, they’re just… not great.

Note: Please forgive the optical illusion effect that the stripes give off in these pictures. They look totally normal in person—I swear!

For starters, the print I chose reminds me of pajamas. More specifically, Bananas in Pajamas. The fabric itself is fine: a 100% cotton stretch twill with 15% stretch across the grain. It’s a true medium weight though, and I think these pants—when sewn in a woven—would work better with a floatier, lighter textile.

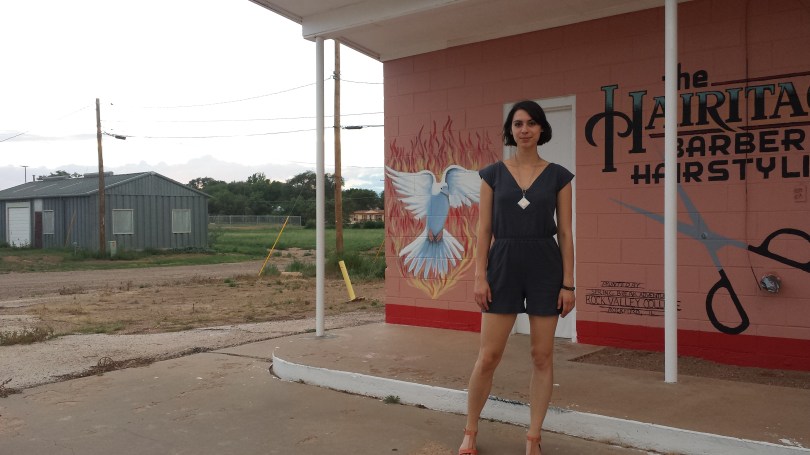
Kelli’s woven variation tutorial on the True Bias blog suggests going up two to three sizes, so I cut a 12 instead of an 8 this time. I must have forgotten about the stretch in these pants when cutting—looking back, I should have cut a size 10 considering the 15% stretch. Here’s what they looked like before surgery:

woven hudson pants beofrewoven hudson pants before

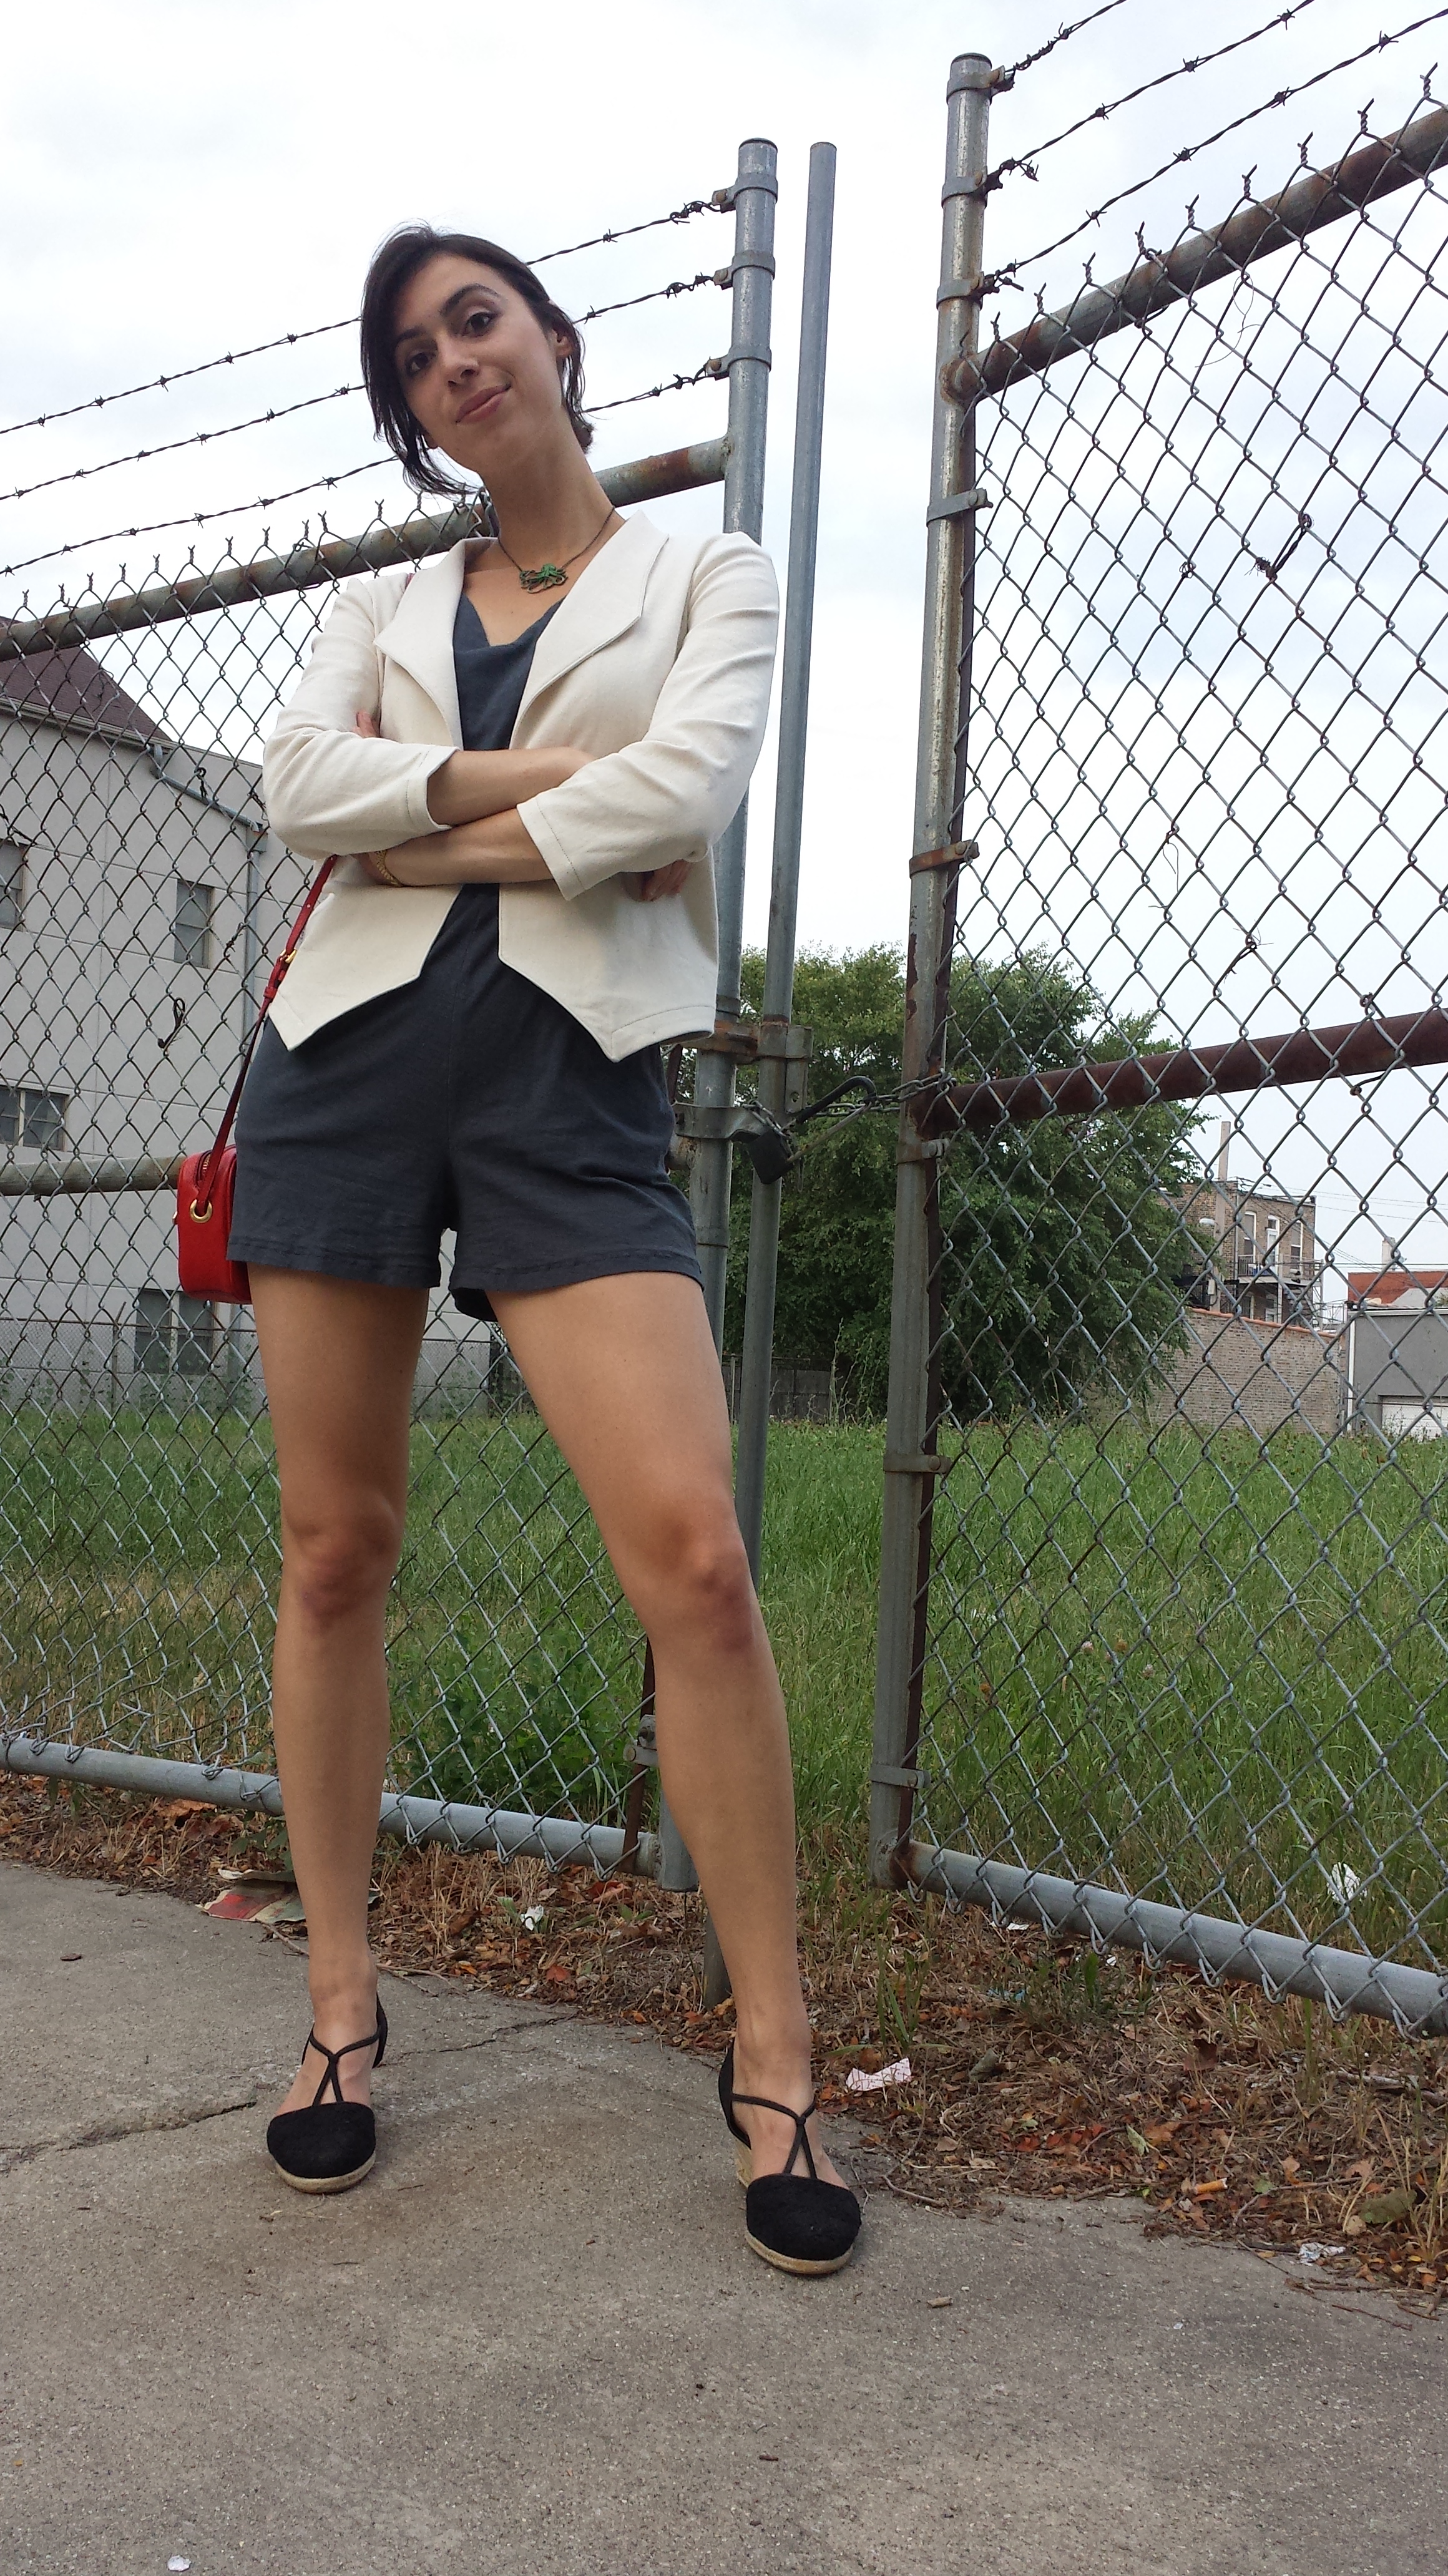
As you can see, they are YOUUUUGE, even with a 3/4″ seam allowance (rather than the suggested 3/8″ SA). There’s tons of excess fabric in the crotch and hip area, and the length is kind of off. Here’s what they look like postsurgery:

woven hudson pants true bias bottom half

The fit still isn’t fantastic in the crotch area, but I had to stop somewhere. Fiddling anymore with these pants would’ve driven me mad, especially considering I sewed the elastic waist too loose the first time around and had to pick out a bunch of zigzag stitches through two layers of fabric AND the elastic. Woof. These pants were truly a test in patience. Pretty sure I got a C–.

woven true bias hudson pants

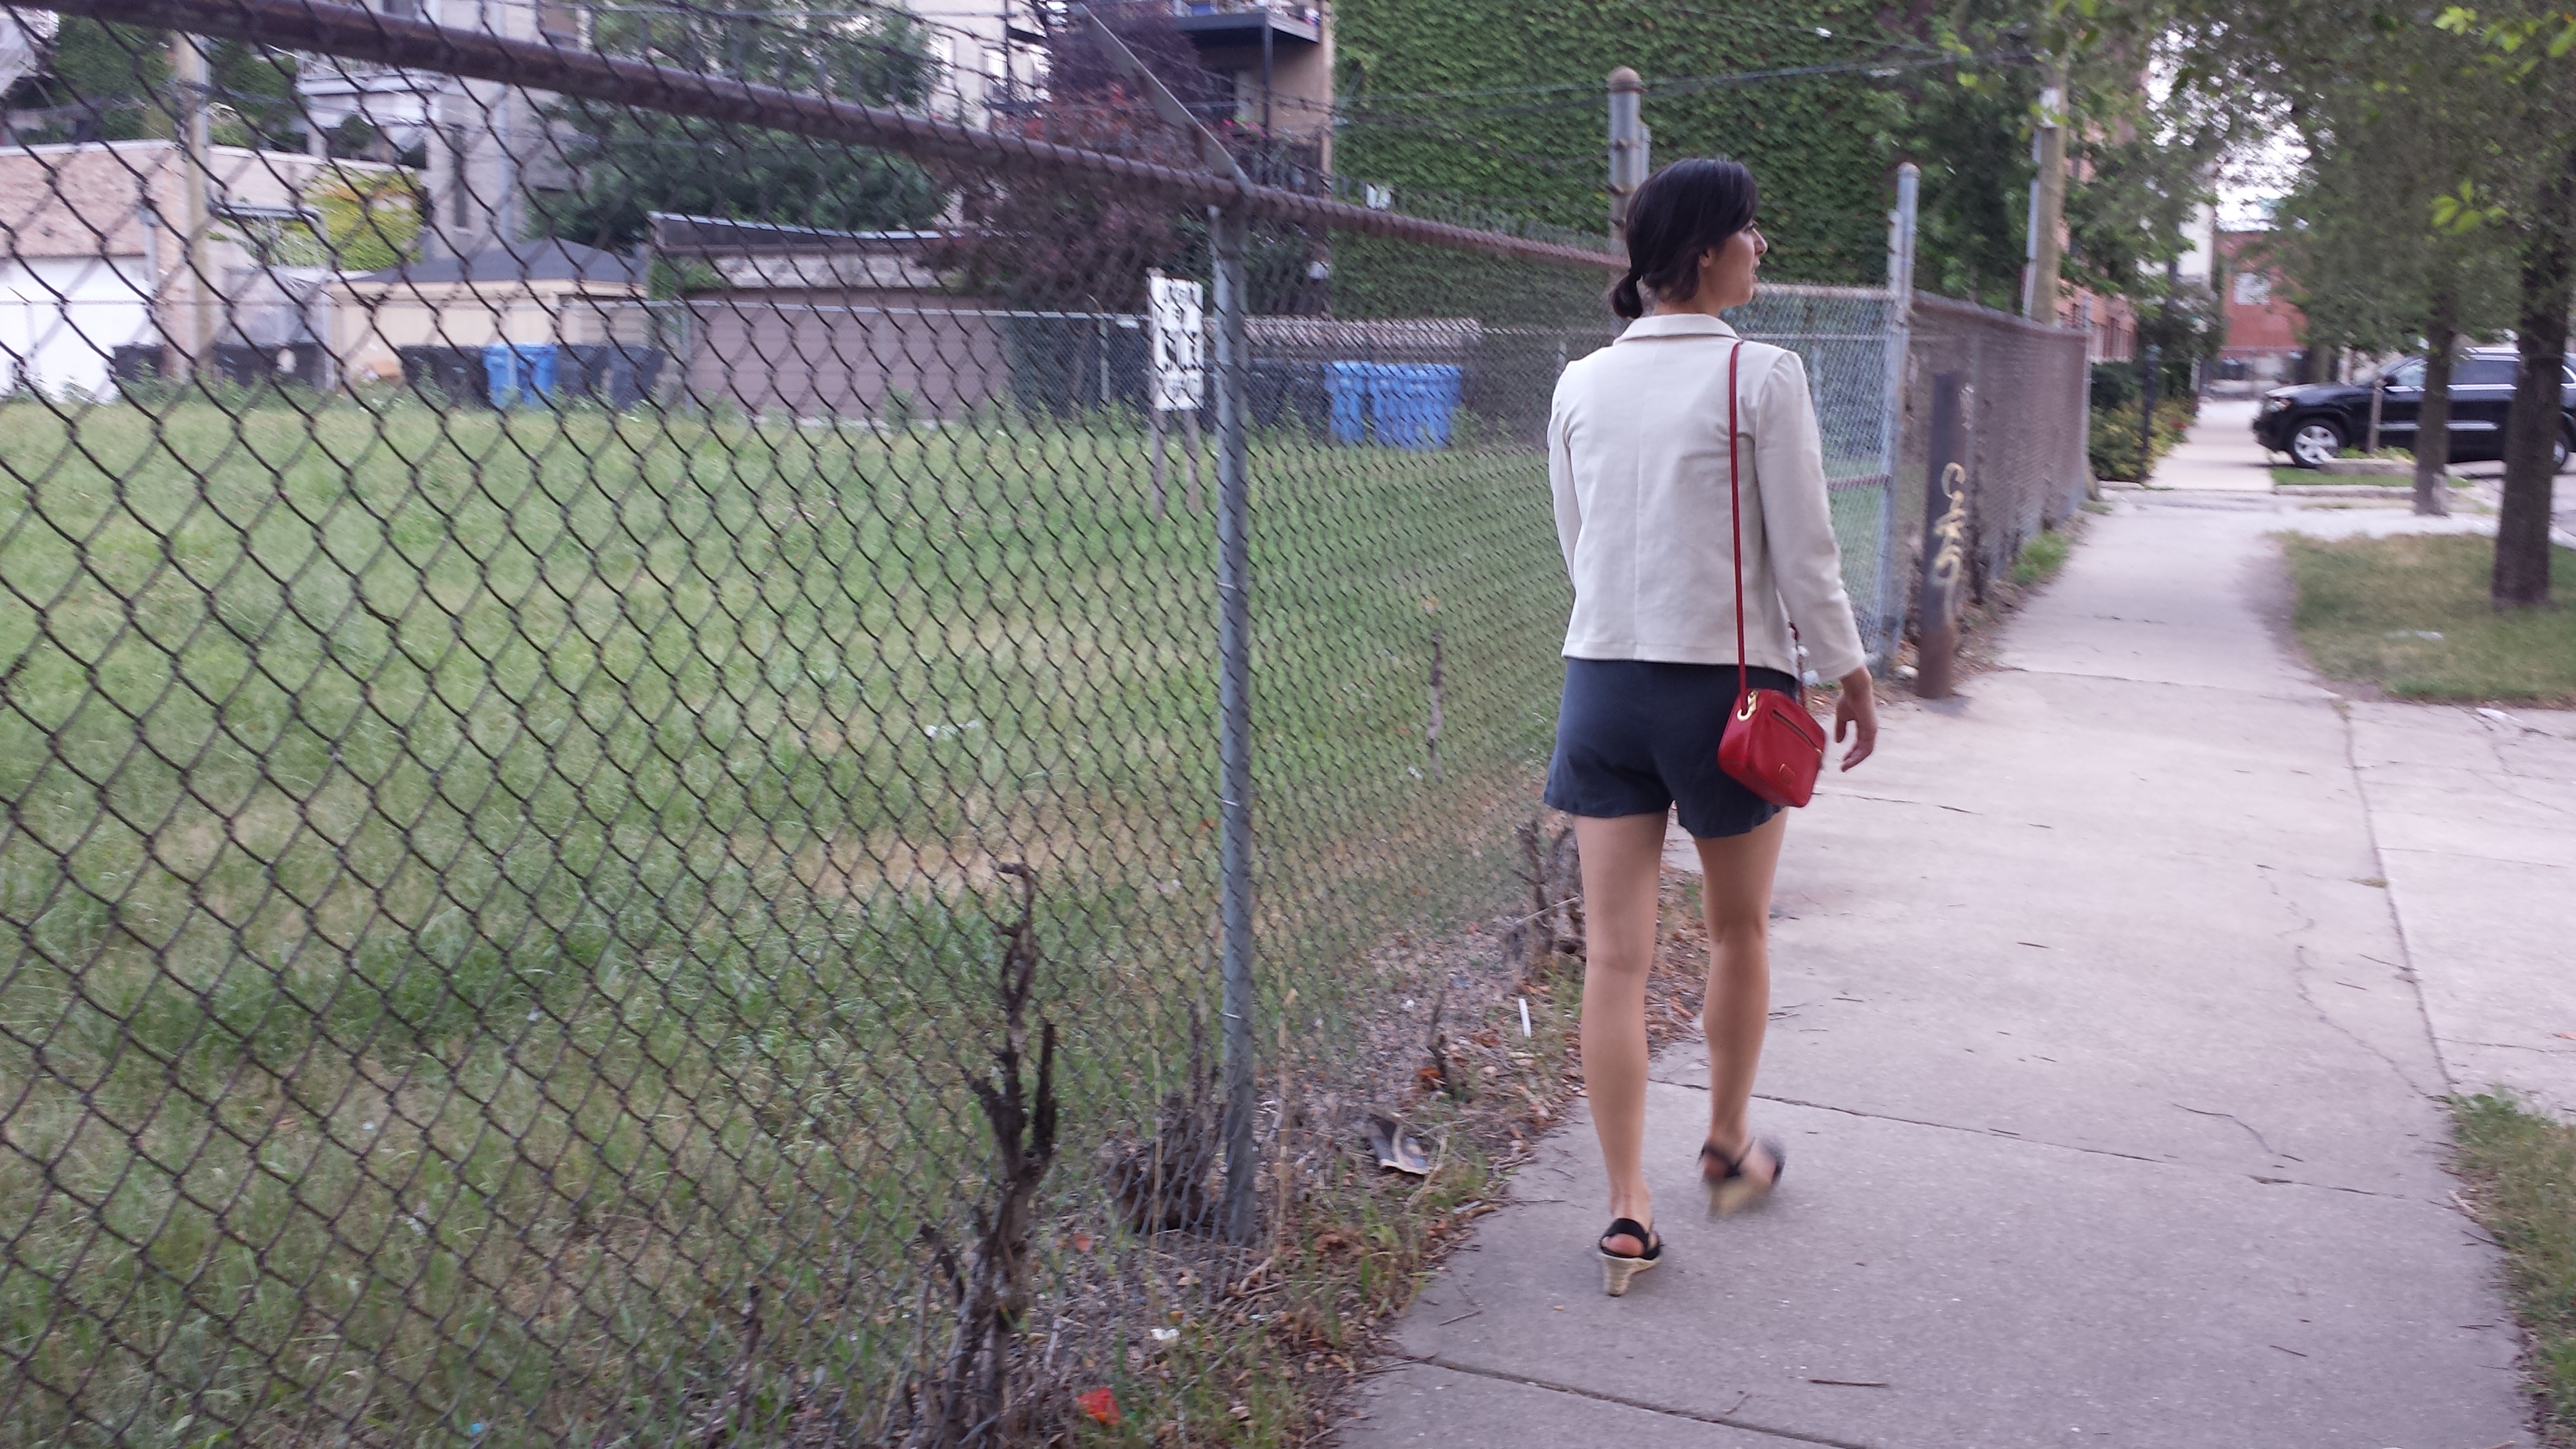
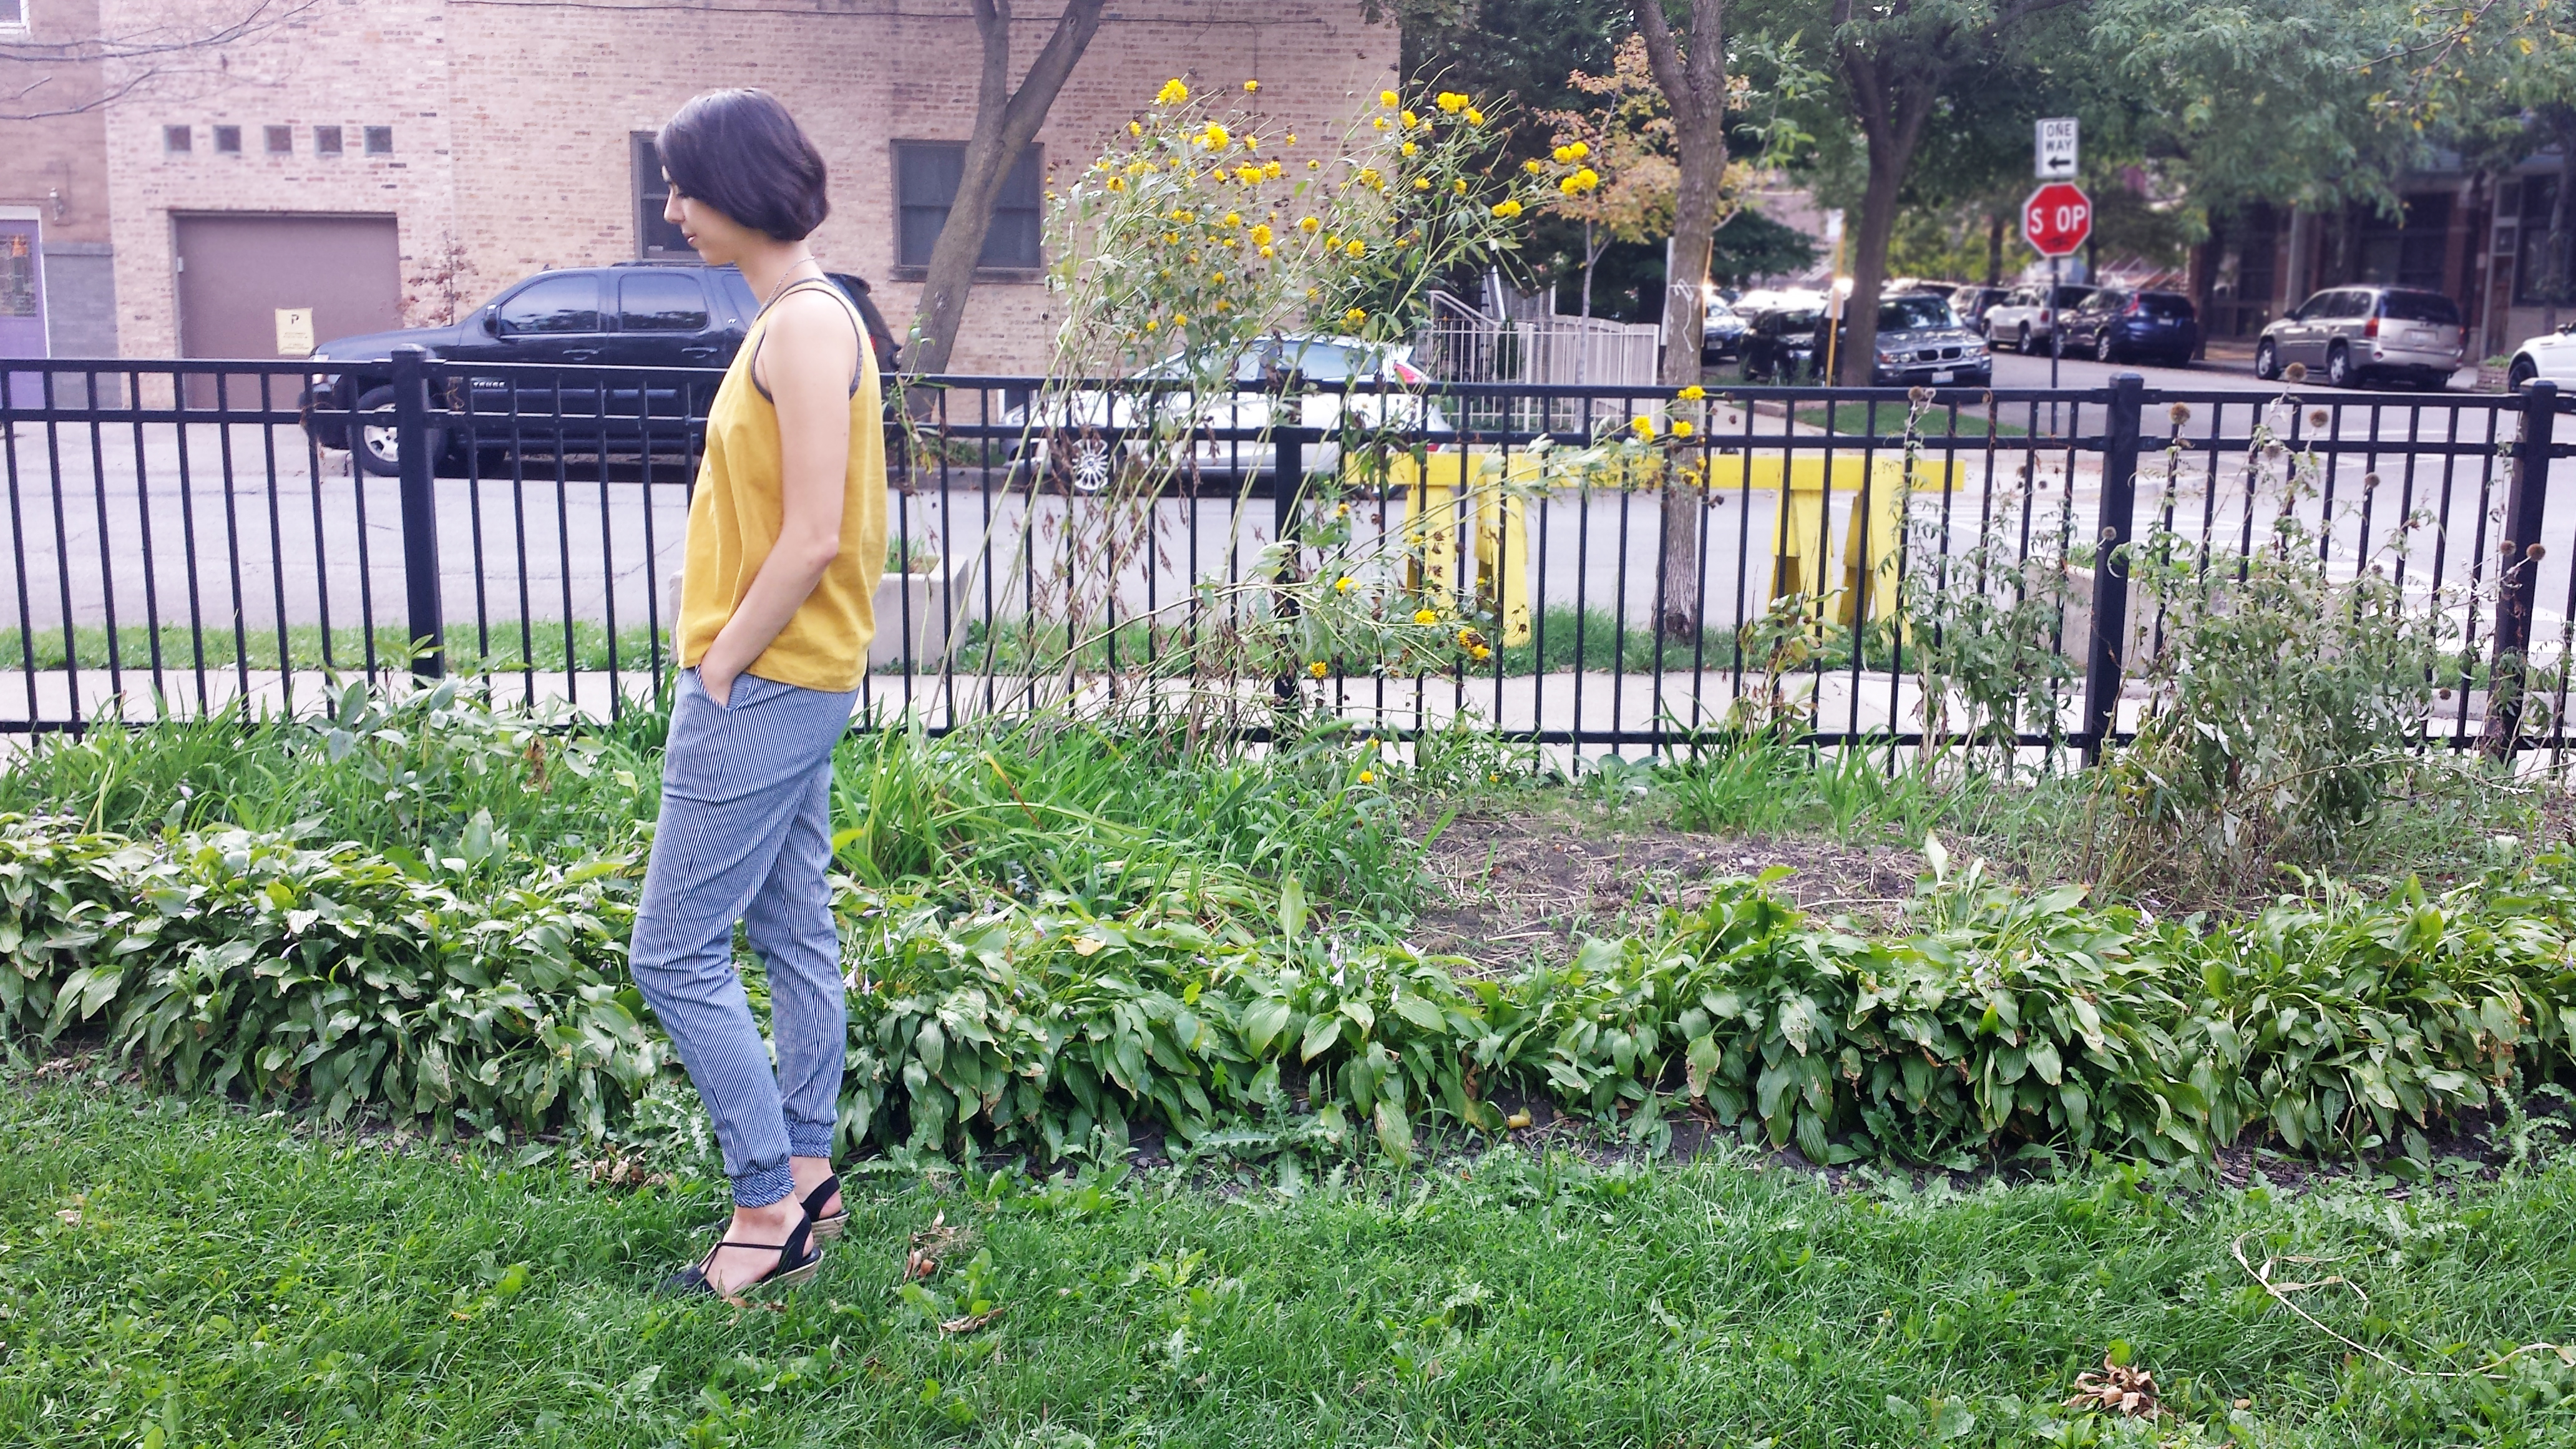
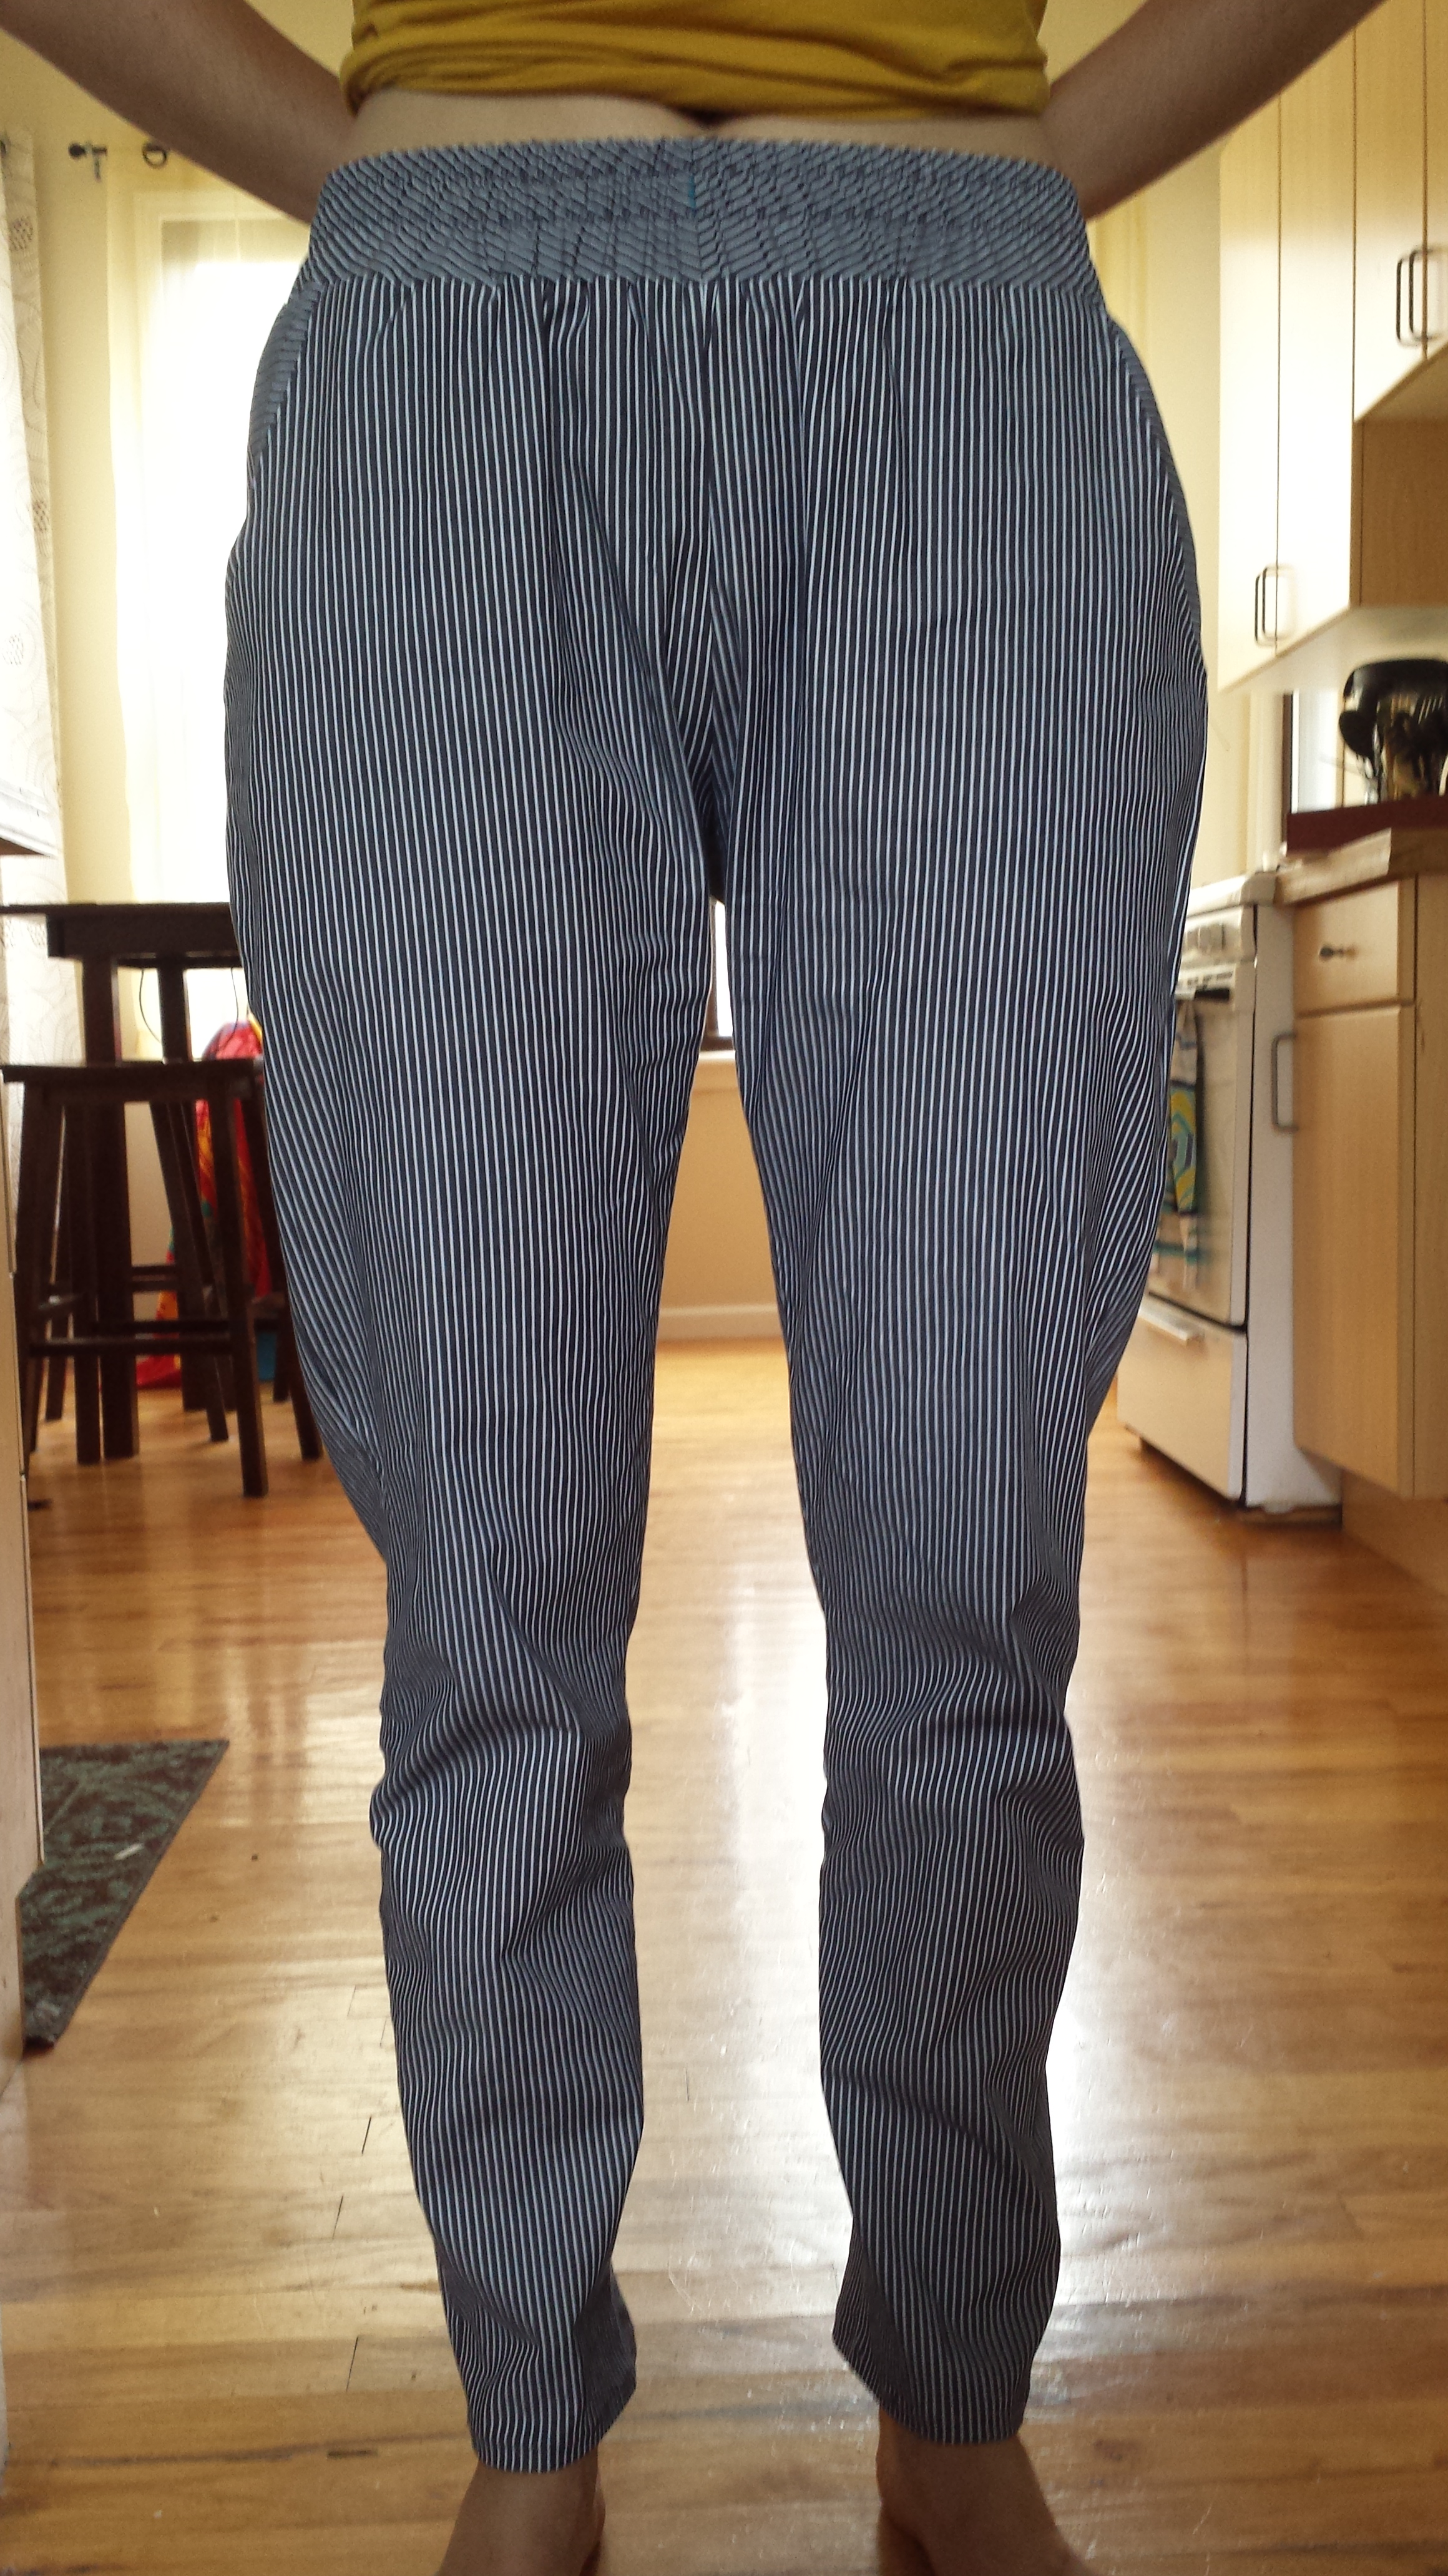
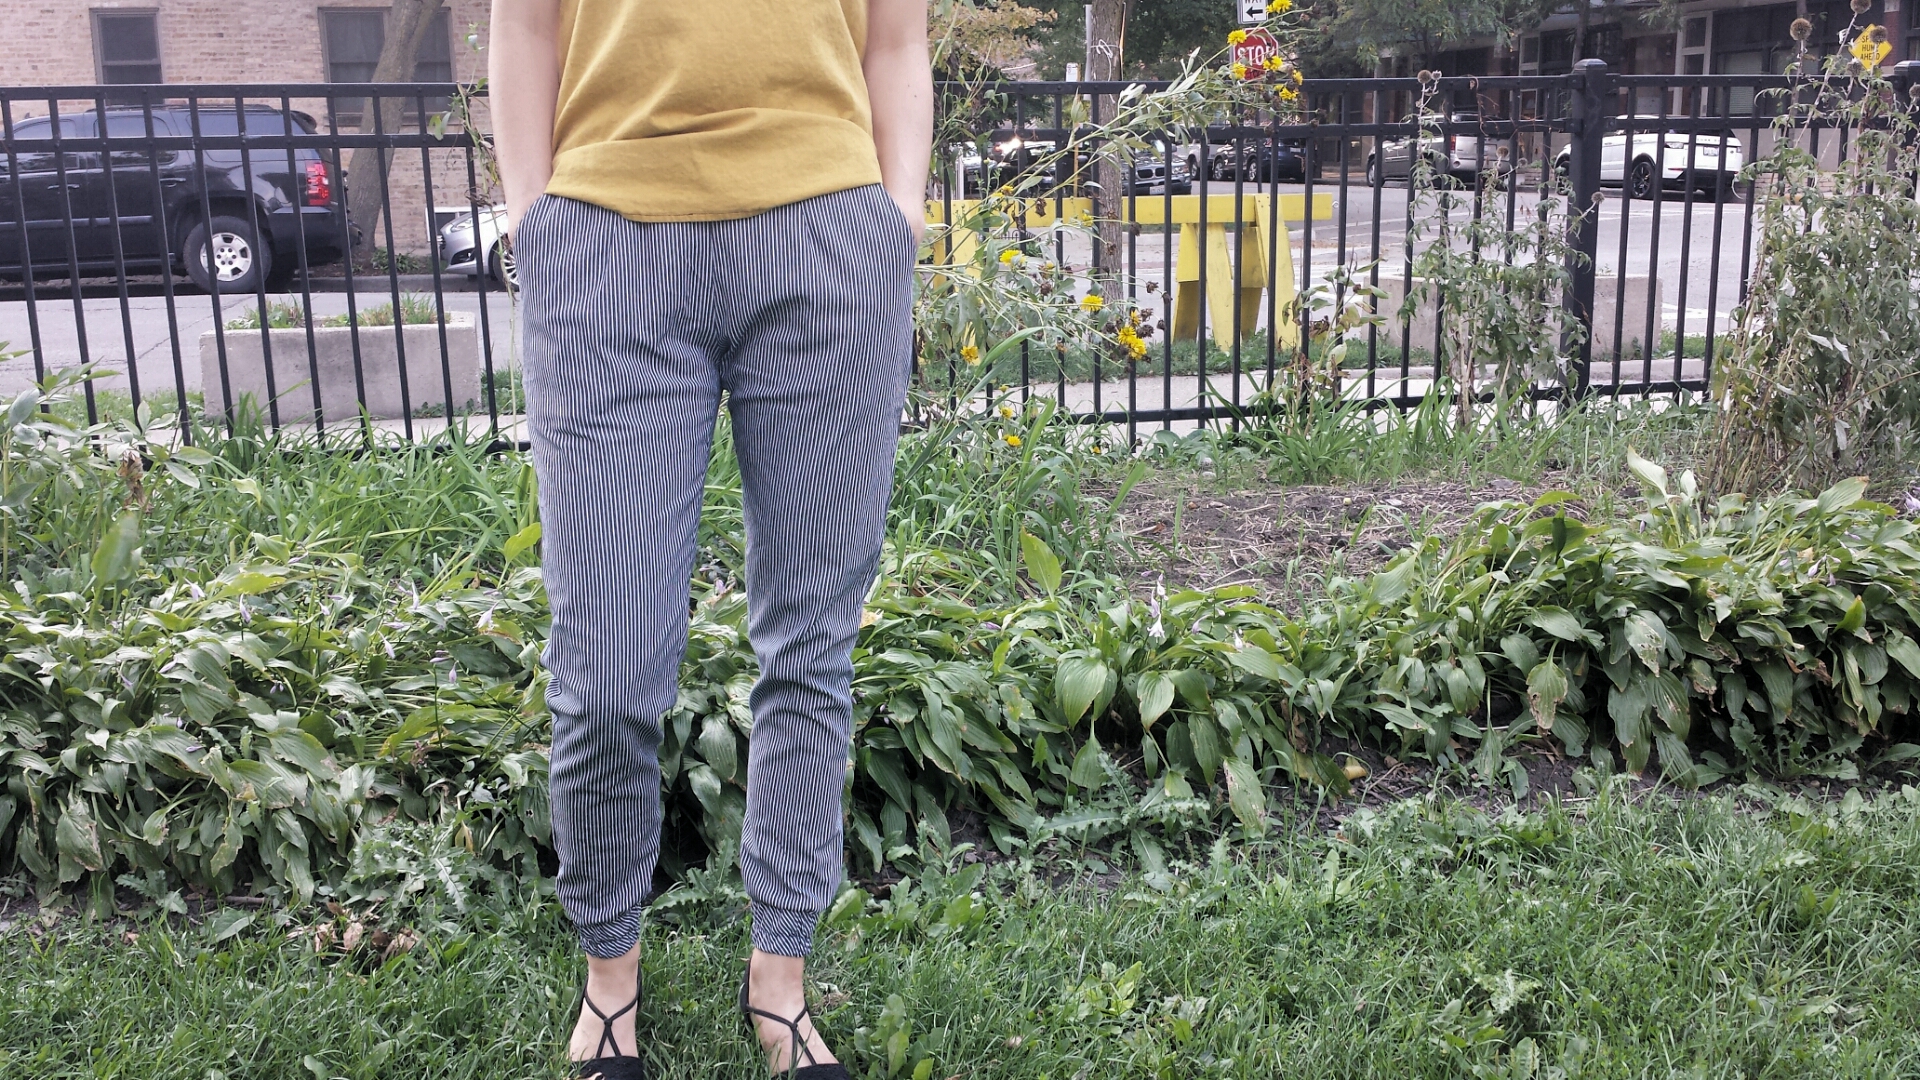
You might be thinking, “They’re not too shabby from this angle!” You’re right, they’re not. But what fun would a sewing blog be if it didn’t reveal its hideous underbelly? In the interest of transparency, here’s what the crotch looks like now (avert your eyes if you want to avoid gratuitous bunching):

woven true bias hudson pants
No, those aren’t headlights. It’s just the way the fabric on my top is folding.

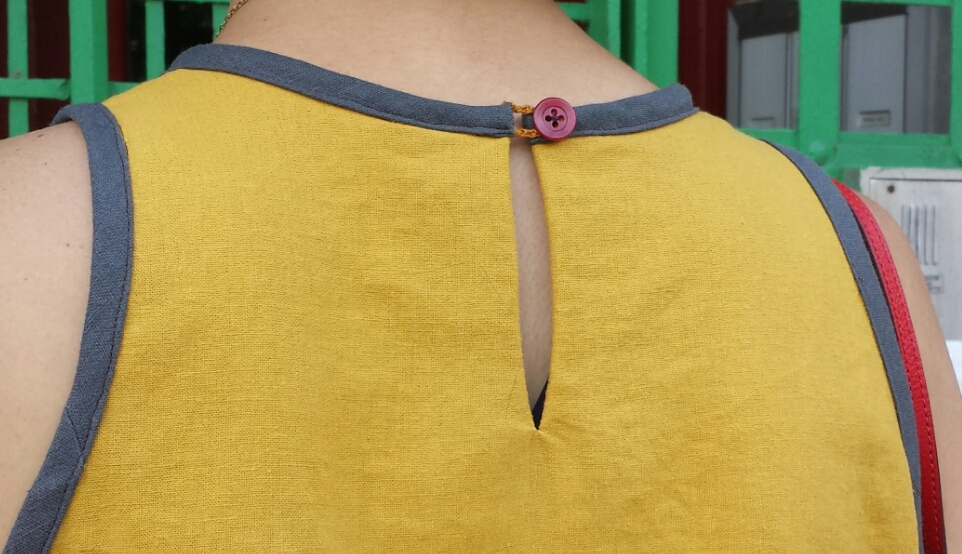
Elastic-waisted anything always rides up that high on me. The extra crotch depth I added deters any camel toe, but there’s just still too much fabric there. I added a few darts to help fix the issue, and they definitely help. I’m glad I added the cuffs, as I think the pants look more modern and less pajama-like now. See, it’s not all cold pricklies and pessimism here!

woven hudson pants cuff

The Nitty Gritty

  • Lengthened the pants 3″ at the lengthen/shorten line.
  • Followed Kelli’s instructions re: altering the pocket pieces, adding length to accommodate for hemming instead of sewing on an ankle band, and grading the leg opening a little wider. I cut the main pocket on the cross grain, and I love the way the stripes play against each other.
  • Cut the waistband on the bias for similar stripey goodness.
  • Ended up adding cuffs, cut on the bias after measuring the leg opening.
  • Added 1″ to the crotch depth on the front and back pattern pieces. On my second pair of knit Hudsons, I added 1″ to the crotch length. That seemed to help a little bit with the camel-toe issue I had on the first knit pair, but the second pair seemed to pool too much in the front, so I figured it might be more of a depth vs. length issue. For a little background on that, here’s what the Reader’s Digest Complete Guide to Sewing has to say:

The crotch depth is the measurement of the distance from your waist to the bottom of your hips, taken when you are sitting. . . The crotch length is is actual length of the crotch seam, taken between the legs, from waist at center front to waist at center back.

  • Added two small darts in the front and back to reduce some of the excess fabric.

woven hudson pants

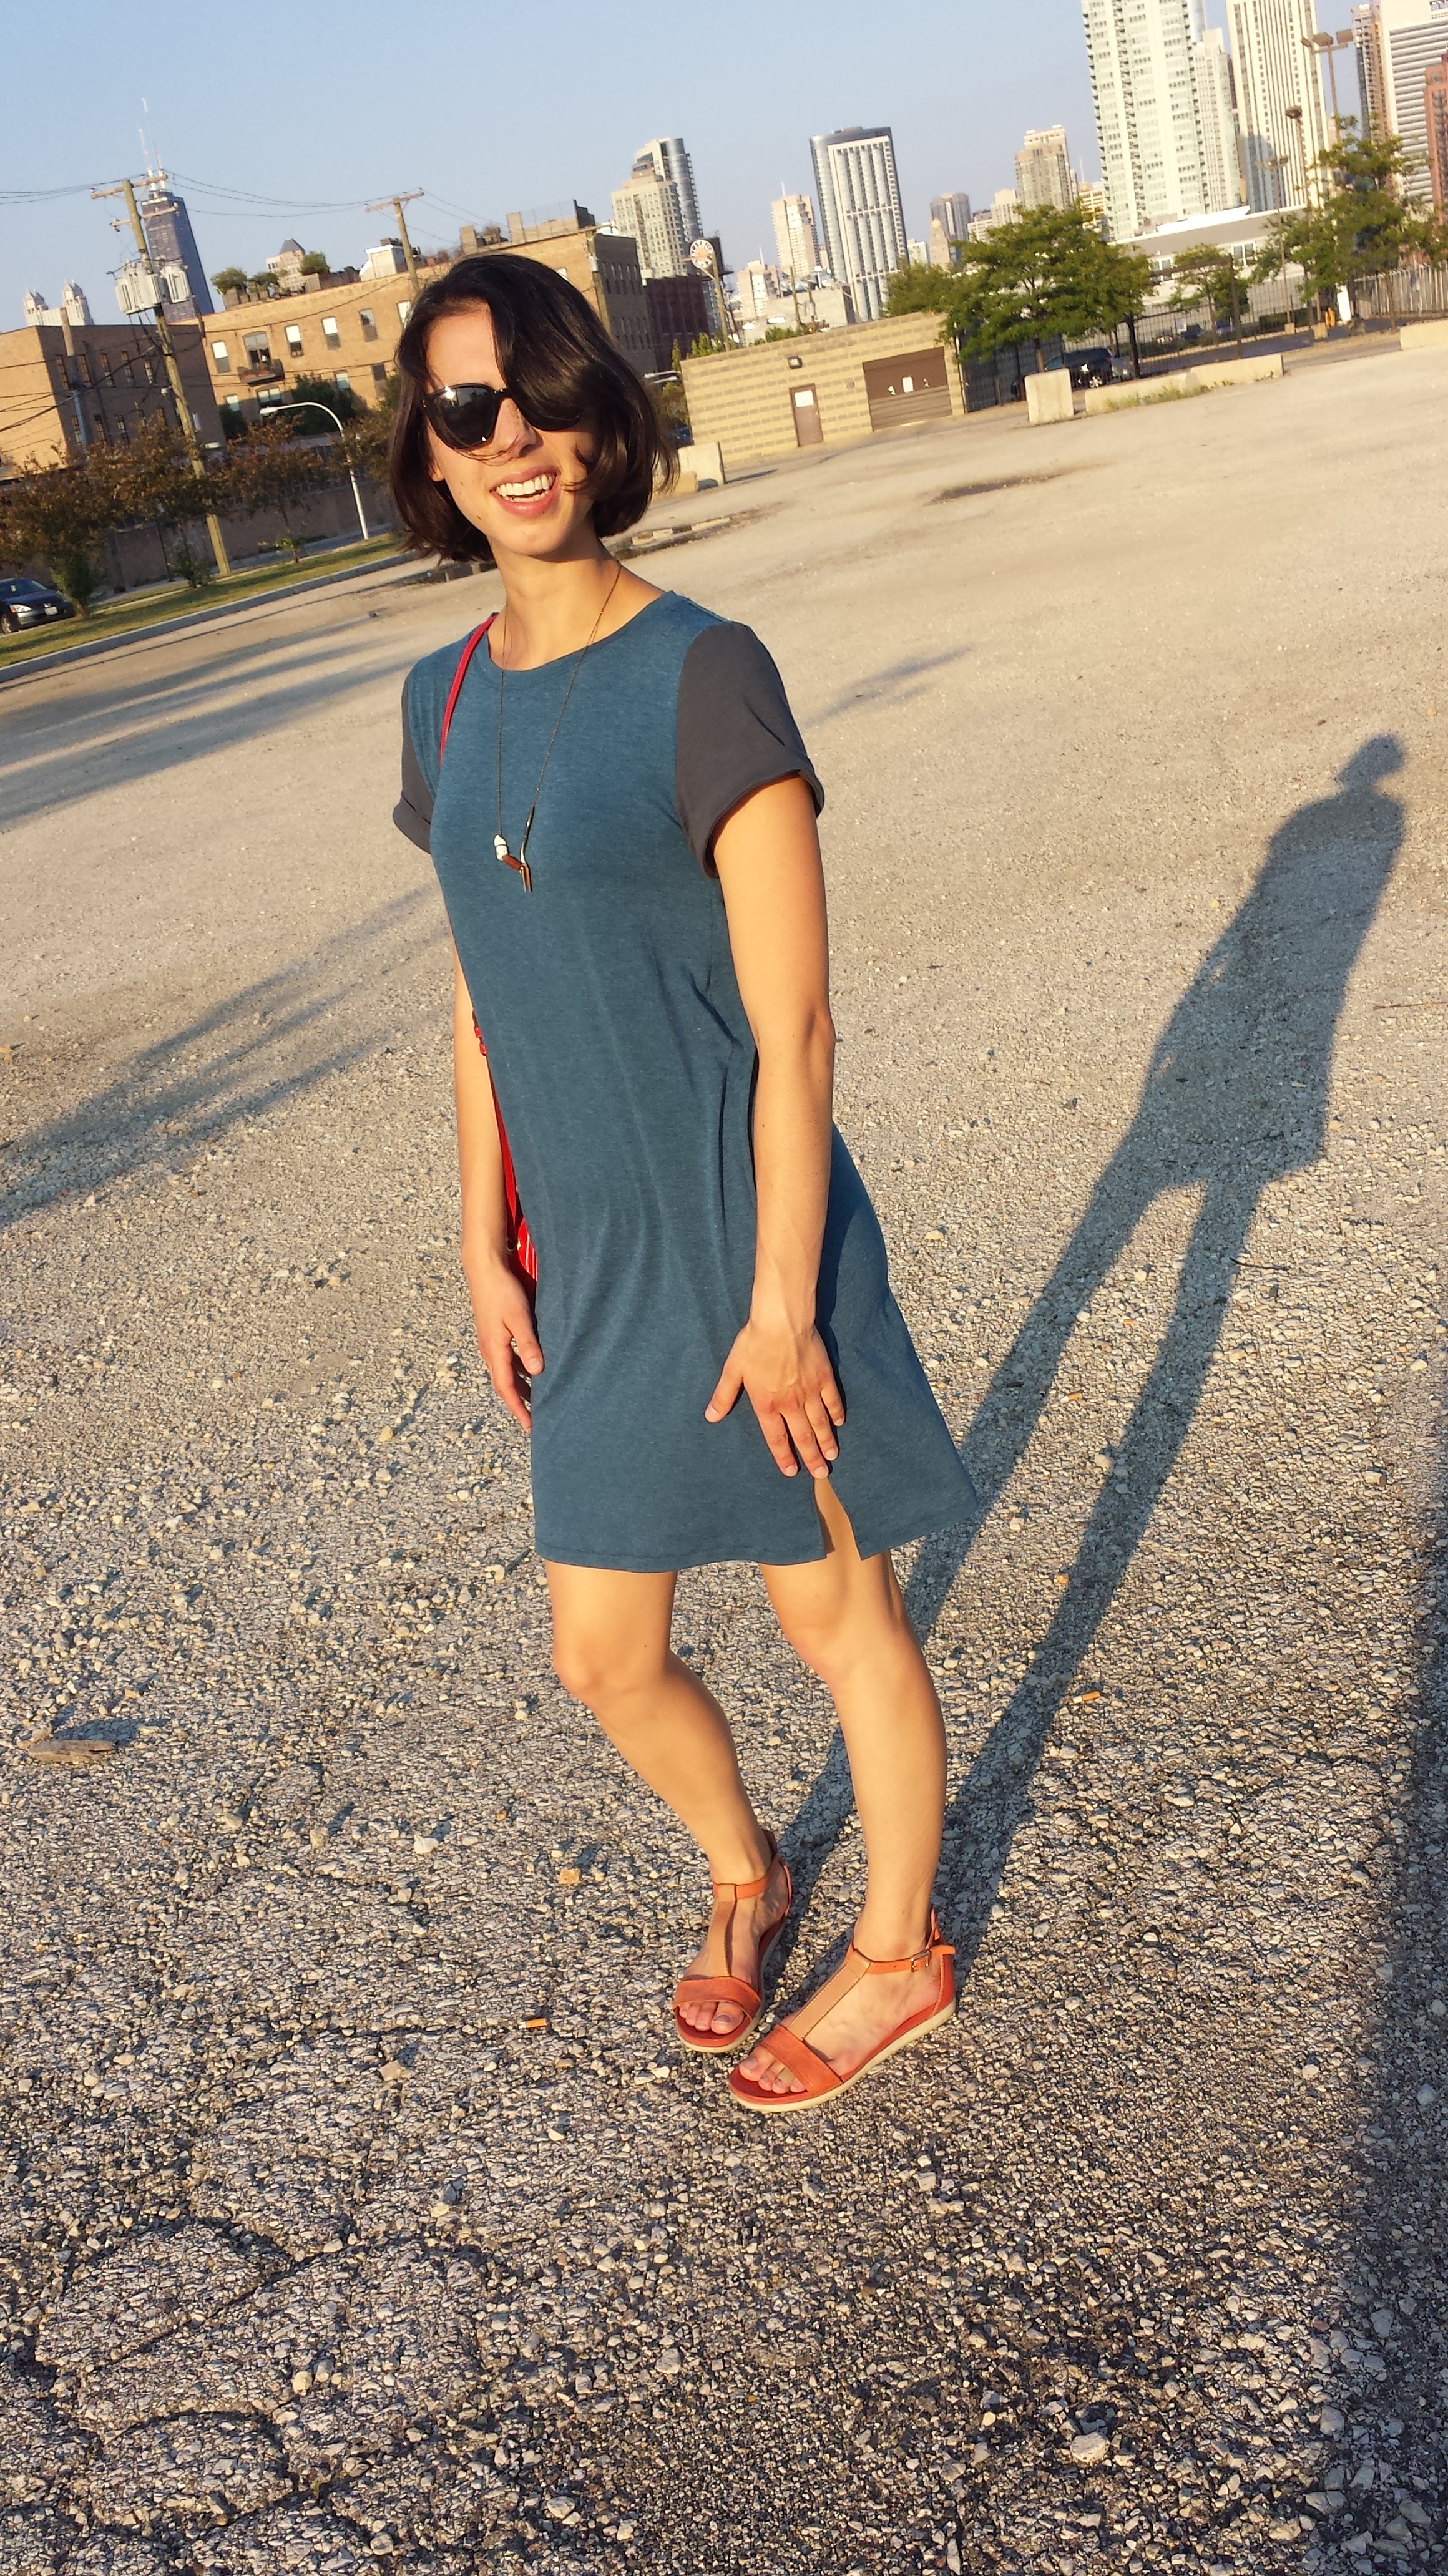
All-in-all, these pants aren’t a total bust. They really are comfortable and I think they look okay styled with my Ruby Top. In reality, I’ll probably wear these around the house on my work from home days. Normally I’m wearing shredded old pajama shorts and a tank top when I work from home, so these pants will be a vast improvement. And who knows—maybe they’ll grow on me.

Have you sewn any duds lately? If you have, at what point did you throw in the towel? Commiserate with me, it’ll be fun!

Knit Inari Tee Dress

inari tee dress

Some sewing projects are a labor of love. Maybe you take extra care cutting a slippery fabric (rayon spandex: I’m lookin’ at you), or maybe you take the time to hand sew an invisible hem. For me, button-up shirts and silly, time-consuming Halloween costumes fall into the Labor of Love category. If you’re Morgan from Crab & Bee, your sister’s insanely gorgeous wedding dress falls into that category. If there’s an award for Sewing Goddess of the Year, Morgan deserves it. I don’t even want to know how many hours she put into conceptualizing, pattern hacking, and sewing that two-piece gown. All I know is that It. Paid. Off.

But, life is full of ebbs and flows. Sometimes literally: This week, my apartment flooded during a flash flood, but then I got a haircut I really like. See?! For every action there’s a reaction. Yin and Yang. Fire and Water. Easy and Hard. For every painstaking sewing project we put ourselves through, there is another satisfying, easy-peasy one waiting in the wings.

inari tee dress
“Can you get a shot of the split hem?”

And that’s where the Inari Tee Dress dress comes in. I spotted this loose-fitting dress over on Heather’s blog and immediately fell in love. I’d been meaning to try a Named Patterns garment for awhile now, and their take on the tee dress is just so chic. It’s got a cocoon silhouette that just skims the body, a split hem (cue googly eyes) that’s slightly longer in back, and sleeves with a permanently rolled up effect. Basically, this thing is crying out for Madewell-style knockoffs from the sewing world. (It’s our DUTY, people.)

named patterns inari tee dress

The Inari Tee Dress, which is a 2-for-1 pattern that also includes a crop tee option, calls for woven fabric or knit fabric with “slight stretch.” Since I wanted to do a test version before I cut into my precious tencel denim, I decided to do some serious stash-busting. The gray fabric is leftover from my Sallie romper, and the blue knit is leftover from a tank top I made for Marc and a knit Scout. It definitely has more than some “slight” stretch. To accommodate for this, I sewed the US size 8 with 1″ side seam allowances (grading to 1/2″ at the armhole) instead of the prescribed 3/8″. Anything more fitted might be venturing into bodycon, which would not be in keeping with the pattern’s slouchy, effortless style.

inari tee dress

Even now, the material clings a LOT, especially when you’re in the midst of a wind gust. Despite its clinginess, I love this dress and have already worn it a few times. The drafting of the knit neckband is pretty spot on (no gaping to speak of!) and construction was a breeze. I used my walking foot, a lightning bolt stitch, and ballpoint needle to sew everything together. To hem the bottom, I just used a simple zigzag stitch, flipping to a longer straight stitch at the side vents. Next time, I’ll understitch the rolled-up accent on the sleeve to keep the seam on the inside, and I’ll probably use a facing instead of a knit neckband when I sew this up in a woven.

Have you tried any patterns from Named? I’ve had my eye on the Alexandria Peg Trousers and Kielo Wrap Dress for awhile now. After Inari, I might not be able to help myself…

A Very Wearable Morris Blazer Muslin

morris blazer grainline studio

The Morris Blazer was an impulse buy. It went something like this: 1). Jen announced the Morris Blazer on the Grainline Studio blog on April 21. 2). By 10:30 a.m. that day, I’d already purchased and printed out the PDF. Don’t get me wrong: I would’ve eventually bought the pattern anyway. But in the instant-gratification world of PDF sewing patterns, I generally try to read other folks’ reviews and determine how much I’d wear it before clicking purchase. It’s for my bank account. (And my social life. And my sanity.)

morris blazer
Grainline Studio’s Morris Blazer sample

That tactic fell by the wayside this time, though, since I was a total goner when I set eyes on Morris. I own two blazers, back from the time when my 9–5 occasionally required it. Those Banana Republic jackets do the trick when I need to look professional, but they scream STUFFY. Morris, on the other hand, has a modern, cropped cut, and it’s designed for stretch wovens—cha-ching! I ordered some natural-colored stretch twill at $3.50/yard from Fabric.com with every intention of making a muslin as soon as I got the fabric.

morris blazer grainline studio

Fast-forward four months later, and I finally got to work on it. Apparently the dog days of summer are when I decide it’s appropriate to sew a blazer. The humidity must be slowly killing what’s left of my rational brain cells. Anywho, here’s the nitty gritty:

morris blazer grainline studio

Morris Blazer

  • Size: 8
  • Modifications: added 2″ to the body and 1.5″ to the sleeves at the lengthen/shorten lines
  • Fabric: medium-heavyweight stretch cotton twill with 10% stretch across the grain and great recovery (I think it’s got about 2% Lycra, though it’s not available on Fabric.com anymore so I’m not certain)
  • Interfacing: Omitted (GASPGASPGASP). Since this was supposed to be a quick muslin, I didn’t bother running out to buy the necessary tricot fusible interfacing. Luckily, the fabric is weighty enough that it doesn’t look too droopy or stretched out along the hems—yet. I’m hoping it won’t bag out, but only time will tell.
  • Construction: I followed the pattern directions and referred to Jen’s sew along. That was especially helpful when attaching the facing, since that step was a little confusing to me in the pattern directions.
  • Finishing: I used a zig-zag stitch to finish all the inner seams, but then I decided that Hong Kong seams would look baller on the back and side seams. I luuuuurve them. The bias strips are self-made using some leftover floral cotton.
honk kong seams grainline studio morris blazer
*my precious* during the construction process

I wore this blazer (in air conditioning) all night and it was supremely comfortable. I’m kicking myself for waiting so long to make it, since summer is “almost over” and only now did I decide to sew an off-white blazer. Instead of wallowing in poor-timing sorrow, I’ll leave you with two questions (and a dumb photo shoot outtake):

80s ladies
“Imma try a sassy one”
  1. Have you ever tried the Hong Kong seam finish?
  2. Is the whole No White After Labor Day thing an evil, evil lie?
sallie jumpsuit romper closet case files

A Sallie Romper and the Conclusion of the Coyote Saga

I wouldn’t recommend driving 1,800 miles in three days. But if you have to do it, you should reward yourself each night with a cocktail at a local watering hole, or a 40 of Bud Light while lying in bed in a Motel 6. No one’s judging here. Both happened last weekend, when the bf and I flew out to the Southwest to finally pick up his car. In case you’re unaware of the Coyote Saga, here’s the rundown (and some pictures for good measure):

canyonlands, utah
Canyonlands was pretty magical

May 14: We set out on the first day of our road trip, which started in Chicago (home) and continued on to Denver/Boulder, Canyonlands in Utah (the most beautiful place I’ve ever been), Vegas, and the Grand Canyon. After seeing the Grand Canyon (which was barely visible since it was sleeting that day :-/), we planned on spending the night in the small town of Gallup, New Mexico, before heading to Santa Fe and then eventually making our way home.

grand canyon bust
GREAT visibility at the Grand Canyon…

May 22: I was gazing up at the stars through the sunroof right after nightfall when I felt a huge thump. “Oh my god. I think I just hit a white wolf,” says Marc. The phrase was so ridiculous I laughed out loud, but the laughing quickly turned to mild terror when we realized that the radiator was busted, leaving us stuck on the side of the road in the middle of nowhere, Arizona. Apparently white wolves coyotes get real big out in the Southwest (RIP coyote). After sitting two hours in genuine fear that a Jeepers Creepers–type character was going to steal me and eat my skin, a tow truck arrived and we spent the night at a Travelodge in Holbrook, AZ. Long story somewhat shorter: We got a rental car for the next few days and explored Albuquerque and Santa Fe before driving back to the body shop in Holbrook, where we learned that the car would take at least a few weeks to fix. We couldn’t afford to take any more time off work, so a flight back to Chicago it was.

prom picture
Marc asked me to prom in Albuquerque. I said maybe.
silver saddle motel santa fe
The Silver Saddle Motel in Santa Fe was our home for three nights.

July 23: Nine weeks later, the car was finally fixed. We flew back to Phoenix and drove a rental the three hours from the airport to Holbrook, and then spent the next 2.5 days driving back to Chicago. Aside from almost hitting a stray dog eating roadkill in the middle of the road (crisis averted), the drive was blessedly uneventful. Humid as hell, but uneventful. SAGA OVER.

sallie jumpsuit romper

So as timing would have it, this iteration of Sallie made it’s debut in Phoenix, Arizona, on a 100º evening. It was so comfy—despite the heat—that I bust it out the next night in Tucumcari, New Mexico, another middle-of-nowhere town along old Route 66.

sallie jumpsuit romper closet case files

Here’s a breakdown of my Sallie:

  • Cut a straight size 10, adding 1.5″ to the bodice and lining and lengthen the bottoms 1″ at the lengthen/shorten line.
  • To make this into a romper, I chopped the pattern off 4.5″ below the crotch, but next time I will definitely alter the bottoms using Heather’s tutorial
  • I bought 4 yards of this gray knit fabric (not sure of the content, I picked it up for $2.95/yard at Textile Discount Outlet in Pilsen) with the intention of making a jumpsuit muslin, but then I decided to go with the romper length. After making a romper muslin (which was necessary bc of crotch length issues), I had ALMOST enough to make my “real” version, but I had to use a similar black knit for the lining. It peeks out a bit, but it doesn’t bother me.
  • I think I could afford to go a tiny bit shorter with the length, but it’s comfortable as is so I might just leave it.
  • For construction, I cursed the fact that I don’t have a serger, and then sewed this up using my regular machine and a ballpoint needle with either a straight or zigzag stitch, depending on the seam. I broke my twin needle (WAH!) so I hemmed the shorts with a zigzag, too.

I never thought I’d be a romper/jumpsuit person, mainly because whenever I’ve tried one on the crotch looks obscene. It turns out that I LOVE this romper because it actually fits my torso. If you’re on the fence about this look, I highly recommend giving this pattern a try, plus you get maxi dress and tank options if those are more your thing.

How do you feel about jumpsuits? Willing to give ’em a go?

Floral Laurel

colette patterns floral laurel

The intro of this post was going to be different. It was going to be about how this is dress is not a timely make. It’s midsummer where I live and floral dresses—especially ones with sleeves—belong in early spring. It’d go on to talk about how I’ve struggled with managing my sewing queue and keeping up a good pace the past few months—why, I’m not sure yet. An active summer social life? Watching more movies and cooking more dinners and doing more YouTube yoga? Maybe.

But instead of delving into possibly existential topics, I’m going to talk about how I only just realized that Fabric.com shipped me the wrong fabric for this Colette Laurel dress. And I made the thing without even realizing it. I’ve never been the most observant person, but I don’t think I’m completely oblivious. (I hope.) Here, you be the judge:

kaffe fasset floral fabric

Months ago, after going back and forth about which Kaffe Fasset floral to buy, I finally settled on this one. What I got was this one. I mean, a floral’s a floral, right? They all look alike?! She says with a crazed look in her eye. Luckily, I really love the mistake fabric. Just like my parents love my little brother. (Just kidding, mom. We know you wanted three kids all along. Wink wink.)

Fabric-confusion aside, this dress was really fun to sew.

colette patterns laurel dress

The size 8 muslin I sewed was pretty roomy, so I sewed a straight 6 this time around. I could get the muslin on and off easily without unzipping it, so I decided to omit the zipper on this dress. I also ended up interlining the fashion fabric with cotton batiste to eliminate any transparency. This was my first time interlining, and it went relatively smoothly save for a little bit of fabric pooling in the front.

colette patterns floral laurel dress

Here’s the laundry list of changes I made to the pattern and during construction:

  • Slashed the pattern at the neck to fix a slightly gaping neckline using a Fashion Sewing Blog tutorial (Colleen G. Lea you are a goddess)
  • Lowered the bust darts by 1/2″
  • Lowered the back darts by 1″
  • Added 2″ at the lengthen/shorten lines
  • Widened the seam allowance a bit at the natural waist for more definition
  • Sewed a 1.5″ hem instead of 2″
  • Eliminated the back zipper
  • Sewed a keyhole back using a tutorial from the free Laurel extras PDF download

colette patterns floral laurel

The pattern calls for more hand sewing than I’m used to, with slipstitches to secure the bias tape at the sleeves and a catch-stitched hem. I’m slowly but surely coming around to appreciate hand stitching. It’ll be a slow burn, I’m sure. My favorite detail on the whole shebang is the keyhole back, which serves the dual purpose of looking cute and making it slightly easier to get in and out of the dress since I made it sans zipper. Form and function wins out!

I love my little mistake dress, but I know I should’ve gotten around to making it earlier. Has anyone else been sewing seasonally inappropriate stuff? Tell me all your dirty sewing secrets.

P.S. I’m still going to wear the hell out of this dress on summer days below 80º F. B-)

The Octopus Negroni Shirt

Colette Negroni shirt

This shirt makes me happy for so many reasons. No other piece of clothing has given me the chance to say the word octopi or the phrase yes, its a very octopussy shirt so many times. I’m also ecstatic to get this out of my queue, since I’d been staring at 3 beautiful yards of cotton lawn octopi for far too long.

Ever since I successfully made an Archer for myself, Marc’s been asking for a short-sleeve shirt of his own. I settled on Negroni by Colette Patterns after seeing Lladybird’s version, so next came the fun/tricky part: finding the ideal fabric. I’ve had decent luck with Fabric.com, whose selection led both Marc and me to the octopi fabric, surprising since—while I loved it—I thought it might be a little too loud for his taste. I guess you don’t really know someone until you go virtual fabric shopping with them.

colette patterns men's negroni shirt

When it came to sewing, I added 2″ to the lengthen/shorten lines, and then made a muslin to test the fit. Marc’s 6’2″ and slim, and the medium fit him great in the body. It turns out I didn’t need to add the length after all, so technically the medium fit him right out of the package. Oh, men. Your lack of hip curves and boobs makes fitting so much easier.

Colette Negroni shirt

Here are the few changes I made to the final product:

  • Used self fabric for the facing, since the “lightweight” fusible interfacing I used on the muslin seemed miiiighty bulky. The Negroni has a pretty wide facing, but this cotton lawn is lightweight enough to feel comfortable while still providing some stability for the buttonholes and buttons. I fused the collar per the instructions, since a little extra stiffness there is fine.
  • Omitted one pocket and sewed it without the flap.
  • Omitted the collar loop. I think it would’ve made the Octopi look smug, or something.

Colette Negroni shirt

The sleeves came out pretty long when hemmed per the instructions, but Marc rolls most of his sleeves so the extra length isn’t a big deal. I cannot stress enough how much I love this Cotton and Steel Tokyo Train Ride fabric (also available in a few other colorways). It sewed like a dream, and the shirt is super soft yet crisp enough to hold its shape. Plus OCTOPI FOR DAYS! They’re so cute that I don’t even care that the yoke is horribly pattern matched. (I was running out of fabric, so certain octopi look like mutants with a bajillion tentacles.) I’ve already seen this material popping up all over Instagram, and I can’t wait to see what other folks are making with it!

And now, back to sewing myself a few things. My half-finished floral Laurel is currently crying out for attention on my ironing board, so that’ll be next. How about you? Sewn anything for a friend or S.O. lately?

Tessuti Ruby Top in Mustard Linen

Tessuti ruby top

Remember when cutaway necklines starting cropping up a few years ago? I’ve always liked the look, but the bra situation can be dire. Standard bras are out, since the straps peek out in both the front and the back. I avoid strapless bras like the plague unless one is absolutely necessary. For now, I settled on pairing this top with a racerback bralette bought from Gap Body god only knows when.

Tessuti Ruby top

Bra-talk aside, I am thoroughly pleased with this pattern: the Ruby Dress/Top from Tessuti Fabrics. This is the second Tessuti pattern I’ve sewn—the first being the Mandy Boat Tee. The directions were yet again straightforward and easy to follow, and the cut of the pattern is modern and flattering, probably on a variety of shapes. Here are the deets:

Fabric: mustard linen blend from JoAnn fabrics; leftover dark-gray linen for the binding

Size: cut an AU size 10. The units are in cm, so a 10 roughly corresponds to 35.8″-31″-39.8″ bust-waist-hip measurement. I decided to go with the bust measurement as my guide, since the top slightly flares at the hemline. It’s a teensy bit big, but the style’s so forgiving that a little extra width doesn’t make a huge difference.

Alterations to the pattern: added 1″ of length to the bottom hem

Tessuti ruby top facing

Construction: I followed the pattern’s directions for the French seams, double-turned hem, keyhole facing, and thread-chain-loop closure. Tessuti has a helpful tutorial on its website for those of us who haven’t sewn a thread loop before. Sewing one reminded me of the hours I used to spend making friendship bracelets that were no doubt lost or thrown away after a week. Oh to be a fickle adolescent again.

Tessuti Ruby Top back

I strayed from the directions in two places: stabilizing and binding. I couldn’t find tearaway Vilene shields (used to prevent the neckline and armholes from stretching), so I just staystitched those edges. It seemed to work fine. As for the binding, the pattern instructs you to apply the binding to the right side and then stitch in the ditch to secure. I REALLY HATE stitching in the ditch, so I took a tip from the Thornberry blog, which suggests applying the binding to the wrong side and then topstitching in place on the right side. That worked great for me! It’s the same technique used in the Colette Sorbetto top, and I once again used Colette’s trusty tutorial for making continuous bias tape.

Tessuti Ruby top

One of my favorite things about wearing linen (blends) is that you don’t have to worry about wrinkles. It’s the one fabric where massive wrinklage is expected. (We all know wrinklage should be a word so let’s just accept it.) I’d be wary of anyone who wears linen without having it become a creased mess. There’s probably some Stepford shit going on there if that’s the case.

And that’s that! Ruby in linen gets a big thumbs up from me. Have you sewn any Tessuti patterns lately? I’d love to hear about any favorites!

Thoughts on Me Made May 2015

So, Me Made May 2015 has come and gone. What did I learn? To respect the almighty #mmm15 hashtag and its inspiring bounty of outfits. That I have a uniform and it consists of a boxy T-shirt, long necklace, and jeans. That a mere year ago, I didn’t understand the importance of “finishing” the guts of a garment. Whoopsies.

me made may 2015
The four most popular makes, according to Instagram likes. Clockwise from upper left: modified Scout Tee, french terry Mandy Boat Tee, jersey Mandy Boat Tee, split-hem Linden Sweatshirt

It’s been a pretty revelatory month. My goal for the challenge was to wear one me-made garment five days per week. In reality, I wore one (and sometimes two!) me-made garments 24 out of 31 days. I’d say that’s a goal achieved!

Here are my top takeaways from this year’s Me Made May:

  1. Taking a daily outfit pic is exhausting. For those of us who don’t revel in posting #OOTD snaps on Instagram, taking bathroom selfies or forcing a loved one to take yet another boring outfit photo gets old real quick. The founder of MMM makes it clear that the challenge isn’t about daily pictures, but it kiiiind of seems like par for the course.
  2. I should make more bottoms. I wore me made bottoms five times throughout the challenge: a half-circle skirt three times and Hudson Pants twice. Looks like I’ll bump a skirt and pair of Maritime shorts up to the top of my queue.
  3. I’m in love with my Mandy Boat Tees. Seriously, I don’t know how Tessuti made such a gem of a one-size-fits-all pattern. I’ve got two of ’em, and I’m not ashamed to admit to wearing each twice throughout the challenge. I suggest making several for yourself if you haven’t already. Kelli’s got the idea.
  4. Building a handmade wardrobe takes time. Some sewing folks seemed to wear me-made from head-to-toe for most of the month. It’s inspiring and daunting at the same time! I’ve accepted that either 1). These folks have been sewing for awhile, and I too can get there someday, or 2). They have seven arms.
  5. Take a look back to take a step forward. You don’t realize how far you’ve come with a skill until you look back at earlier work. I was planning on wearing a floral shirtdress I’d made last year until I spotted the armhole seams, which I’d left completely unfinished. The humanity! That day I didn’t have the time to go back and fix it, so I sadly left the dress in the closet. It’s hard to believe that I made that dress just one year ago. Since then, I’ve learned a lot about finishing seams. What’s the point of making a beautiful dress if the insides look all gnarly? I don’t have a serger, so I’ve used pinking (probably more often than I should have), zigzag stitches, flat-felled seams, and french seams to finish my woven garments. The Reader’s Digest Complete Guide to Sewing contains a bunch of pretty finishes, and I’m excited to try even more.

I’d say Me Made May was a success. It’s revealed holes in my wardrobe and lit a fire under my buns to get sewing again. I definitely won’t miss taking those daily pics, tho. I like to limit my selfie game to horribly unflattering Snaps, thank you very much.

Did you take part in MMM? How’d it go for you?