two tessuti mandy boat tees

Tessuti Mandy Boat Tee x2

The concept of one-size-fits-all is kind of insane. In the real world, Sisterhood of the Traveling Pants–style magic does not exist. Most one-size items leave us wondering: Will this look like a cute shift dress or a muumuu? Is it a crop top or an accidental underboob tank? This Buzzfeed pictorial, “This Is What One Size Fits All Actually Looks Like on All Body Types,” does a pretty good job of debunking the one-size-fits-all myth. Some garments fare much better than others, but not one piece of clothing got a universal thumbs up from the women in the testing group.

Naturally, I was a little wary when I came across my first one-size-fits-all sewing pattern. But the beauty of sewing, rather than buying, a one-size-fits-all garment is that you can alter the pattern however the hell you want! Lengthen, shorten, take in the side seams, deepen the neckline, whatever. I’m so glad I took the leap (can I call it a leap if the pattern was free?) and sewed up that Hemlock Tee. It was only a matter of time before the Tessuti Mandy Boat Tee—also *free*—found its way to my cutting table floor.

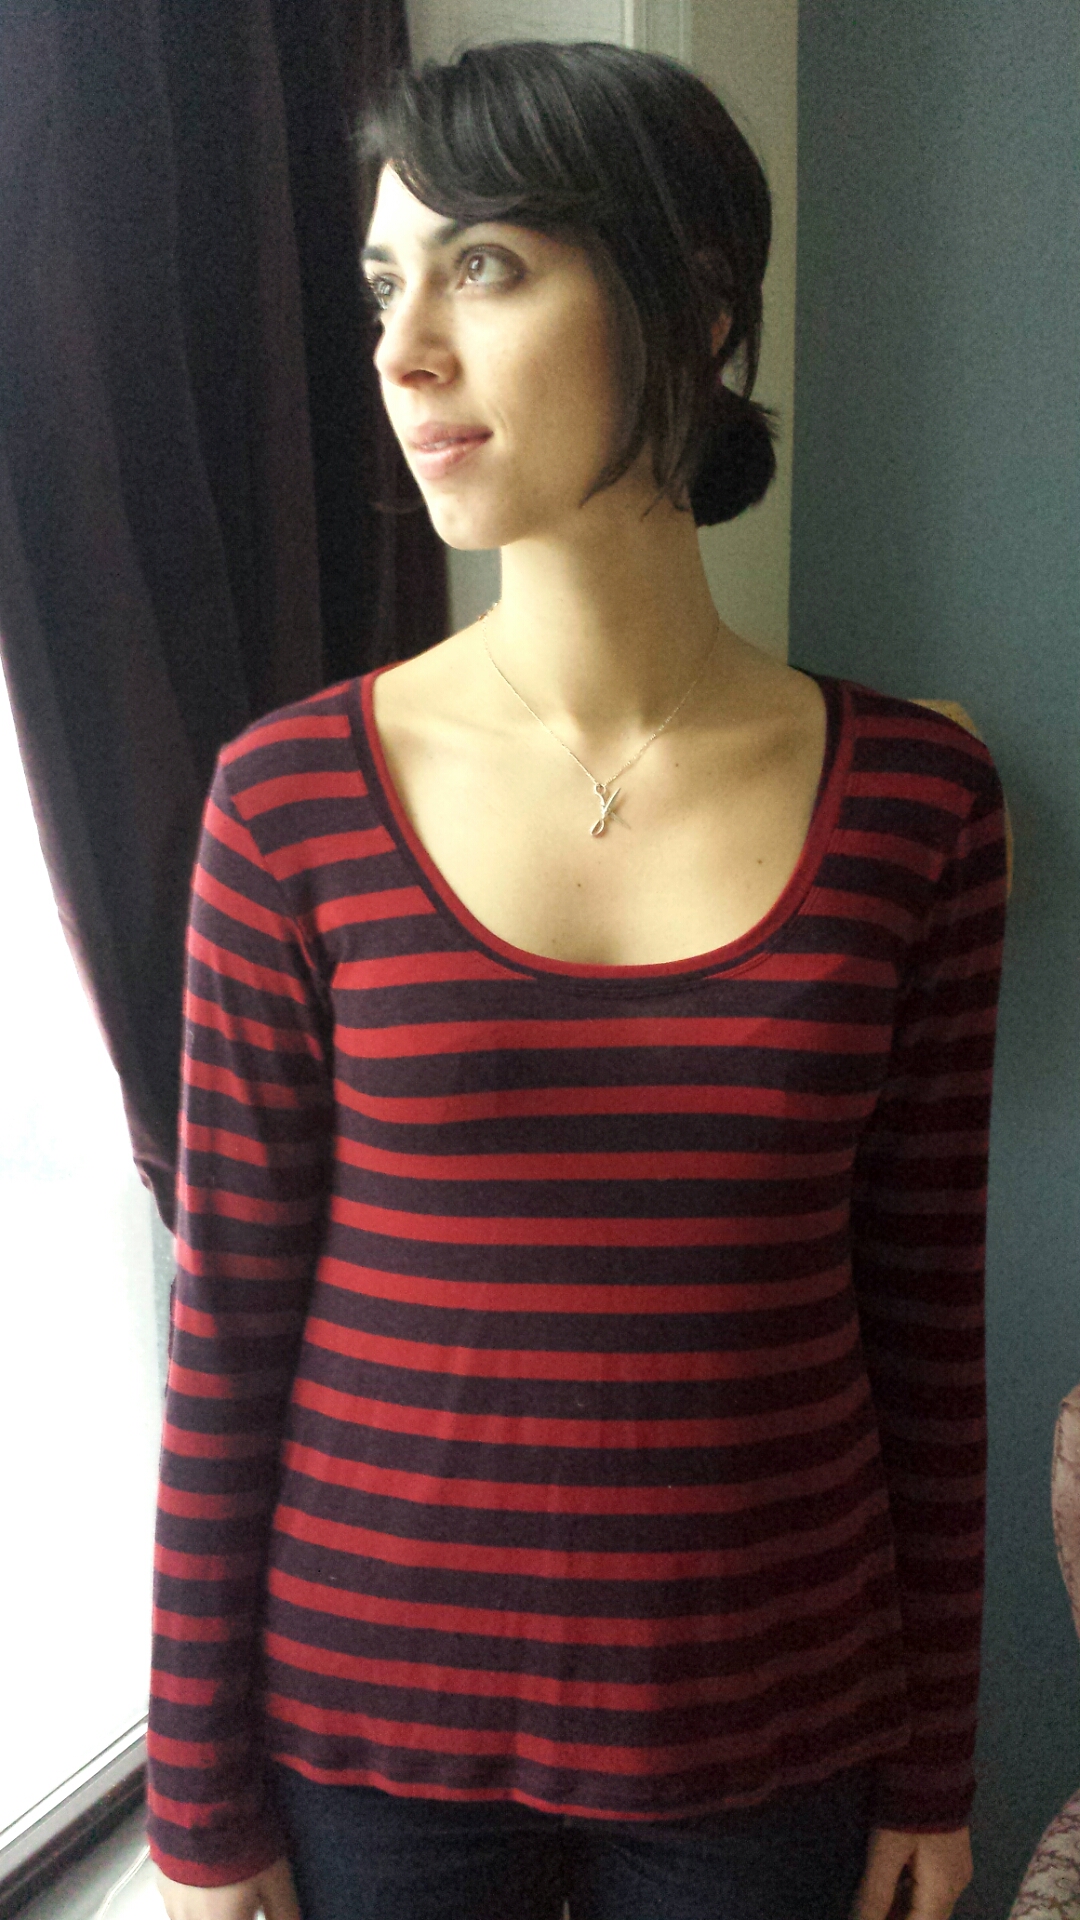
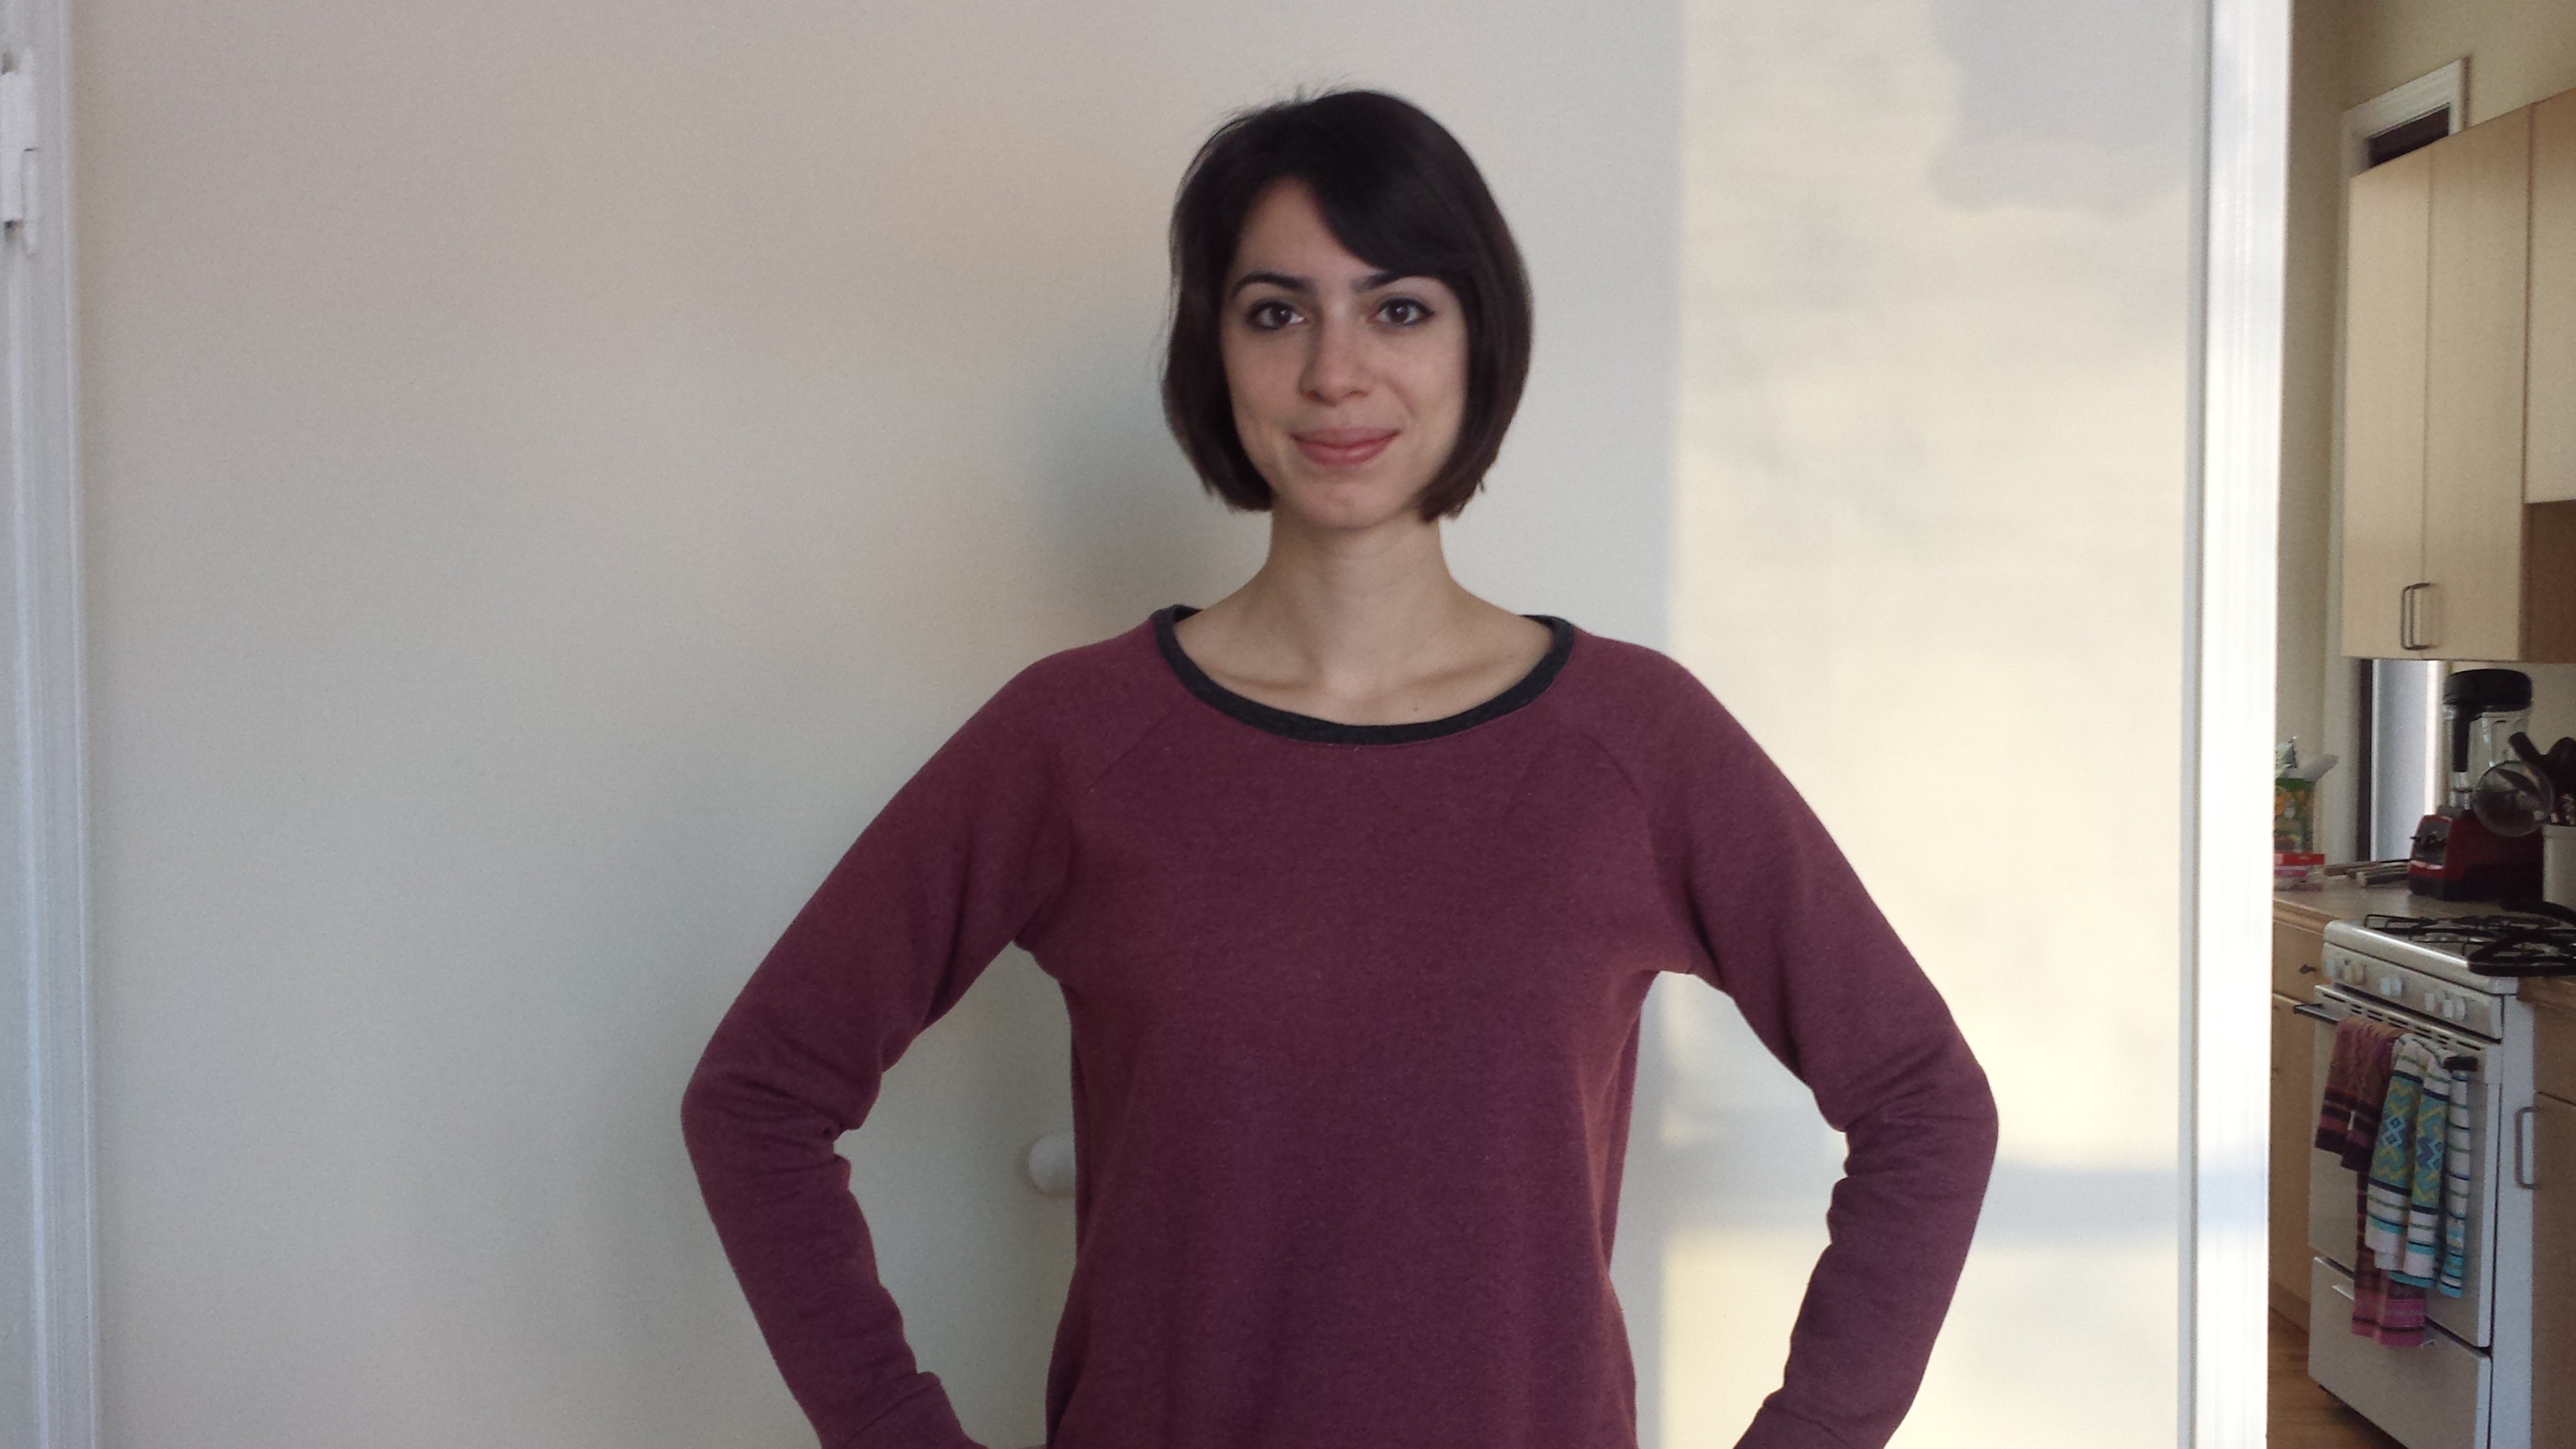
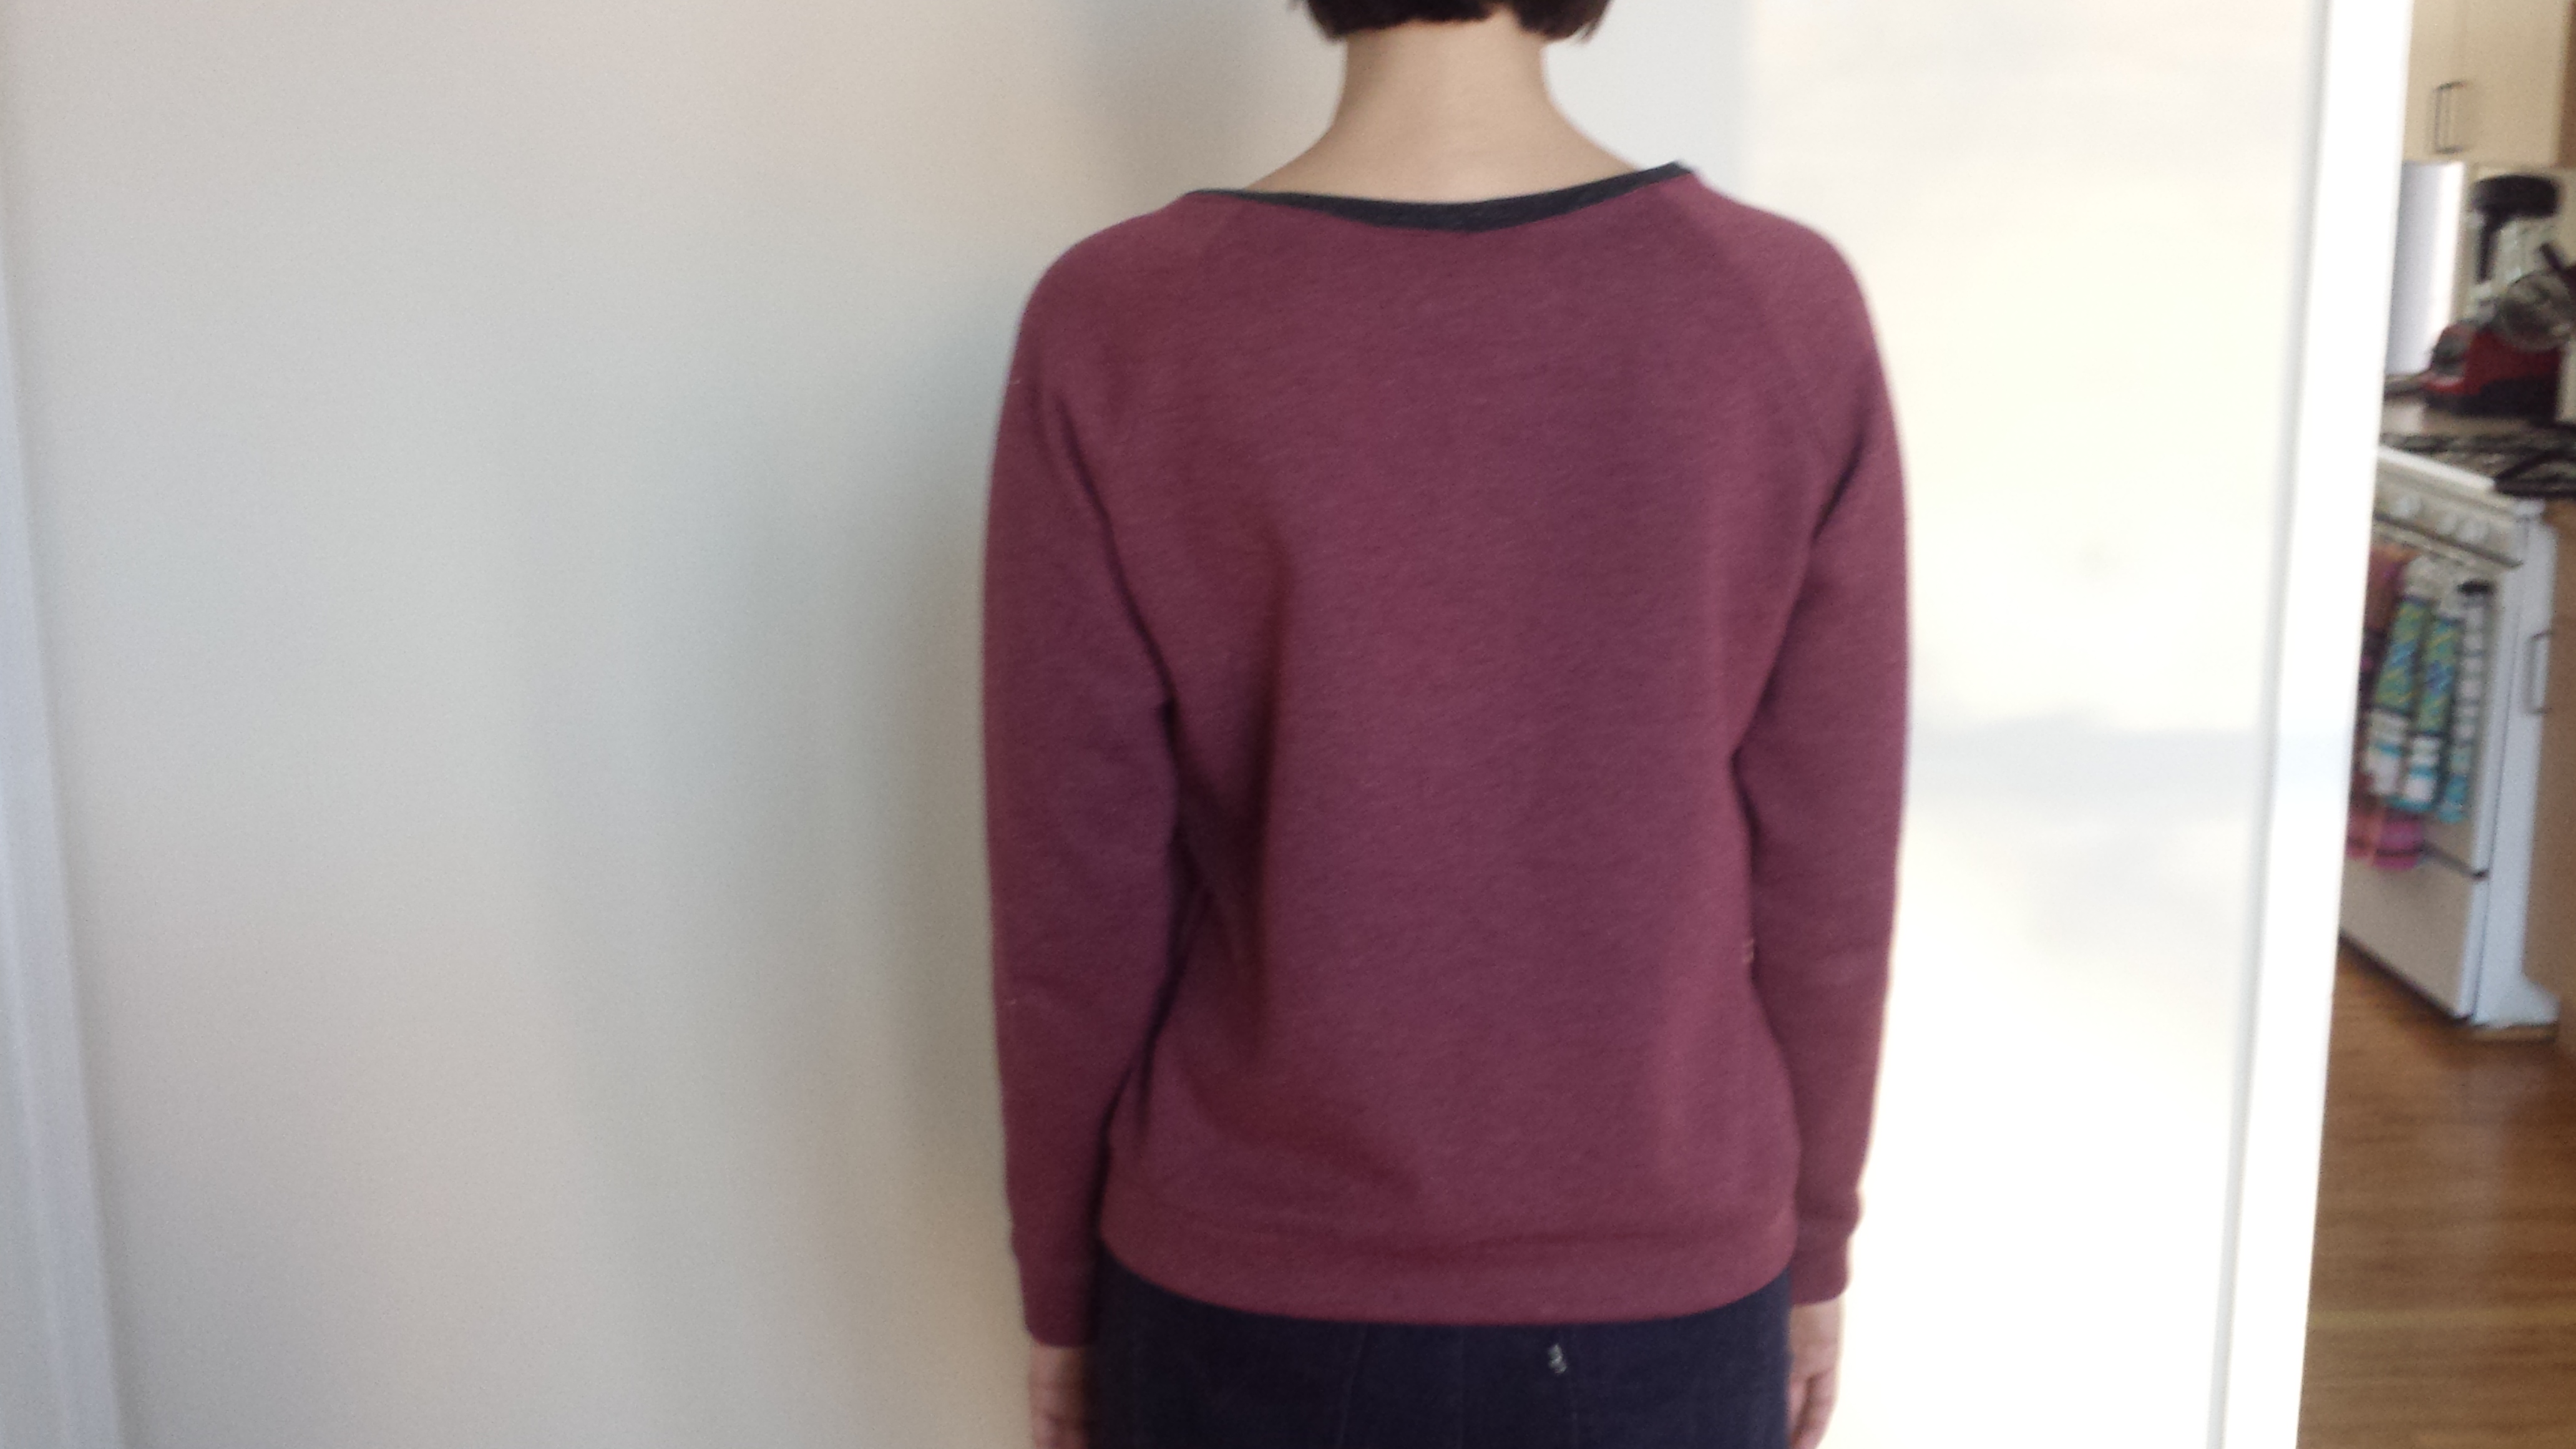
The pattern is essentially two rectangles and a couple of slim-fitting sleeves. Its boat neckline renders it even less time consuming than the Hemlock Tee because there’s no neckband binding involved. The pattern just calls for you to fold the front and back neck hems down 5/8″ and finish them with a twin needle, which is also how you finish the bottom hem and sleeves. This is such a quick, satisfying sew that I ended up making two Mandies within days of one other.
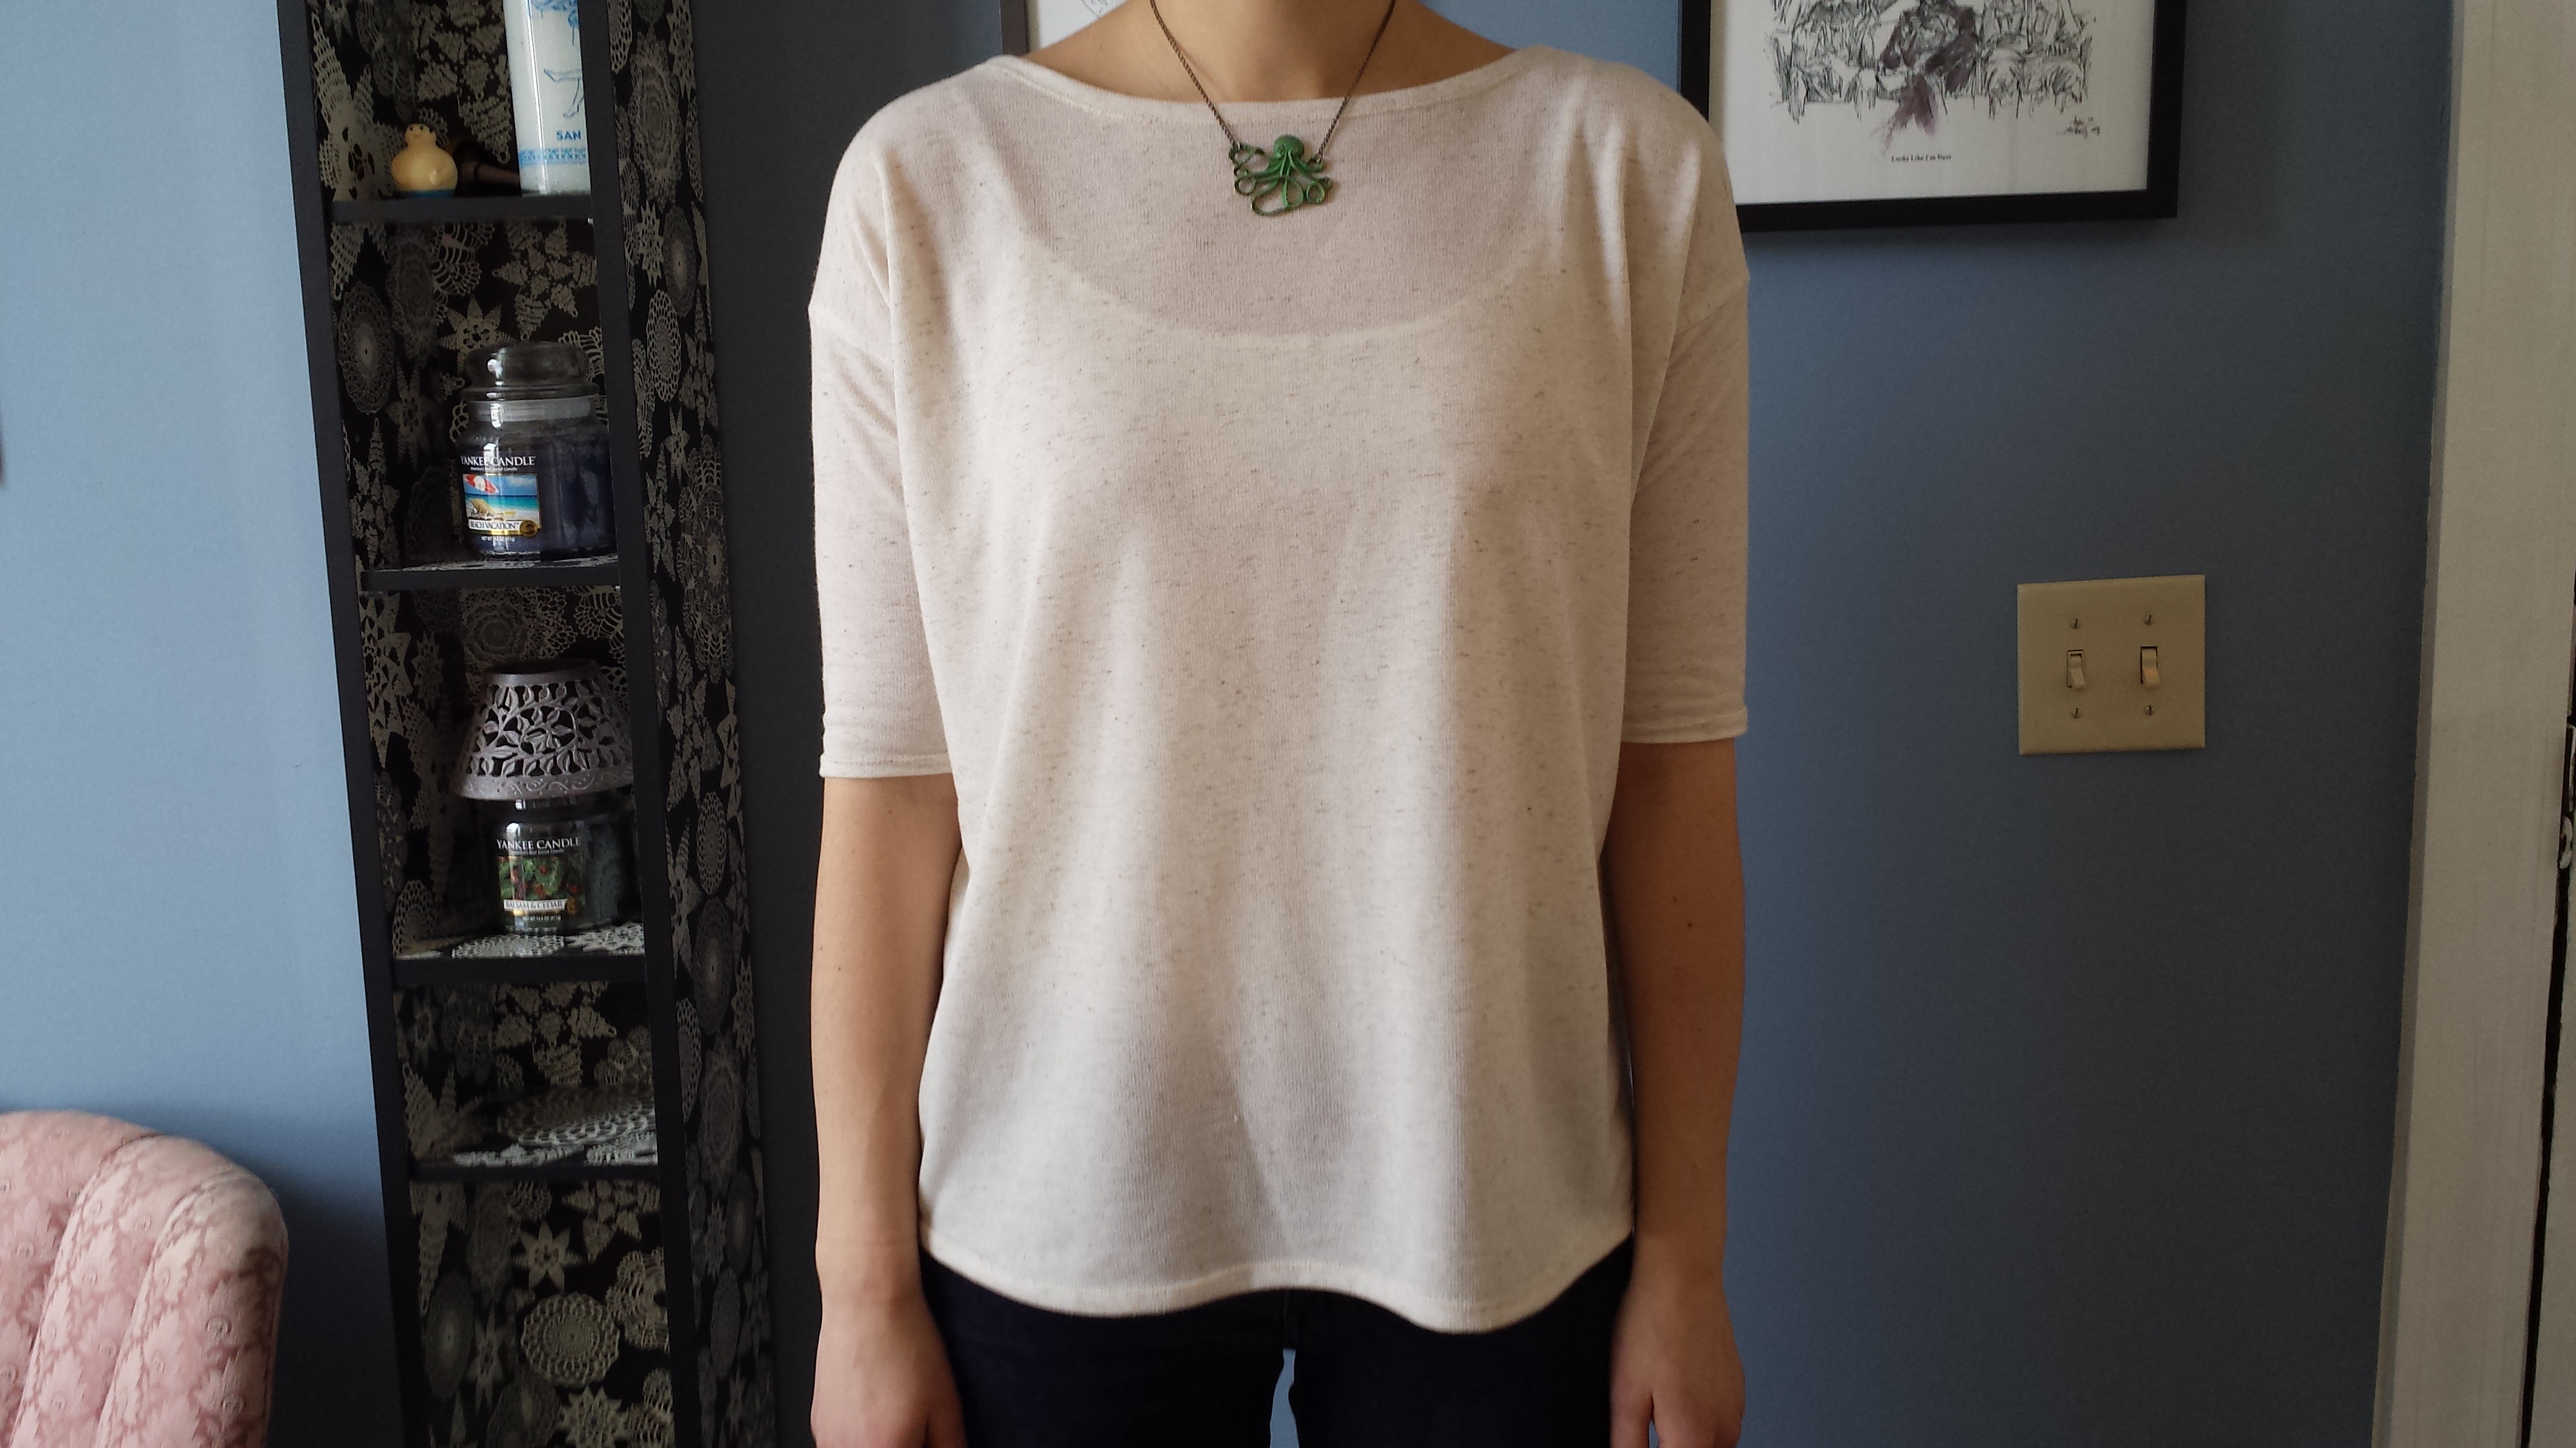
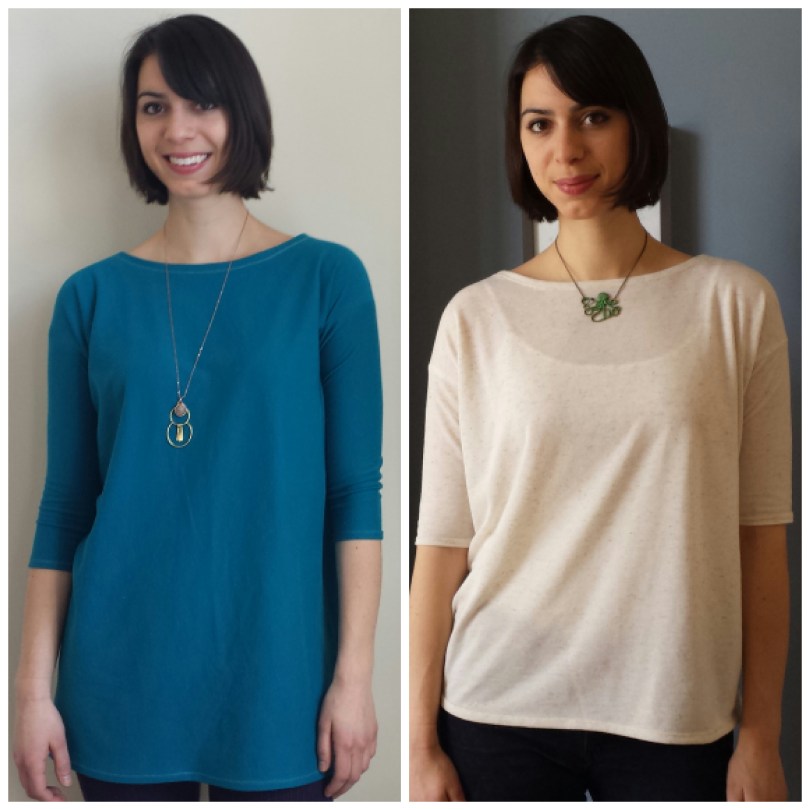
tessuti mandy boat tee

mandy tessuti boat tee

Mandy Boat Tee #1

Fabric: micro french terry knit in cream; $4.98/yard from Fabric.com (sold out)

Alterations: Cut off 1/2″ from the armhole and side seam edge of the front and back pattern pieces; lengthened the body about 1/2″; shortened the arms (after sewing it up and trying it on)

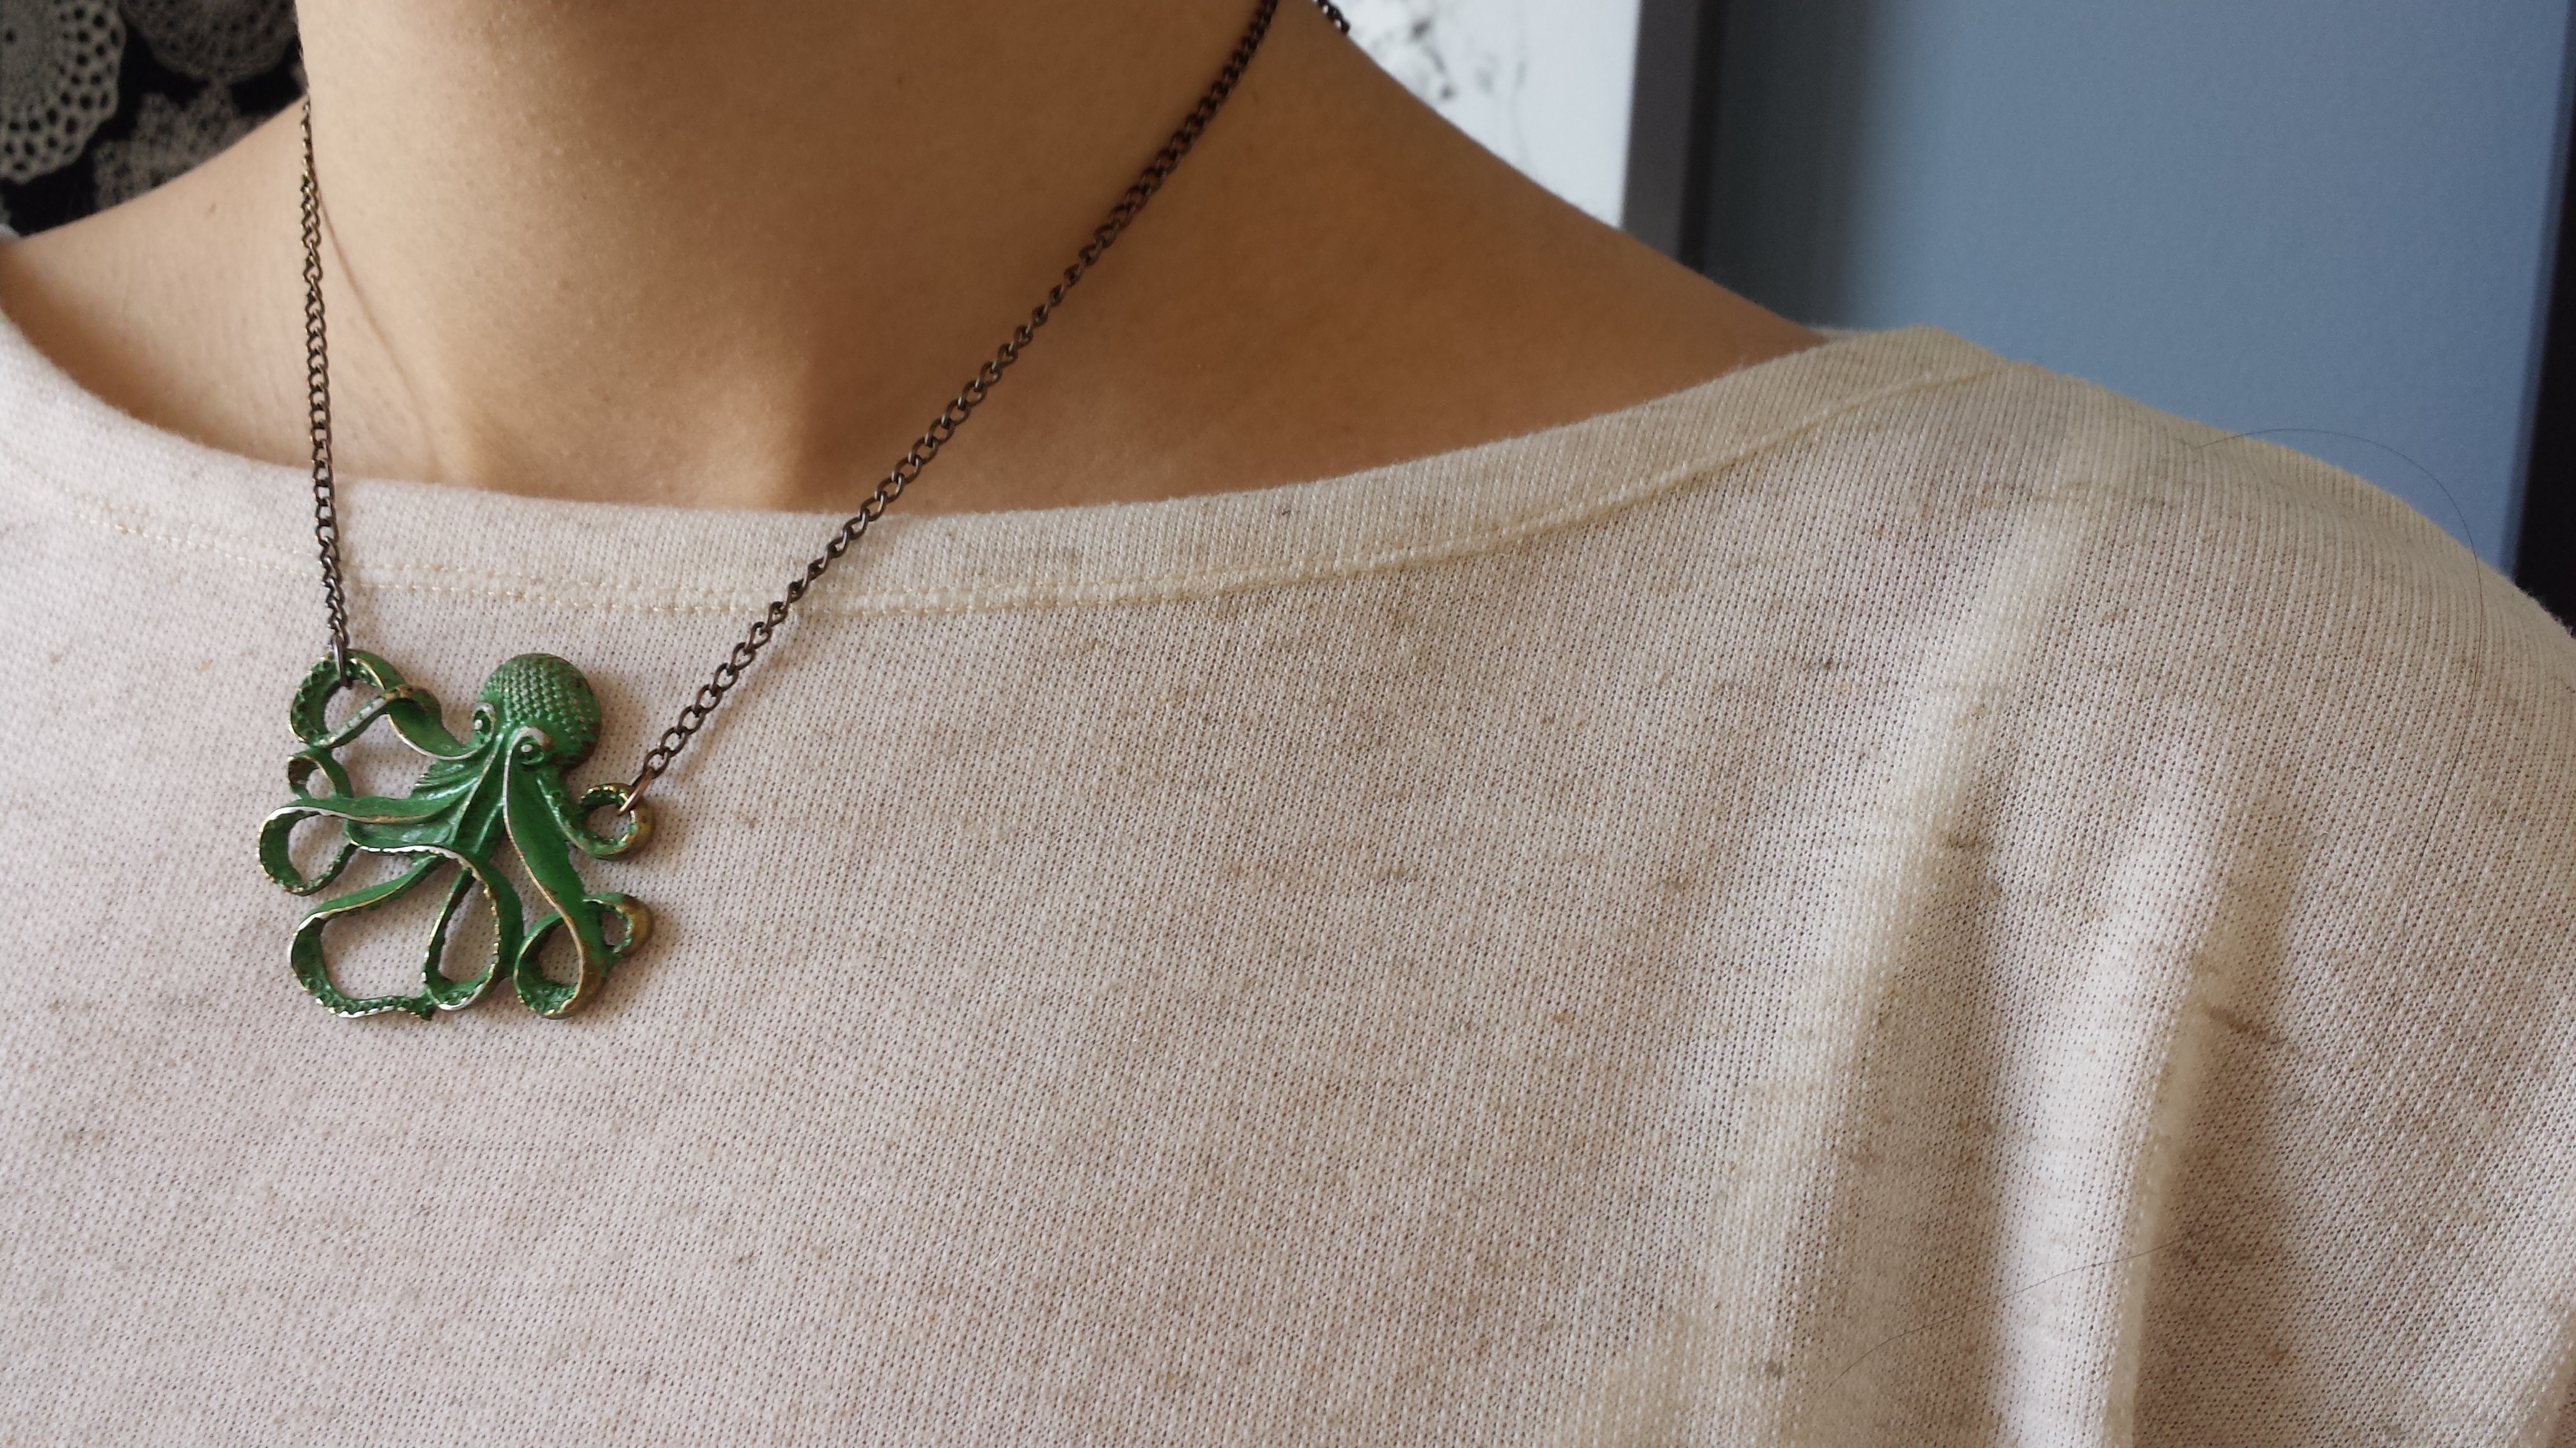
Tessuti posted a gorgeous Missoni-style boat tee on their blog, and that post recommended lengthening the arms if you lopped inches off the side seams. I did that, but I ended up cutting a couple inches off the arms anyway, since I like the look of above-the-elbow sleeves with this variation. The arms are pretty snug, but they fit me perfectly even after a day of wear. If you are jacked, you might want to widen the arms accordingly.

tessuti mandy boat tee

tessuti mandy boat tee

tessuti mandy boat tee

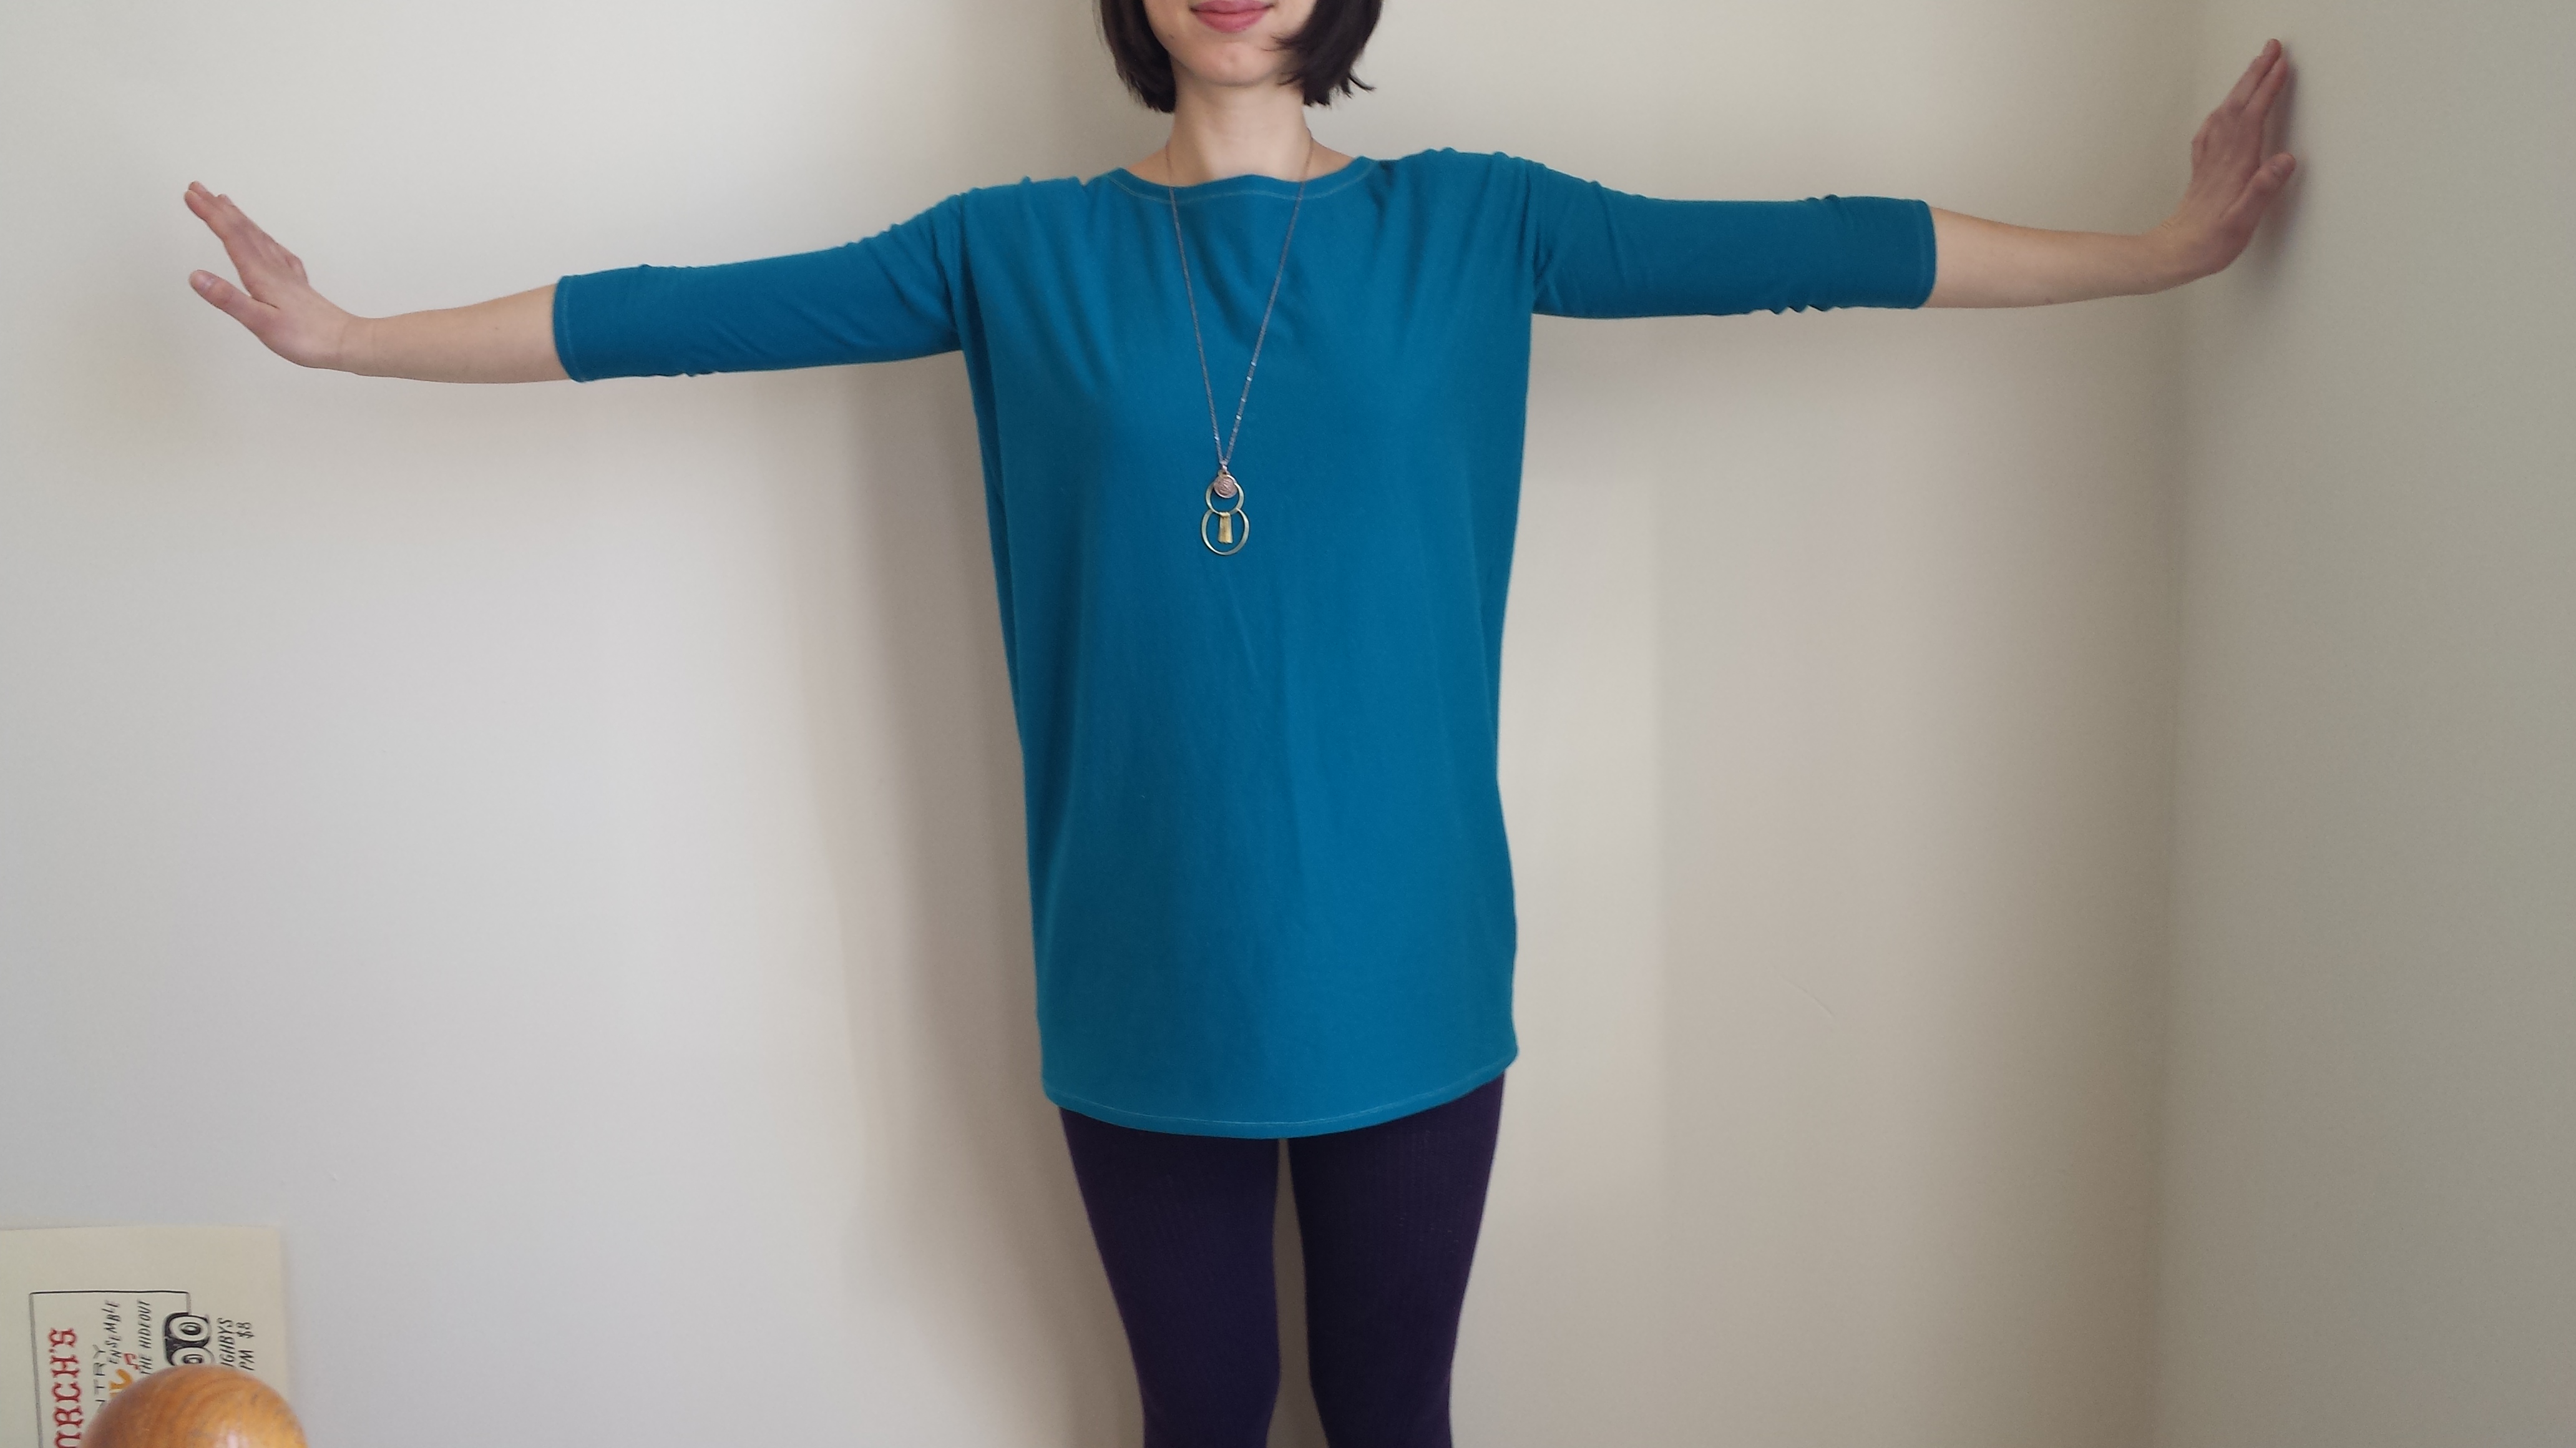
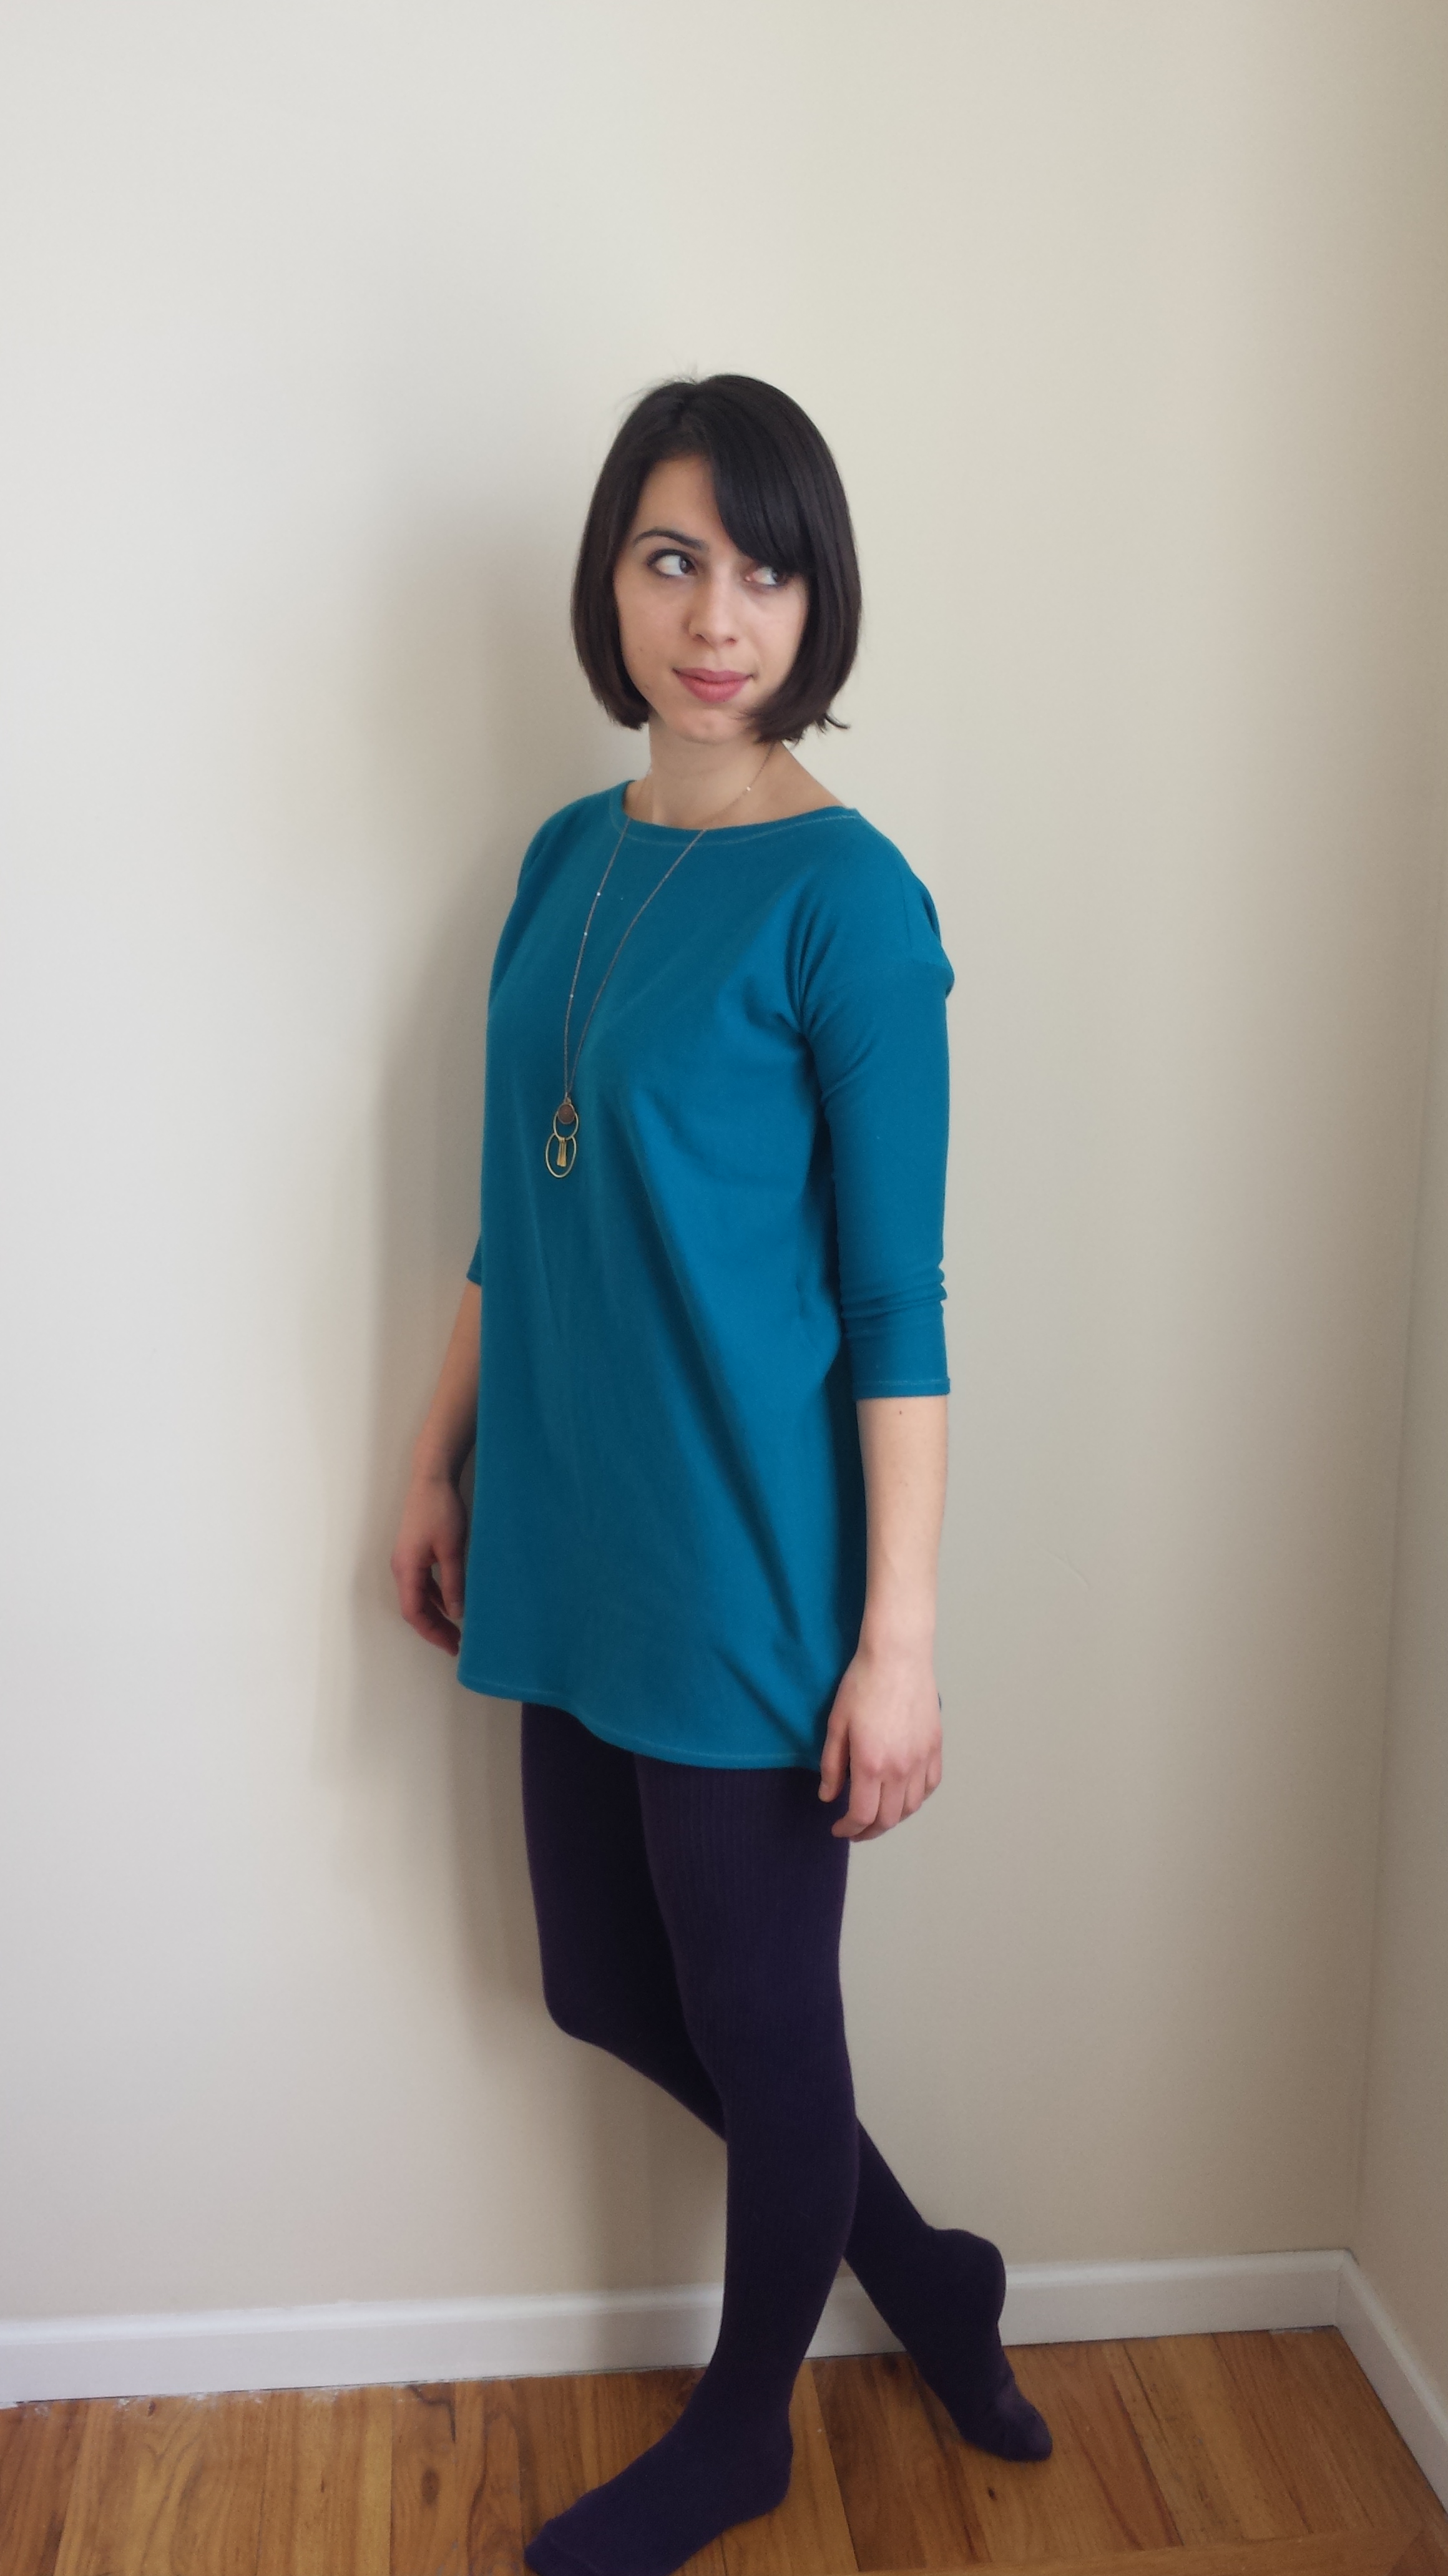
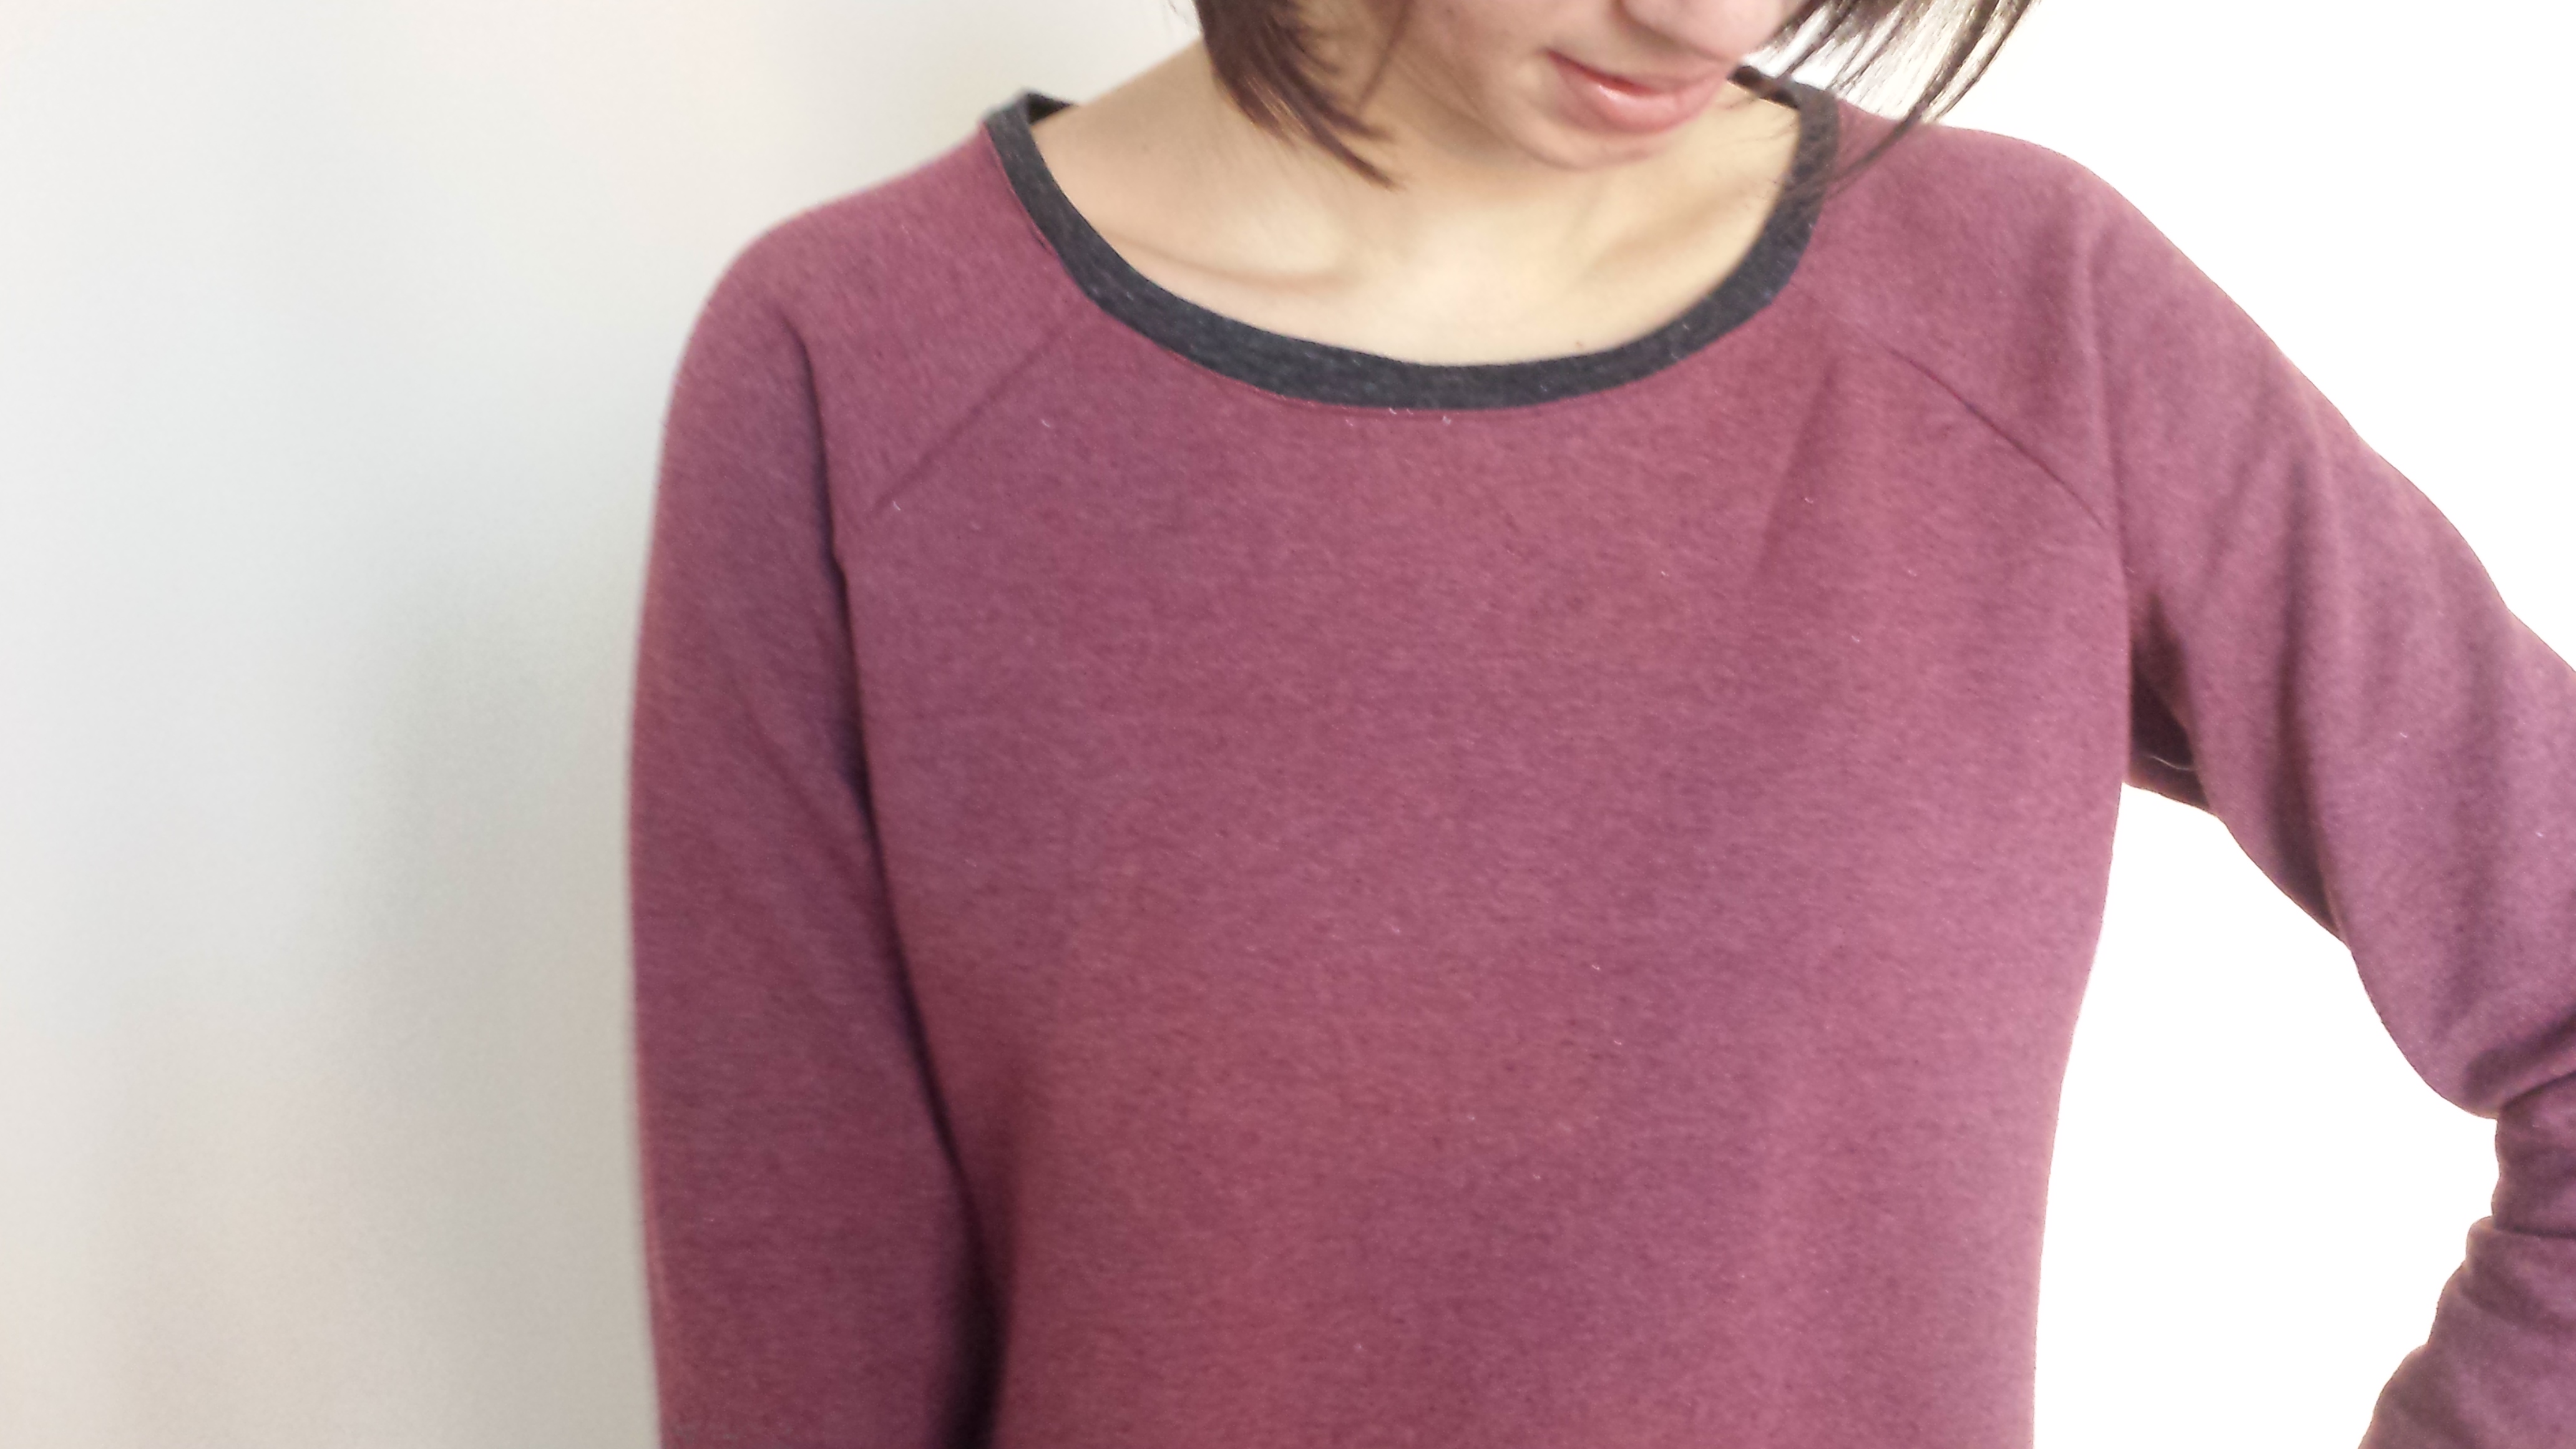
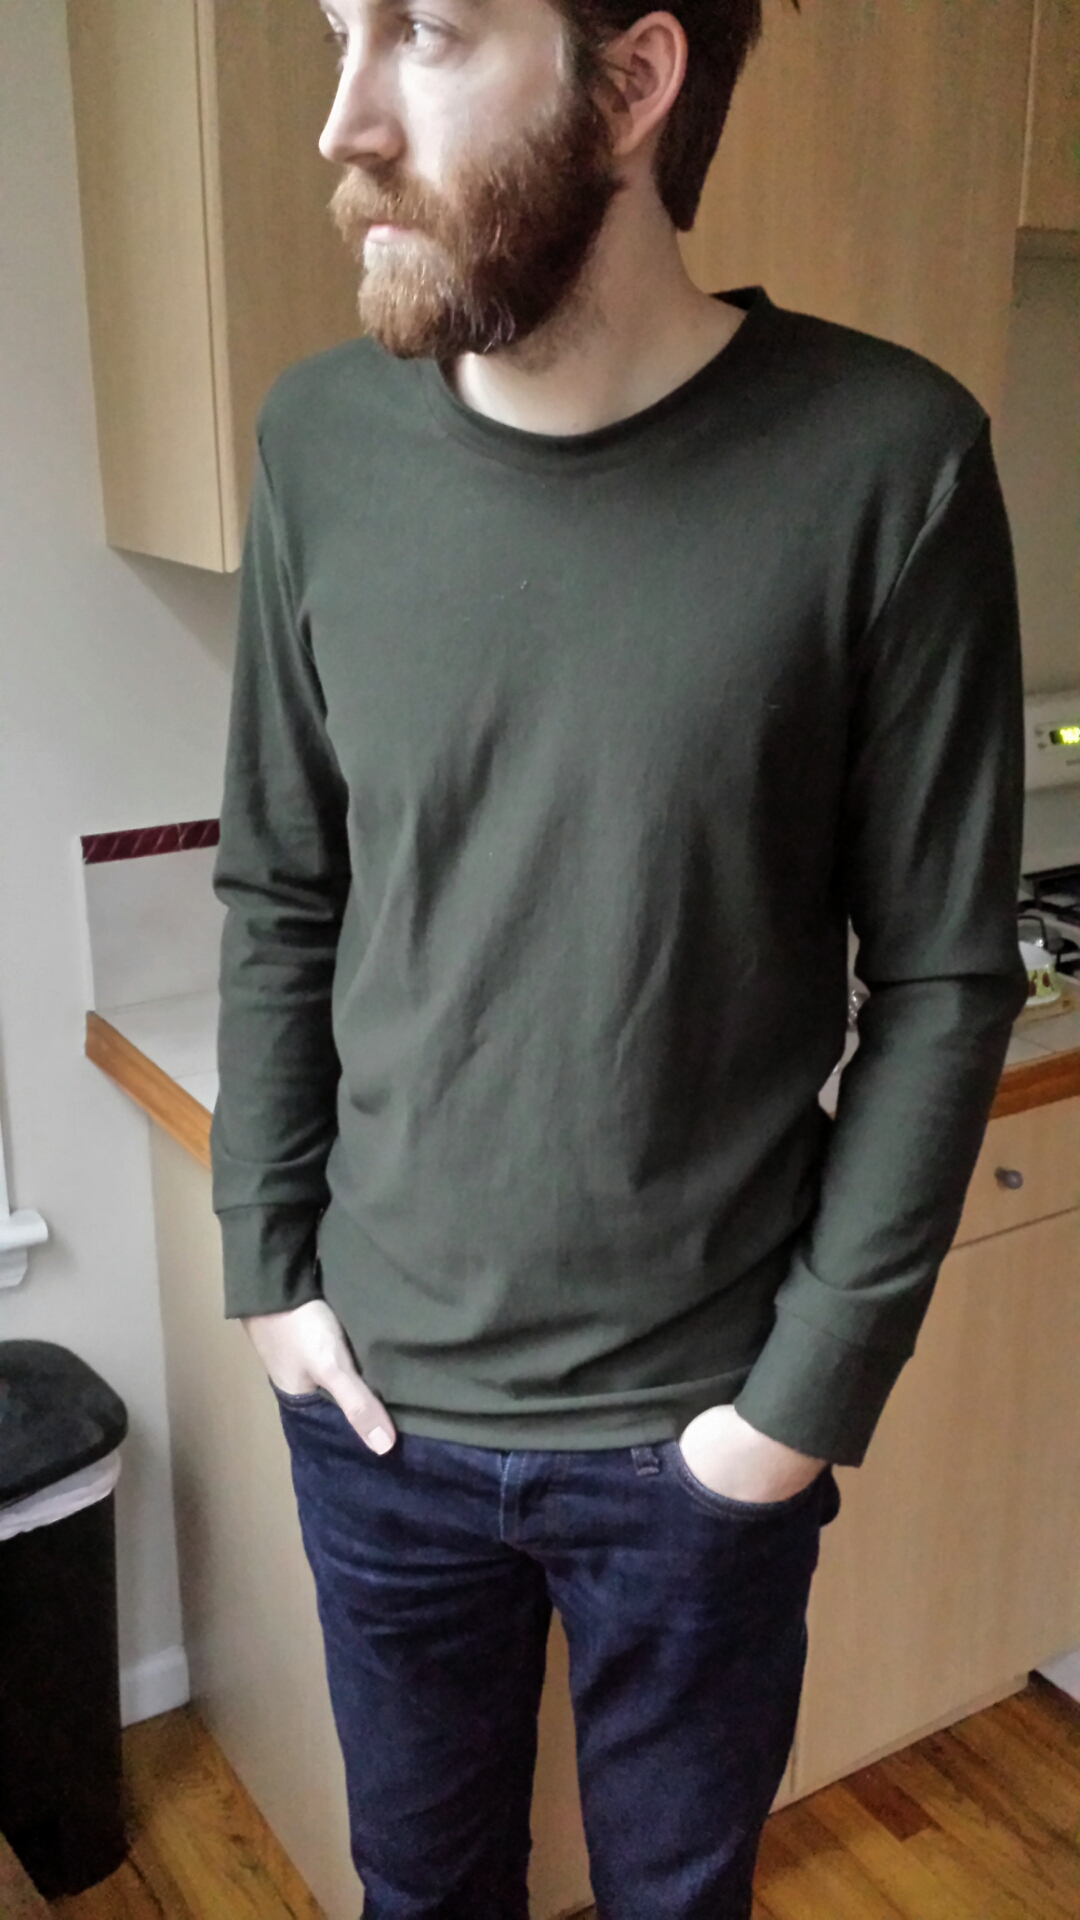
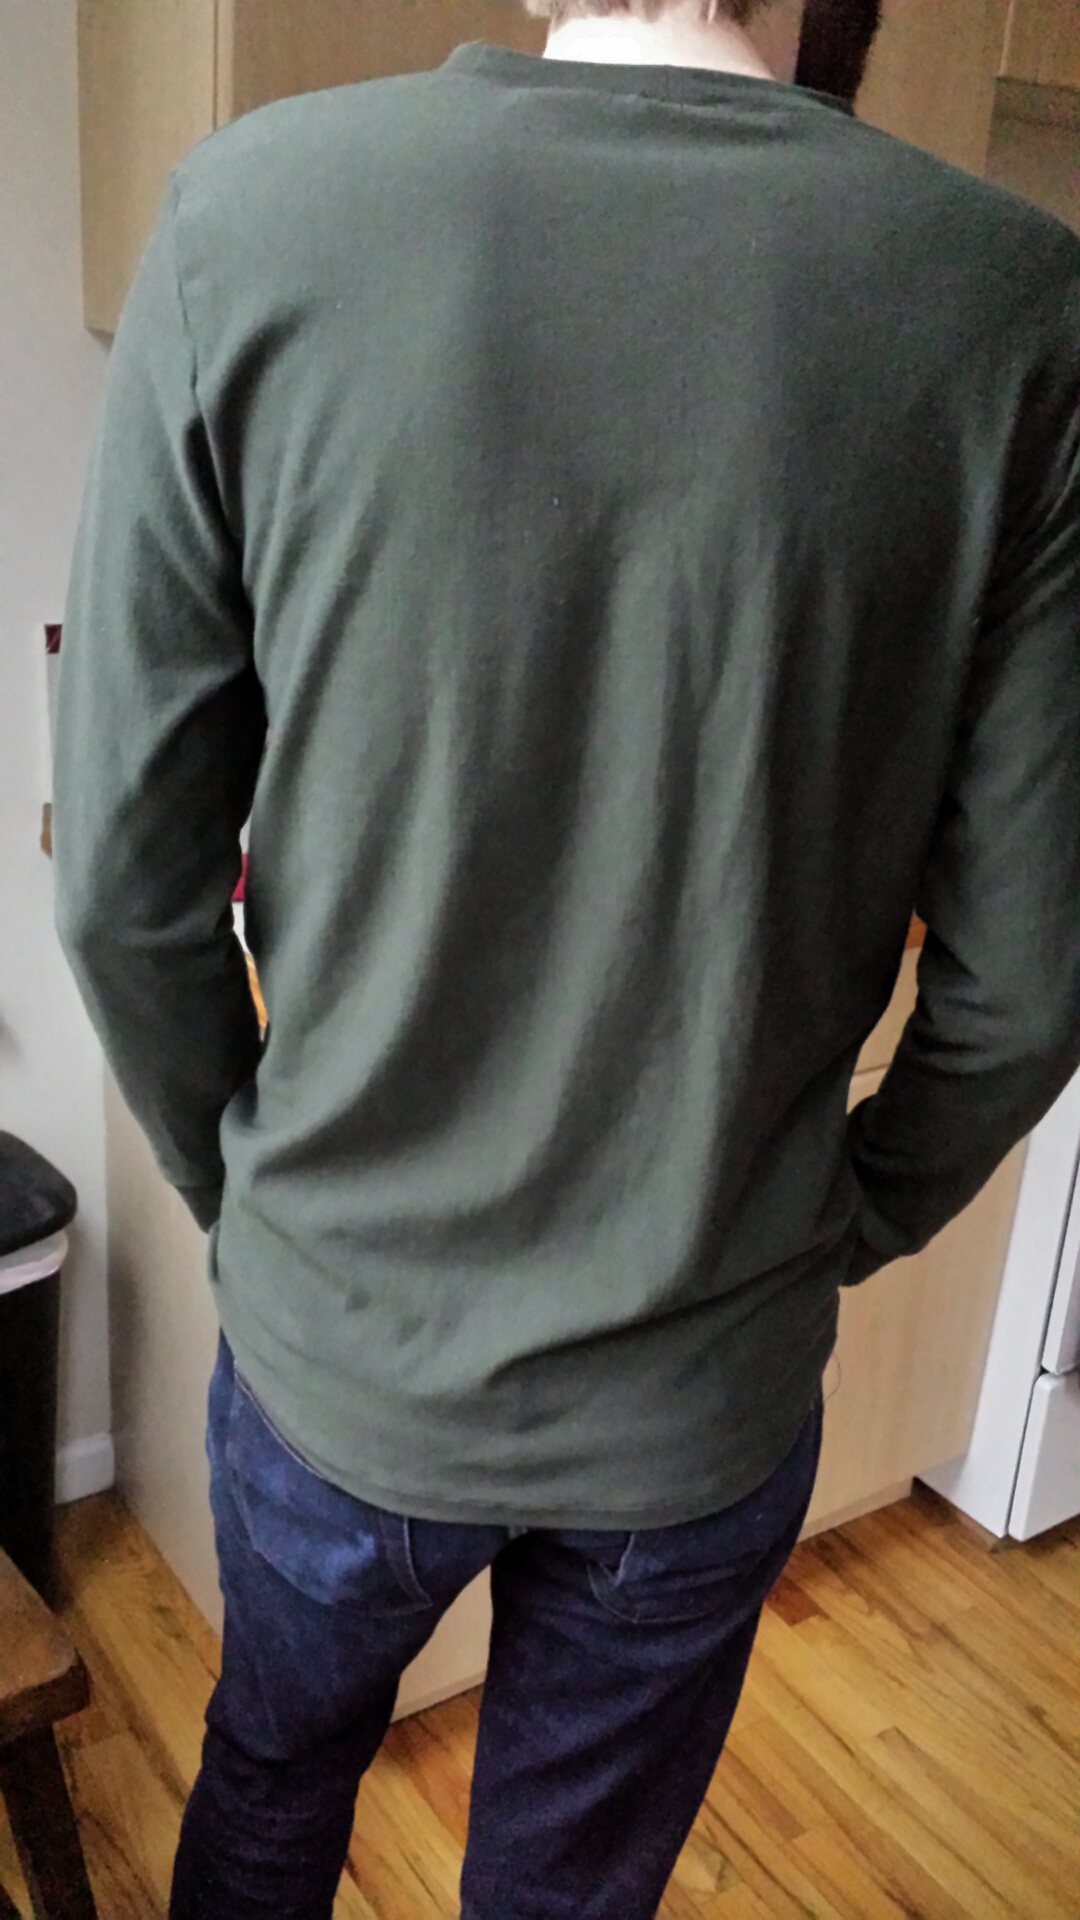
Mandy Boat Tee #2 (a very looooong tee)

Fabric: tissue french terry knit in teal; $4.98/yard from Fabric.com

Alterations: Cut off another 1/2″ from the armhole and side seam edge of the front and back pattern pieces (for a total of 1″ cut off); lengthened the body 4.5″

I wasn’t sure about the color of this fabric when I first opened my package from Fabric.com, but I have to admit that it’s grown on me. I’m about 10 shades paler than I am in the summer, and somehow this teal doesn’t make my sickly winter olive skin look green. As for the fit, this is probably the most comfortable T-shirt I own. I wanted to make a something that I could wear with leggings around the house, and it totally fits the bill (though the fabric wrinkles like crazy!). I’m not sure if this shirt is versatile enough to wear out yet, since it doesn’t completely cover my buns and I am of the camp that refuses to reveal my legging-clad derrière unless I’m in running tights. That said, I could see pairing this with a borderline pair of leggings—you know, those ones that are super thick and opaque and can almost pass as pants. We’ll see about that one.

grainline studio archer button up

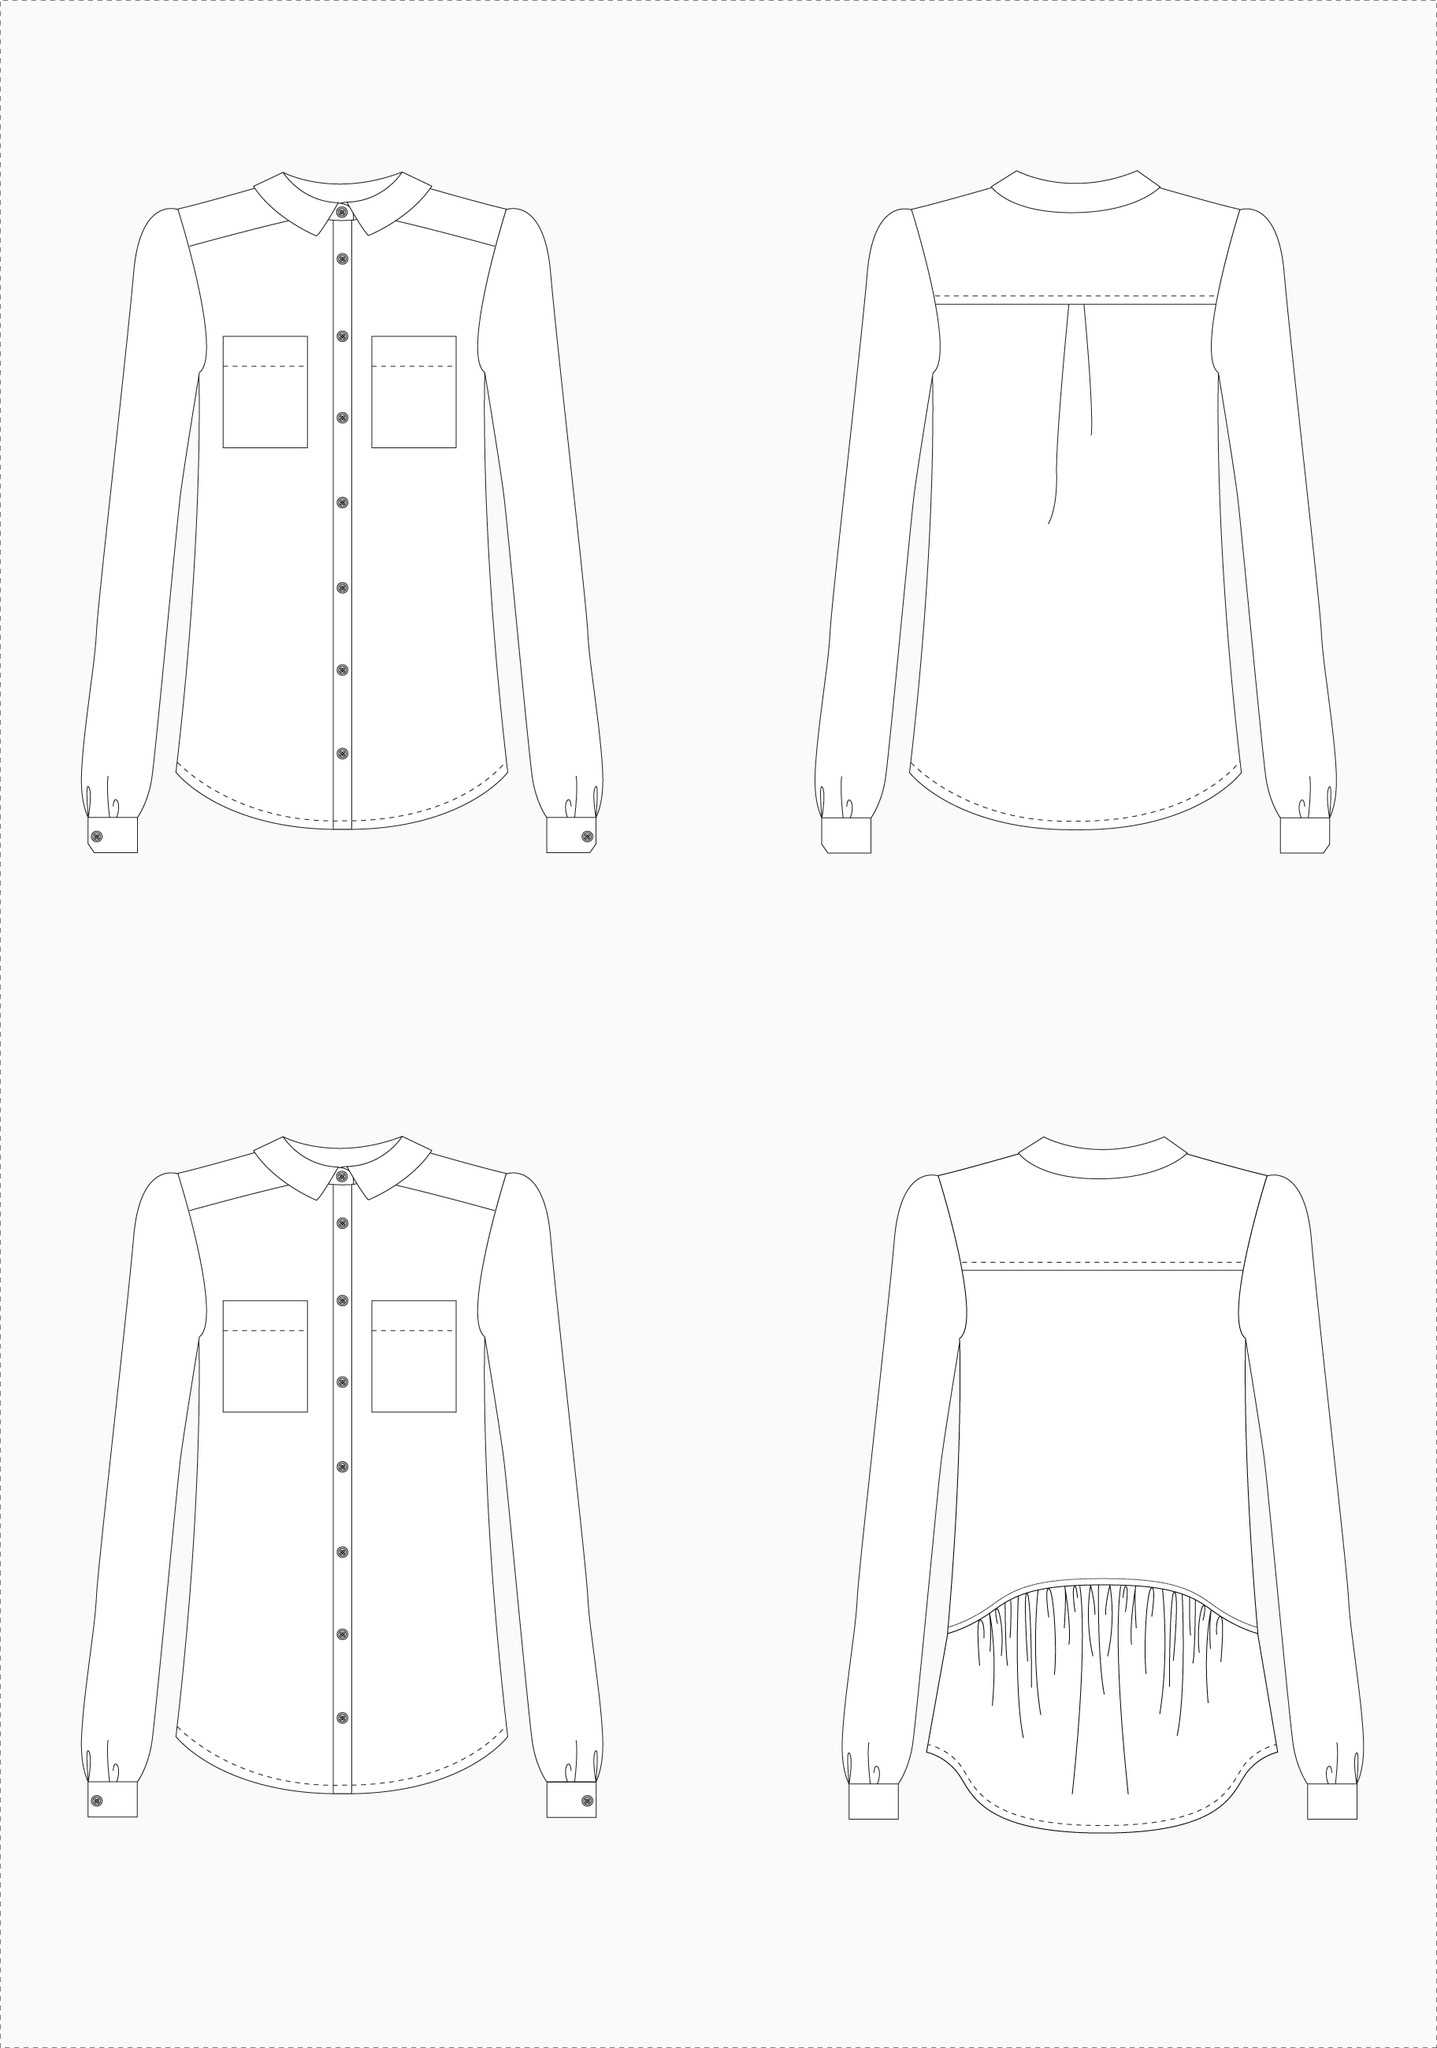
Next up for me is Grainline’s Archer Button Up! I’m excited to work with a woven material again and learn some things about shirt-making along the way. The steps seem a little daunting to me right now, but I’m planning on following Jen’s sew-along for extra help. If anyone has any tips on conquering the perfect Archer, hit me!

Deer and Doe Plantain T-Shirt

plantain t-shirt deer and doe

This shirt almost didn’t get made. Not because it’s tricky to sew; in fact, it’s a pretty easy make if you’re familiar with knits. The reason it almost landed in my scrap bin is that I carelessly snipped a hole in the sleeve when clipping down the excess seam allowance. Gah! After about 15 minutes of hysterics, I realized that I had more than enough leftover fabric to cut a brand new sleeve. Crisis averted—well, almost. Unpicking an entire row of zigzag stitches in a slinky knit proved to be very tedious, and the shoulder seam isn’t as smooth as the other because I had to sew it with a teensy seam allowance. Aside from those misfires, the shirt turned out just fine.

deer and doe plantain t-shirt
These are not my sewing scissors.

The pattern is the Plantain T-Shirt from French company Deer and Doe, who released it in January of 2014. You’ve probably already seen versions of this shirt floating around the Internet, and for good reason: it’s amazing! Here’s why:

  1. It’s ~*FREE.*~ And in the words of Deer and Doe: “Even though this is a simpler design that needs less pieces, it received as much care as all our others products: detailed instructions and testing in all sizes.” Eléonore, I like you already.
  2. The neckband is drafted perfectly. Neckbands on knits have always been a pain point for me, so I was a little nervous to finally attach this sucker, especially since the scoopneck dips pretty low for a T-shirt. Lo and behold, the neckband sewed on without a hitch, and it lies perfectly flat.
  3. The shape is flattering. I figured this cut (fitted at the shoulders and flared at the hips) would be comfortable, but I was pleasantly surprised by how the top skims and flows in the right places.
  4. You’ve got options: short-, 3/4-, or full-length sleeves. You better believe I’ll be making this up as a short-sleeve tee for the summer.
  5. Elbow patches, y’alls. I didn’t buy a contrast fabric, so I just cut the patches so their stripes would run perpendicular to the stripes on the sleeve. I love the way they add a little quirk to a simple tee.

deer and doe plantain t-shirt deer and doe plantain t-shirt

(Note: To take the picture on the right, I taped my phone to the window, set it on the Best Face mode, and jumped back with just enough time for it to capture this grainy photo. (I need a real camera and tripod.) Marc took the other photos, but as the sun was setting and we were inside, the colors are totally wonky. Stupid winter daylight!)

Minus the sleeve-cutting fiasco, construction was a breeze. I cut out a 40 (European sizing) and added about 1″ of length to the body and 1/2″ to the sleeves. Those adjustments worked out great for my 6’0″, size 6/8 frame. My material is a cotton/spandex jersey from The Needle Shop. For the seams, I used a ballpoint needle, stretch stitch, and my walking foot, which turned out to be an absolute necessity with this lightweight knit. I used a little bit of basting spray to attach the elbow patch the the sleeve before stitching to make sure it didn’t slip all over the place. I’m not sure if that’s kosher to use with a knit… but it didn’t burn a hole through my material, so that’s good.

deer and doe plantin t-shirt

I finished the neckline, cuffs, and bottom hem with my twin needle and walking foot, but the bottom hem still managed to turn out a little wavy. Maybe next time I’ll use some tissue paper underneath the fabric to stabilize it. Overall, I highly recommend this pattern, especially since all you need is fabric and thread. It’s the perfect stash buster, and it’s great if you’re a beginner wanting to test the waters with knits. Let me know if you make it, or if you have some surefire tips for wave-free hems!

Linden Sweatshirt

linden sweatshirt

New Year, new garment—finally! But before I get into that, I’d like to wish you all a very Happy New Year, especially as we settle back into our desks at work and our single-digit weather here in Chicago. You’re not alone if you’re feeling a little blue, but luckily there are two simple solutions to combat your inner Debbie this winter:

1). Exercise. Seriously, get a sweat going for 30 minutes a few times a week and there is a 100% chance you will feel better and sleep like a baby.

2). Find a hobby (and stick with it.)

I rode the post-college emotional roller coaster pretty hard my first year after graduating, coming up just short of an existential crisis but with plenty of anxiety to go around. Learning how to sew was probably the number one factor in pulling me out of that funk. Any hobby will do, but sewing is great since you can tangibly mark your progress and actually get everyday use out of what you make.

So come this lazy, grim weekend, still feeling the after-effects of hosting a New Year’s Eve party, I turned once again to my sewing machine. I’d been neglecting it for the past several weeks, but with an afternoon free and Grainline Studio’s Linden Sweatshirt pattern at the ready, I got back to work.

linden sweatshirt

Like most reviews state, this top comes together very quickly, even without a serger. I sewed this up on my sewing machine (size 8 at the bust, graded down to a 6 at the hip) with a ballpoint needle and stretch stitch. The fabric is a sweatshirt fleece from Fabric.com. The one issue I had in construction was with the neckband: my initial band was way too short. This probably has to do with the lack of stretch in my material. I’m pretty sure the listing stated that my material has 40% mechanical stretch; the pattern calls for materials with at least 20% of stretch (or ribbing, which is typically very stretchy and pliable). I guess mechanical stretch and regular stretch are two totally different measurements? If you have insight into this topic, please let me know in the comments!

linden sweatshirt

I tried to eyeball a longer neckband, and then stupidly sewed that on without basting to test it first. Holy mother of god did that leave me with the most insane-looking funnel neck. I ended up cutting that off entirely while trying to preserve the original neckline as best I could. The finished neckband you see is some stretchy heather jersey leftover from my Hudson Pants, and I actually really like the look of the dark gray against the muted red. The neck doesn’t lie 100% flat, but it’s an immense improvement over my funnel monstrosity.

linden sweatshirt

I was a little worried about the cuffs and hem band also being too short, but those came together in a snap. I added about 1″ to the sleeves and body, but I think next time I’ll add 1.5″ to the sleeves and 2″ to the body for comfort. It probably turned out a little shorter than anticipated since my seam allowance was more like 5/8″ instead of the 1/4″ called for in the pattern. My machine was not liking that narrow seam allowance on fleece, and it angrily gnawed it up until I surrendered to a wider allowance.

So far, I love this pattern. I wore the sweatshirt out the first night I finished it, and Marc even said, “It looks like you bought that.” Yes! I’ll take that compliment when it comes to handmade basics. I already have plans to sew this up for a friend as a very belated Christmas gift, and I’ll probably sew another one up for myself soon. Have you tried this pattern yet? Any thoughts on fabric choice or finishing?

how to style a knit skirt

Two Ways to Wear a Knit Skirt

One of the benefits of moving is finding buried treasure. Nobody in their right mind enjoys the laborious process of packing, cleaning, and carting boxes, so I’ll take a silver lining wherever I can get one. This time around—my fifth Chicago apartment in three years—I stumbled across a few forgotten gems. In the bottom what I like to call my Second Hamper, the contents of which hadn’t been laundered in probably 10 months, I found this Madewell Indigo Ink Sweatshirt that I’d scored on super sale a couple years ago. Chaching! It was like shopping in my own (dirty) closet.

When it came time to pack up my sewing supplies, I discovered a few cheap-o patterns I’d bought during one of JoAnn’s pattern sales when I first started sewing. At first glance, these patterns seemed pretty dull: a boring tote, some simple A-line dresses—nothing to write home about. And then I found McCall’s M6654, an easy-level pattern designed for knits.

McCall's M6654 sewing pattern
McCall’s obv. needs to work on its styling…..

I know, it looks kind of boring. But I’ve been looking to add another skirt to my winter wardrobe, and this run-of-the-mill piece fit the bill just fine. The pattern offers semi-fitted and loose-fitting elastic-waist skirts in seven lengths, from mini to maxi. I went with the semi-fitted view and cut out a size 14 (28″ waist; 38″ hip) at length B. Luckily, I had everything I needed already in my stash: just enough french terry leftover from Marc’s Strathcona tee, and some leftover 2″ elastic from my Hudson pants, substituted for the 1″ elastic called for in the pattern.

This was one of the easier projects I’ve sewn in awhile, and that’s saying something since I’ve been whipping up relatively easy garments all year. I used a ballpoint needle coupled with a stretch stitch for the seams and a twin needle for the hem. The fabric is pooling a bit under the waistband, which means I probably could’ve gone one size smaller, especially considering the decent amount of stretch in my fabric. That said, the skirt was incredibly comfortable even after furniture shopping all day, including a multi-hour IKEA trip.

Since I sometimes have trouble deciding how to wear a simple knit skirt, I figured it might be helpful to show two different ways to style one.

how to style a knit skirt

knit skirt dressed downknit skirt

The majority of the time, I’ll be dressing this skirt down, as I work in a very laid-back office and generally dress for comfort. Here, I paired the skirt with a tent-style long-sleeve top from Una Mae’s in Chicago. It’s got an interesting, flowing shape that skims the body and doesn’t compete with the semi-fitted cut of the skirt. Add some tights (a colorful pair would be cute) and a pair of casual boots, and this’ll take me anywhere from weekend shopping to the office to a dive bar.

how to style a knit skirt

knit skirtknit skirt

Look #2 skews dressier. The elastic-waist design makes this skirt a good candidate to pair with an airy blouse. I tucked in a semi-sheer printed blouse and threw on a wide elastic belt for a little extra polish. Simple black tights and monochromatic suede booties with a chunky heel complete the outfit. I could see wearing this to work in a business casual environment, or out to a restaurant with two or more dollar $igns on Yelp.

How do you style a knit skirt?

Sewing for Dudes: Strathcona T-Shirt

thread theory men's strathcona t-shirt

I’m a creature of habit. When it comes to cooking dinner, it’s either chicken fajitas or eggs and TJ’s pumpkin waffles (#breakfast4dinner4life). It’s not that I’m not an adventurous eater (bring on the tendon soup and octopus carpaccio), it’s just that cooking old standbys is quick, simple, and satisfying. The same can be said for my recent wardrobe purchases, 90% of which have been gray or black. For better or worse, this tendency toward the familiar has trickled into my sewing life.

strathcona teestrathcona tee

In keeping with my goal of sewing one item of clothing for another person each month, I bought Thread Theory’s Strathcona pattern to sew a shirt for Marc. In early November, I finally got around to buying the fabric: a french terry from Girl Charlee that’s a soft, stretchy cotton-modal-lycra blend in a deep forest green. I’d just finished cutting out the fabric to make the long-sleeve T-shirt variation when I spotted it: a long-sleeve crewneck thermal from the Gap in nearly an identical shade of forest green, taunting me from its spot in Marc’s clean clothes hamper. At that point, I thought about making the short-sleeve variation instead, but then I remembered I’d bought Marc a short-sleeve American Apparel tee last year in, you guessed it, a nice shade of dark olive. We’re defenseless against the power of the solid neutrals! So, a long-sleeve forest green Strathcona it would be.

strathcona teethread theory strathcona tee

Marc is 6’2″ and generally wears a slim-fit medium in shirts, so I cut a medium. The general consensus for this pattern is that it runs a bit long in the body and very long in the sleeves, so I kept the body as is and took a bit of length off the sleeves. As far as construction goes, the shirt came together pretty easily, although next time I’ll use my walking foot to keep things smoother. I think the walking foot would have been especially helpful when attaching the sleeves, since I ended up with some weird pockets on the shoulder seam and had to do somewhat of a hack job to get them to lie flatter. I could definitely use a bit more practice setting sleeves with a knit fabric. (Actually just setting sleeves in general!) Anyone have tips for that?

strathcona men's t-shirt neckline

The pattern calls for the sleeves and bottom hem to be finished with self-fabric bands or a twin-needle hem, so I went with one of each: banded cuffs and a twin-needle bottom hem. This was my first experience with a twin needle, and I’m smitten! I also used it to topstitch the neckband. It so easily adds a more professional finish with barely any extra effort.

And that’s about it, folks! The important thing is that Marc thinks it’s comfy and likes the color (duh). Have you sewn any garments for the dudes in your life? I’m not very familiar with menswear patterns, so any suggestions are welcome! Next up on my docket is the Linden Sweatshirt from Grainline Studio. Stay tuned for that, or a possible pre-Christmas sewing meltdown. Only time will tell.

strathcona men's tee twin needle neck binding

Twin Needlin’

Winter has been cramping my style lately. It gets dark at approximately 4 p.m. each day, making it impossible to snap blog-worthy pics without resorting to hideous artificial light. That said, I don’t want to jump ship from posting for the next four months, so this post marks the official lowering of my standards for photos. Sorry, y’alls, but it had to happen sometime. (I feel the need to confess here that 99% of my photos have been taken with my Samsung Galaxy S 3 camera phone…)

I haven’t had time to take proper photos of a couple items I’ve recently sewn (men’s Strathcona T-shirt and a super-easy knit skirt), so I wanted to share a few detail images of my favorite new finishing/hem technique: the twin-needle stitch!

strathcona men's tee twin needle neck binding

Here, a twin stitch is used on the neckband of a nearly finished Strathcona tee for Marc.

opposite side of the twin needle hem

Here’s the opposite side of the hem of a knit skirt.

Why was I so terrified of using twin needles for so long?! It turns out they’re just as easy to use as a regular needle (just takes an extra second the thread), and they provide knit garments with a hem that looks less homespun and more RTW professional. I’m excited to have this simple finish in my small but growing bag of tricks. How do you use twin needles? Any tips?

Stay tuned for sewn garment posts, and try to stay safe on the road this holiday weekend! We had a slight mishap on our way out of the Chicago:

ht and run
Hit-and-run drivers are THE WORST #Chicago

This year, I’m thankful for my friends, family, and that we got out of that little accident completely unscathed. Happy Thanksgiving!

The Official 2014 Post-Halloween Sewing Report

sew your own Willy Wonka costumes

October 31 was a wet, blustery night in Chicago. After standing in vain at a freezing wind tunnel of a bus stop for 15 minutes, I gave up and set out walking toward my destination. Traffic’s always rough, but it seemed to be particularly awful that night. It turns out cars were gridlocked on north/south streets because Lake Michigan was throwing up 20-foot waves directly onto Lake Shore Drive, effectively shutting down that thoroughfare. Guess it’s not Halloween without some real-life terrors.

I realized too late that I’d created my own personal Halloween sewing nightmare. As I mentioned in my plans post, my intention was to make Gene Wilder and Johnny Depp Willy Wonka coats and hats for my boyfriend and myself, respectively. Don’t get me wrong, this shit all got done, but not without some moderate freakouts along the way. Somehow I thought that making two jackets and matching hats from scratch would be totally manageable if I chipped away at them each day. I failed to recognize that sewing items I’m not familiar with (jackets, nay, MENSWEAR jackets, and hats) would involve some practice and probably many, many mistakes along the way.

Purple Willy Wonka Coat

Even with a muslin, the first jacket I made (the bright purple one), was a bit of a doozy. I decided against lining the jackets since I wanted to minimize spending and “uneccessary” steps for coats that we’d probably only wear one or two nights. I finally wrapped my head around how to attach the collar and facing without a lining, but then came the sleeves. I didn’t adjust the ease enough the first time I basted them in, and they were a complete disaster. They kind of looked like this. I ripped those sucker out, adjusted the ease a bit more, and Frankensteined them into place. They’re still not perfect, but at least they didn’t make Marc and me immediately burst into laughter just looking at them.

Thankfully, the Gene Wilder jacket and hat came together before our first costume party, held the week before Halloween. I abandoned hope of getting my Wonka getup finished by then, but the makeshift Golden Ticket costume seemed to go over pretty well. Thank god for Blick Art Materials’ golden poster paper and stencils!

wonka and the golden ticket

That next week, I focused on completing the red jacket. Since I’d already hashed out some issues with construction on the first jacket, this piece came together much more easily. The lapel and collar sit flatter, and the sleeves fit nicely after the first try. It was strange wearing a coat tailored for a man, but I cut out a small (instead of the medium I cut for Marc), and that seemed to balance out a little of the bulk. I didn’t have to worry about length for once—the sleeves and waist were pretty much spot on.

Red Willy Wonka Jacket

It’s got pockets, too! The flaps wouldn’t lie flat because I couldn’t iron them (hot irons+corduroy=burning plastic smell), but it was nice to have a place to stash candy, gloves, and cans of cider.

pocket

I could go on about these jackets, but I’m kind of sick of them at this point. McCall’s M7003 served its purpose, but I’ll be happy if I can avoid men’s outerwear or red or purple corduroy for the foreseeable future. Come to think of it, I’d like to add camel and black felt to that list, too.

felt top hats

These unfortunate “top hats” were nearly the death of me. Marc’s was way too small and ended up cutting off circulation to his head. My black hat fared a little better, but neither really looked like an actual top hat. And the camel one definitely looks like something an 8-year-old Indiana Jones might wear. As far as construction goes, I pulled from a medley of confusing WikiHow articles and online tutorials, opting to use sew-in interfacing for the brim and flue of the hat. I wish I’d had more time to make a prototype to figure out how to keep the top of the hat from collapsing into the flue. Millinery is tricky, y’alls! That said, the felt and ribbon came out to roughly $12 overall for both hats, and that’s way cheaper than most decent-looking hats I came across online.

We also made canes by attaching cabinet pulls to stained dowel rods. Thanks, Home Depot! And thanks especially for not giving us a breathalyzer before we used a saw to cut the dowels to our preferred size…

Despite the sewing hangups and imperfections, I’m happy with how our costumes turned out. I’m also happy that I discovered how fabulous dancing is with a cane. Try it! Now that Halloween’s over, it’s time to move on to the greener pastures of soft knits, patterned cottons, and trying to figure out what the hell I’m going to make for xmas gifts this year. Do you have any giftable sewing plans?

A Striped Hemlock Tee (and HaLLoWeEn Plans!)

grainline studio hemlock tee

I’m about a year late to the game with the Hemlock Tee, but I have to say, Grainline Studio hit it out the park with this *free* PDF pattern. At first I was a little freaked out by the one-size-fits-all cut, but since it’s designed for lightweight knits, this top’s really all about the boxy drape. And what a gloriously comfortable drape it is! It’d probably be even more flowy if I hadn’t accidentally cut off an extra 2″–3″ from the hem. Whoops. I made that mistake when trying to even out the bottom with a rotary cutter, not realizing that the stripes were ever so slightly offset. Long story short, this quickly turned into a cropped Hemlock, and I love it!

hemlock tee grainline studio free pattern

Most of my pants hit high enough that I don’t have to worry about flashing skin (it’s fall now, the time when us Chicagoans put away our bare skin until next spring). As far as construction, I used my walking foot and a lightning bolt stitch for the side seams. To finish the bottom and sleeves, I just did a simple turned hem with a slightly lengthened straight stitch. Next time, I’ll try a double-needle finish like the tutorial instructs.

hemlock tee grainline studio

I cut the neckline down a little lower than the pattern, which lead to some problems with the neckband binding. I thought I’d added enough length to compensate, but I had to rip out my first neckband and try again. Does anyone have a surefire formula for calculating neckband length? I know it probably differs depending on the level of stretch, but any tips are welcome!

hemlock tee grainline studio
V excited for BYOB sushi

I have high hopes to whip a few of these up for Christmas gifts, but for now, I’m focusing solely on HALLOWEEN. Halloween is kind of a big deal for me. Ever since I can remember, my mom’s always been a champ when it comes to whipping up creative costumes. As a toddler, I was a hand-sewn furry spider. In second grade, I was the R.M.S. Titanic. 

titanic Halloween costume 1998

There were many more, but that cardboard ship remains the costume to top. Bravo, Mom & Dad in 1998.

Last year marked the first time I sewed my own costume, a spring roll. It took forever, but it was gratifying to know I made the entire piece on my own. This year, I’ve decided to capitalize on my current haircut and go as Johnny Depp as Willy Wonka. And since my boyfriend is blond and light-eyed, naturally I suggested that he be Gene Wilder’s Willy Wonka. I’m planning on sewing the coats, possibly making the hats and canes, and then throwing together the rest of the outfit with items we already own.

M7003 costume pattern

I found this McCall’s pattern for $5 on Etsy and immediately snapped it up. It’s not exactly the style of the Wonka jackets, but I think it’s close enough to pass if we get the accessories right. (And the candy. We’re only allowed to hand out Wonka Candy, otherwise WHAT’S THE POINT?!) The pattern calls for a mid-weight wool or gabardine, but I’m hoping that it’ll work with these mid-weight corduroys I found at Textile Discount Outlet:

red and purple corduroy

At just $3.95/yard, they were way cheaper than anything I could find online, especially when you take into account shipping charges. By the way, Textile Discount Outlet is an old-school fabric labyrinth that definitely deserves a visit if you’re even in Chicago. It’s not glamorous, but it does have an insane number of fabrics, notions, and everything in between.

I just got my pattern in the mail today and can’t wait to get started on these goofy jackets. Do you have any Halloween projects in the works? Let me know in the comments!